Bulbasaur (Pokemon) Pancake Art Tutorial
Introduction
Here’s a guide to making Bulbasaur Pancake Art; Gotta fry ’em all!
Batter Colors:
- Black
- Red
- Light Red (One squirt of red BATTER)
- Green
- Midtone Green (One drop of Green dye)
- Light Green (One three-second squirt of green BATTER)
- Blue-Green (One drop blue, one drop green)
- Light Blue-Green (One five-second squirt ofblue green BATTER)
- Blue-Gray (Two drops blue, one drop orange dye)
- White
- Plain
Note: You can simplify this design by doing a solid light blue for the body, a solid green for the bud on their back, a solid blue for the spots, and solid red for the mouth.
Remember, feel free to customize any part as we go; this is simply a straightforward tutorial. Be as creative as you want!
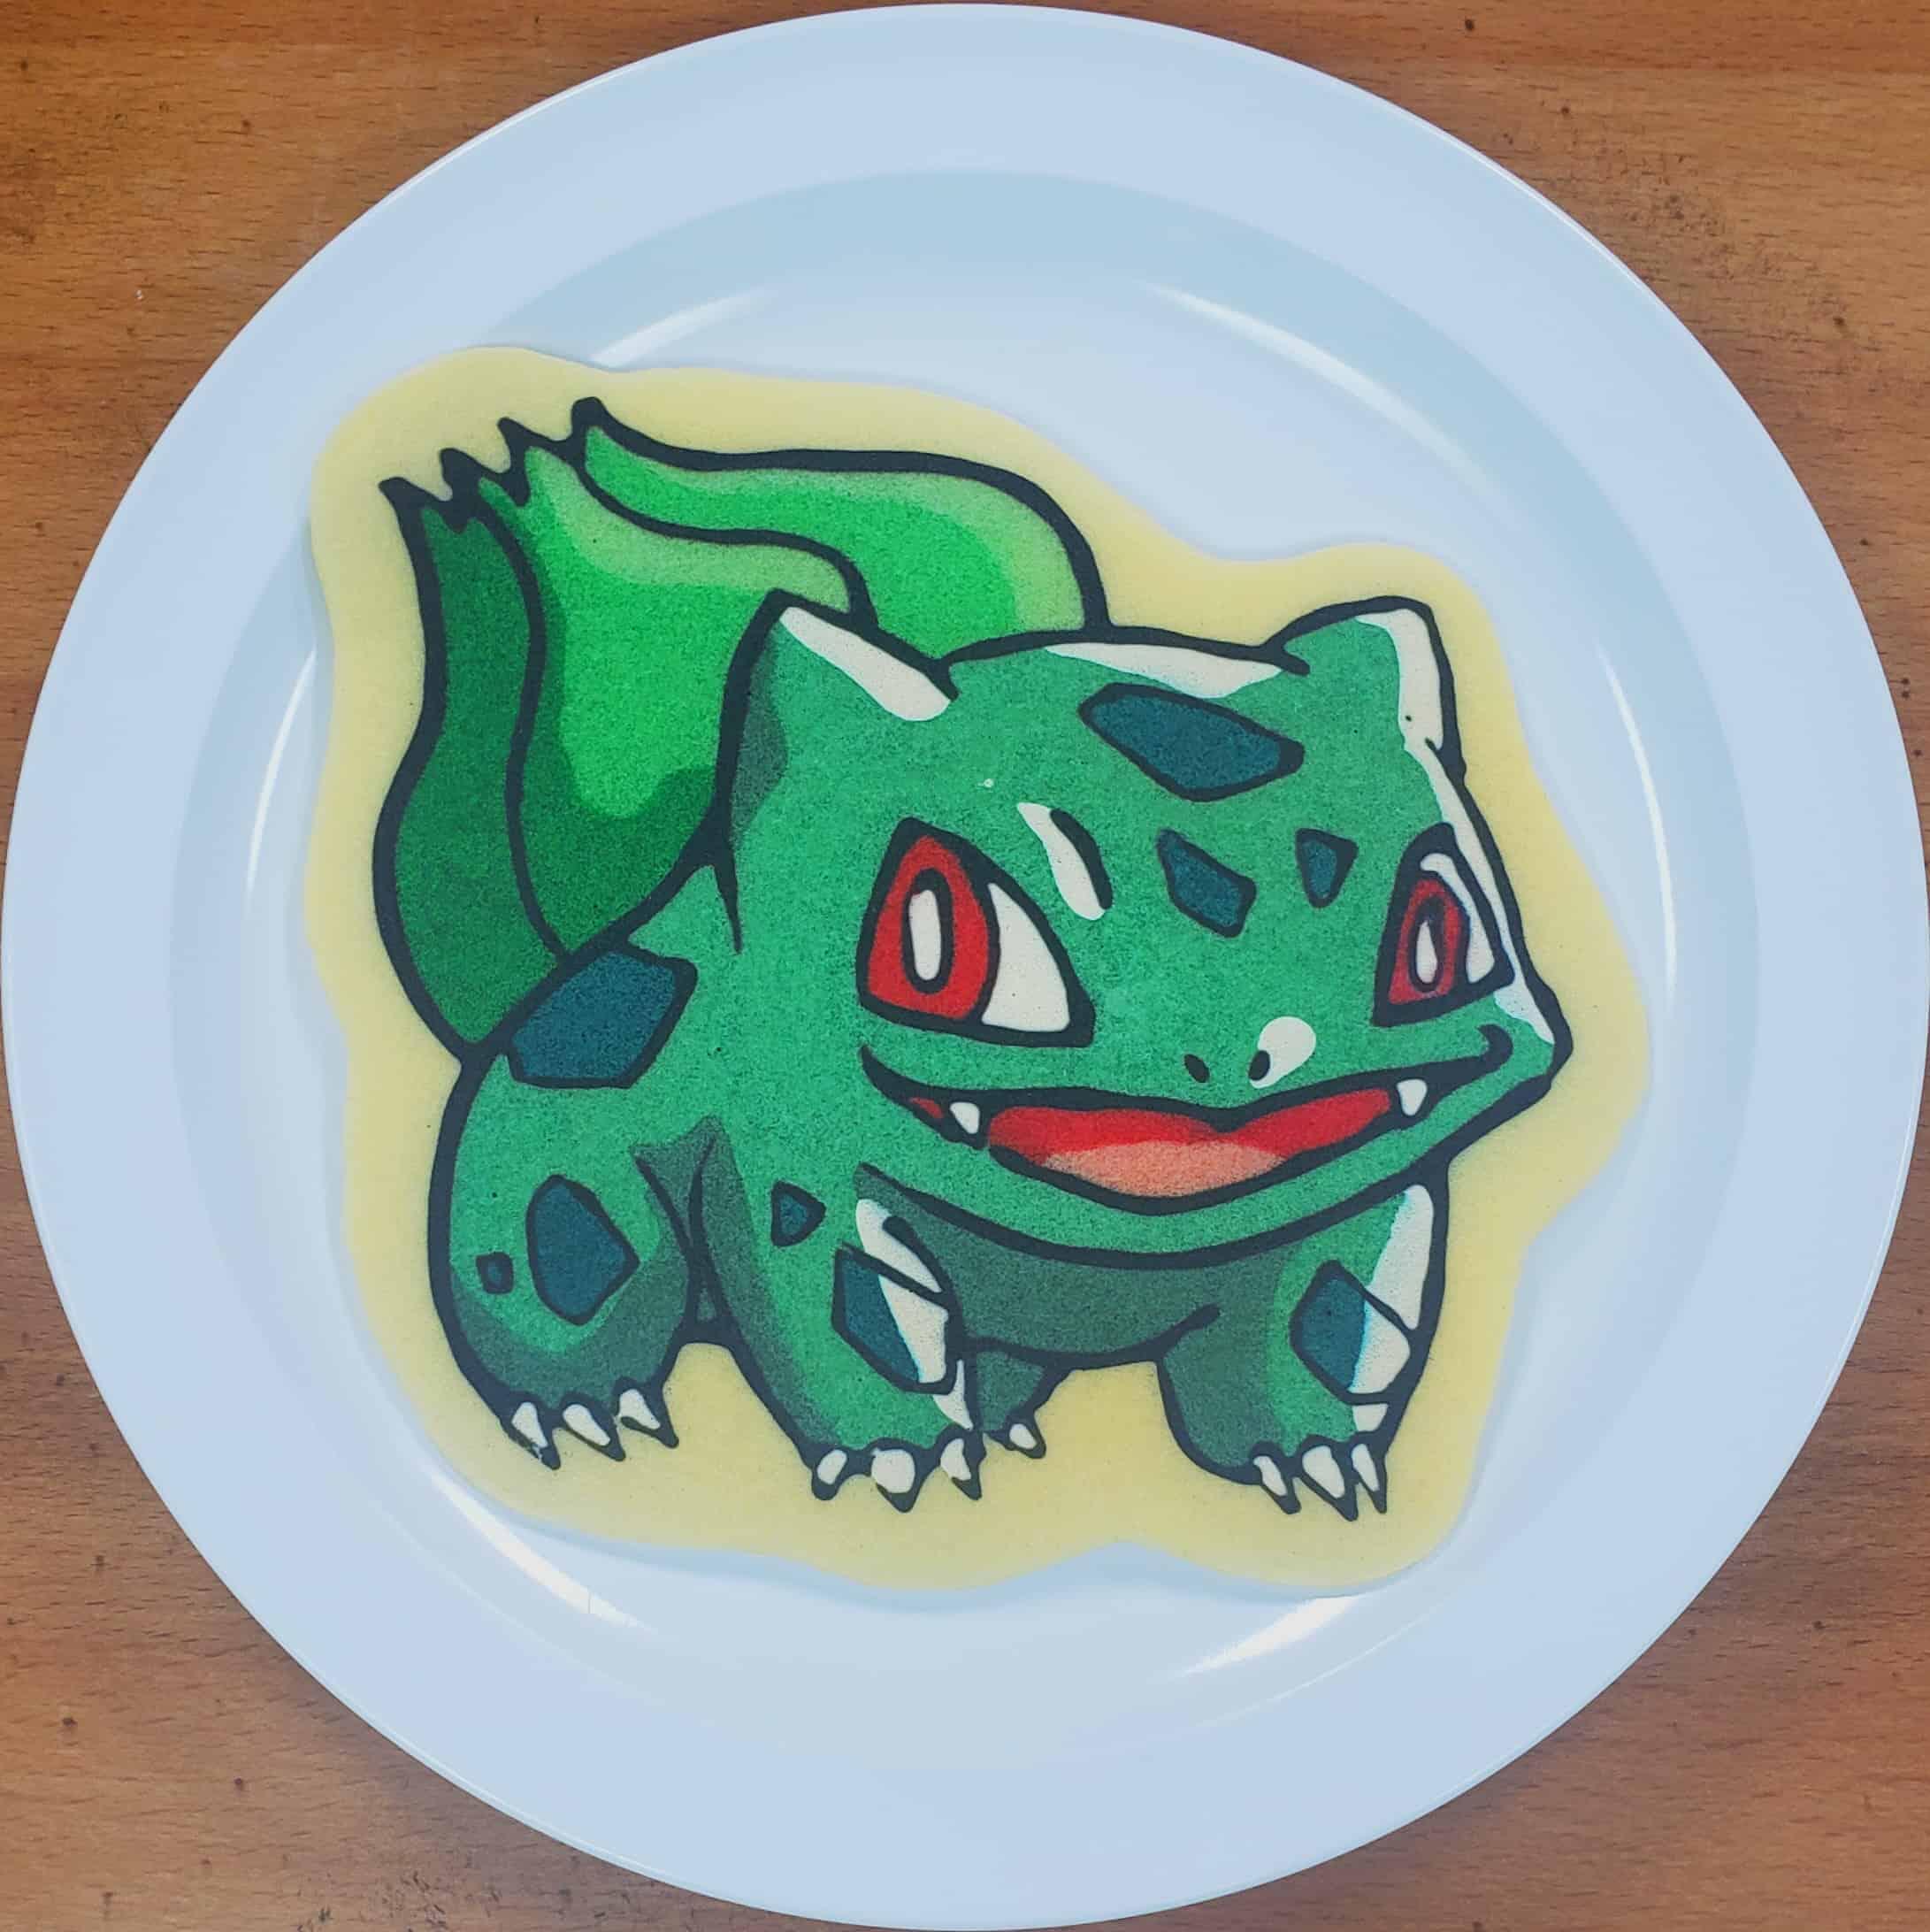
Pokemon 001! From the Pokedex: "Bulbasaur can be seen napping in bright sunlight. There is a seed on its back. By soaking up the sun's rays, the seed grows progressively larger."
Step 1


With your griddle/pan off, begin by drawing the outline of Bulbasaur with your black pancake batter. We recommend starting with the eyes, and keeping them fairly small. Remember, you don’t want to make the pancake too big to flip! The bigger they are, the more chance of breakage and burning. If you are worried about yours being too big as you go or don’t want to do so much detail, feel free to just make Bulbasaur’s face! Use the reference image, and take your time! We’ll explain step-by-step how we’ll draw our linework. Remember, you can use paper towels or Q-tips to wipe up any mistakes you may make.
Step 2


Once you have your outline, we’ll start by filling in Bulbasaur’s eyes. The eyes each have a curved line down their center. On the right side of that line, draw a tall white oval in the center of it to create the pupil in each eye. Then, you’ll go to the left side of that black line and fill that space in with white batter. And, as long as you’re holding your white batter, go ahead and fill in Bulbasaur’s claws and teeth. Next, take your red batter and fill in the space around the white ovals to finish Bulbasaur’s eyes.
Step 3


Now we’ll add in the highlights. Remember that these are where the light hits Bulbasaur the most! It looks like Bulbasaur is facing the light source in this picture; that the light is coming in from the left. Knowing this, we’ll put a white line along the left side of the face, the left side of the ears, the left side of the front arms (the white can go over the spots too!) and the top of their head.
We’ll then apply white along the ridge over the right eye and a white spot over the left nostril. Lastly, we’ll use our lightest green to highlight the left side of two of the the bulb segments on their back. Details like these help to make the character seem more three-dimensional!
Step 4


Now we’ll add the shadows. Remember that these are the places where the light hits Bulbasaur the least, almost like the opposite of the highlight. Knowing that the light source is coming from the left, most of the shadows will be on the right side of him. Using your blue-grey batter, draw a shadow along the right sides of the front legs, the right side of the right ear, the underside of the back legs, and the belly/side.
Next, take your red and draw a curved line across Bulbasaur’s mouth, a little like a rainbow shape. You’ll then fill in the space above that line with red, being careful to stay within the lines of Bulbasaur’s mouth. Lastly, grab your darkest shade of green, and fill in the right side of the bulb in a similar way as the reference image.
Step 5


Now we’ll fill in some final details. Using your red batter, add a rounded tongue-shape in the mouth and fill above this line in the mouth with red batter. Then, fill in the tongue with your pink. Then, using your blue/blue-green, fill in all the spots on their body.
Step 6


Now we can fill in the rest. Fill the empty areas of Bulbasaur’s bulb with your mid-tone green. Fill the rest of the body with your light blue-green . Be careful to stay within the lines!
Step 7


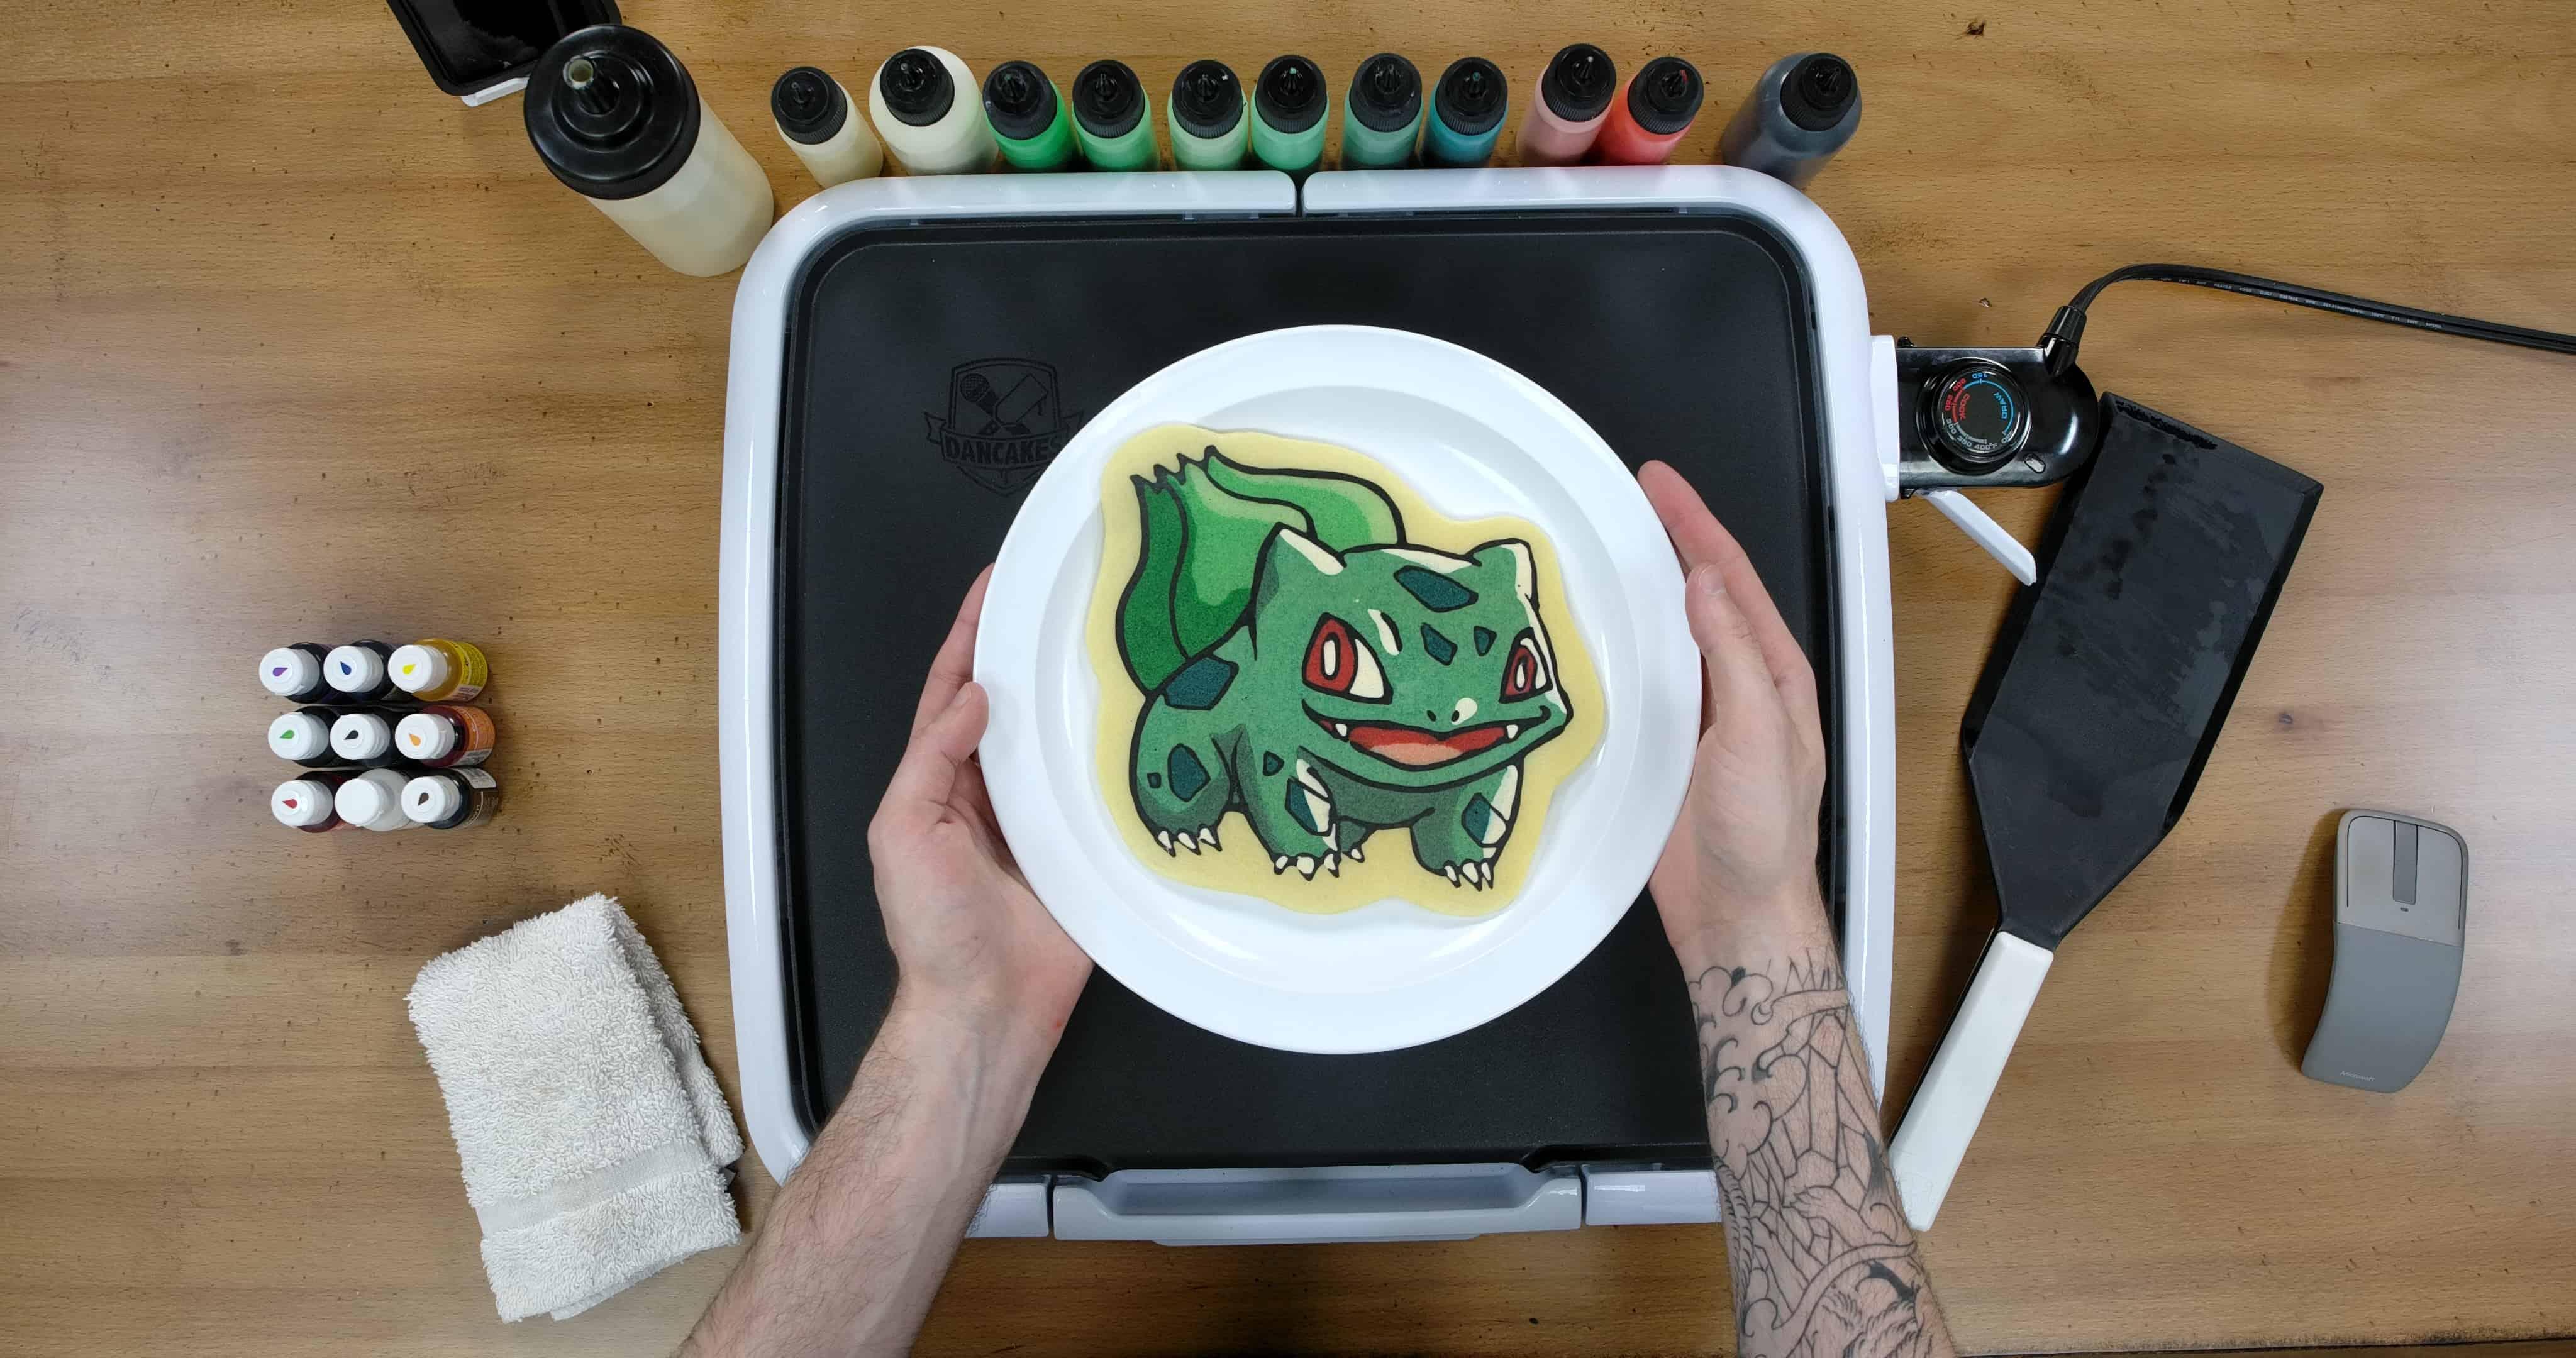
Create an outline around your entire Bulbasaur with batter. We often use plain batter for this, but You can use any color (or colors) that you’d like! Then cover the back of your pancake with a zig-zag as well. For extra precautions (like say, if your pancake is looking paper thin) you can cover the whole backside in plain batter to give it more thickness. This’ll help make it stronger for the flip!
Step 8


It’s time to start cooking this pancake! Once you’ve covered every part of Bulbasaur (check for holes!), you can turn the griddle/pan to around 225°.
While it’s cooking slowly, don’t panic! These pancakes are cooking at a much slower temperature than typical pancakes. They will take a very long time to burn.
Once bubbles begin to cover the surface of your pancake, and the pancake starts to look more like a solid than a liquid, you can work the spatula gently around the edges to separate the pancake from the griddle. This is a process we call “carving.”
Be patient, you shouldn’t need to carve the pancake off forcefully; it’ll separate more and more as it cooks. When you’ve successfully ‘carved’ the pancake, it will slide across the surface of your griddle easily.
Step 9


Once the pancake is unstuck and can freely move around the griddle, it’s about time to flip. It’s very important to slide the spatula under the pancake in one smooth motion, quickly and confidently. You also can’t be hesitant while flipping it. The more confidently you do this step, the more likely your pancake will be fine. Take a breath, have faith… and give it a flip!
After you’ve flipped the pancake and allowed it to cook a little on the other side, remember to turn your griddle off. Then, you can plate the pancake. The trick to plating is to allow some of the pancake to rest on the plate, and use the friction this creates to gently drag the pancake off of the spatula and onto the plate.
Conclusion
Congrats! I’m sure you did great. Even if you don’t think so, remember,
Mistakes Are Delicious!
You’ll do even better next time!
You're all done! Who is that pokemon? It's Bulbasaur!