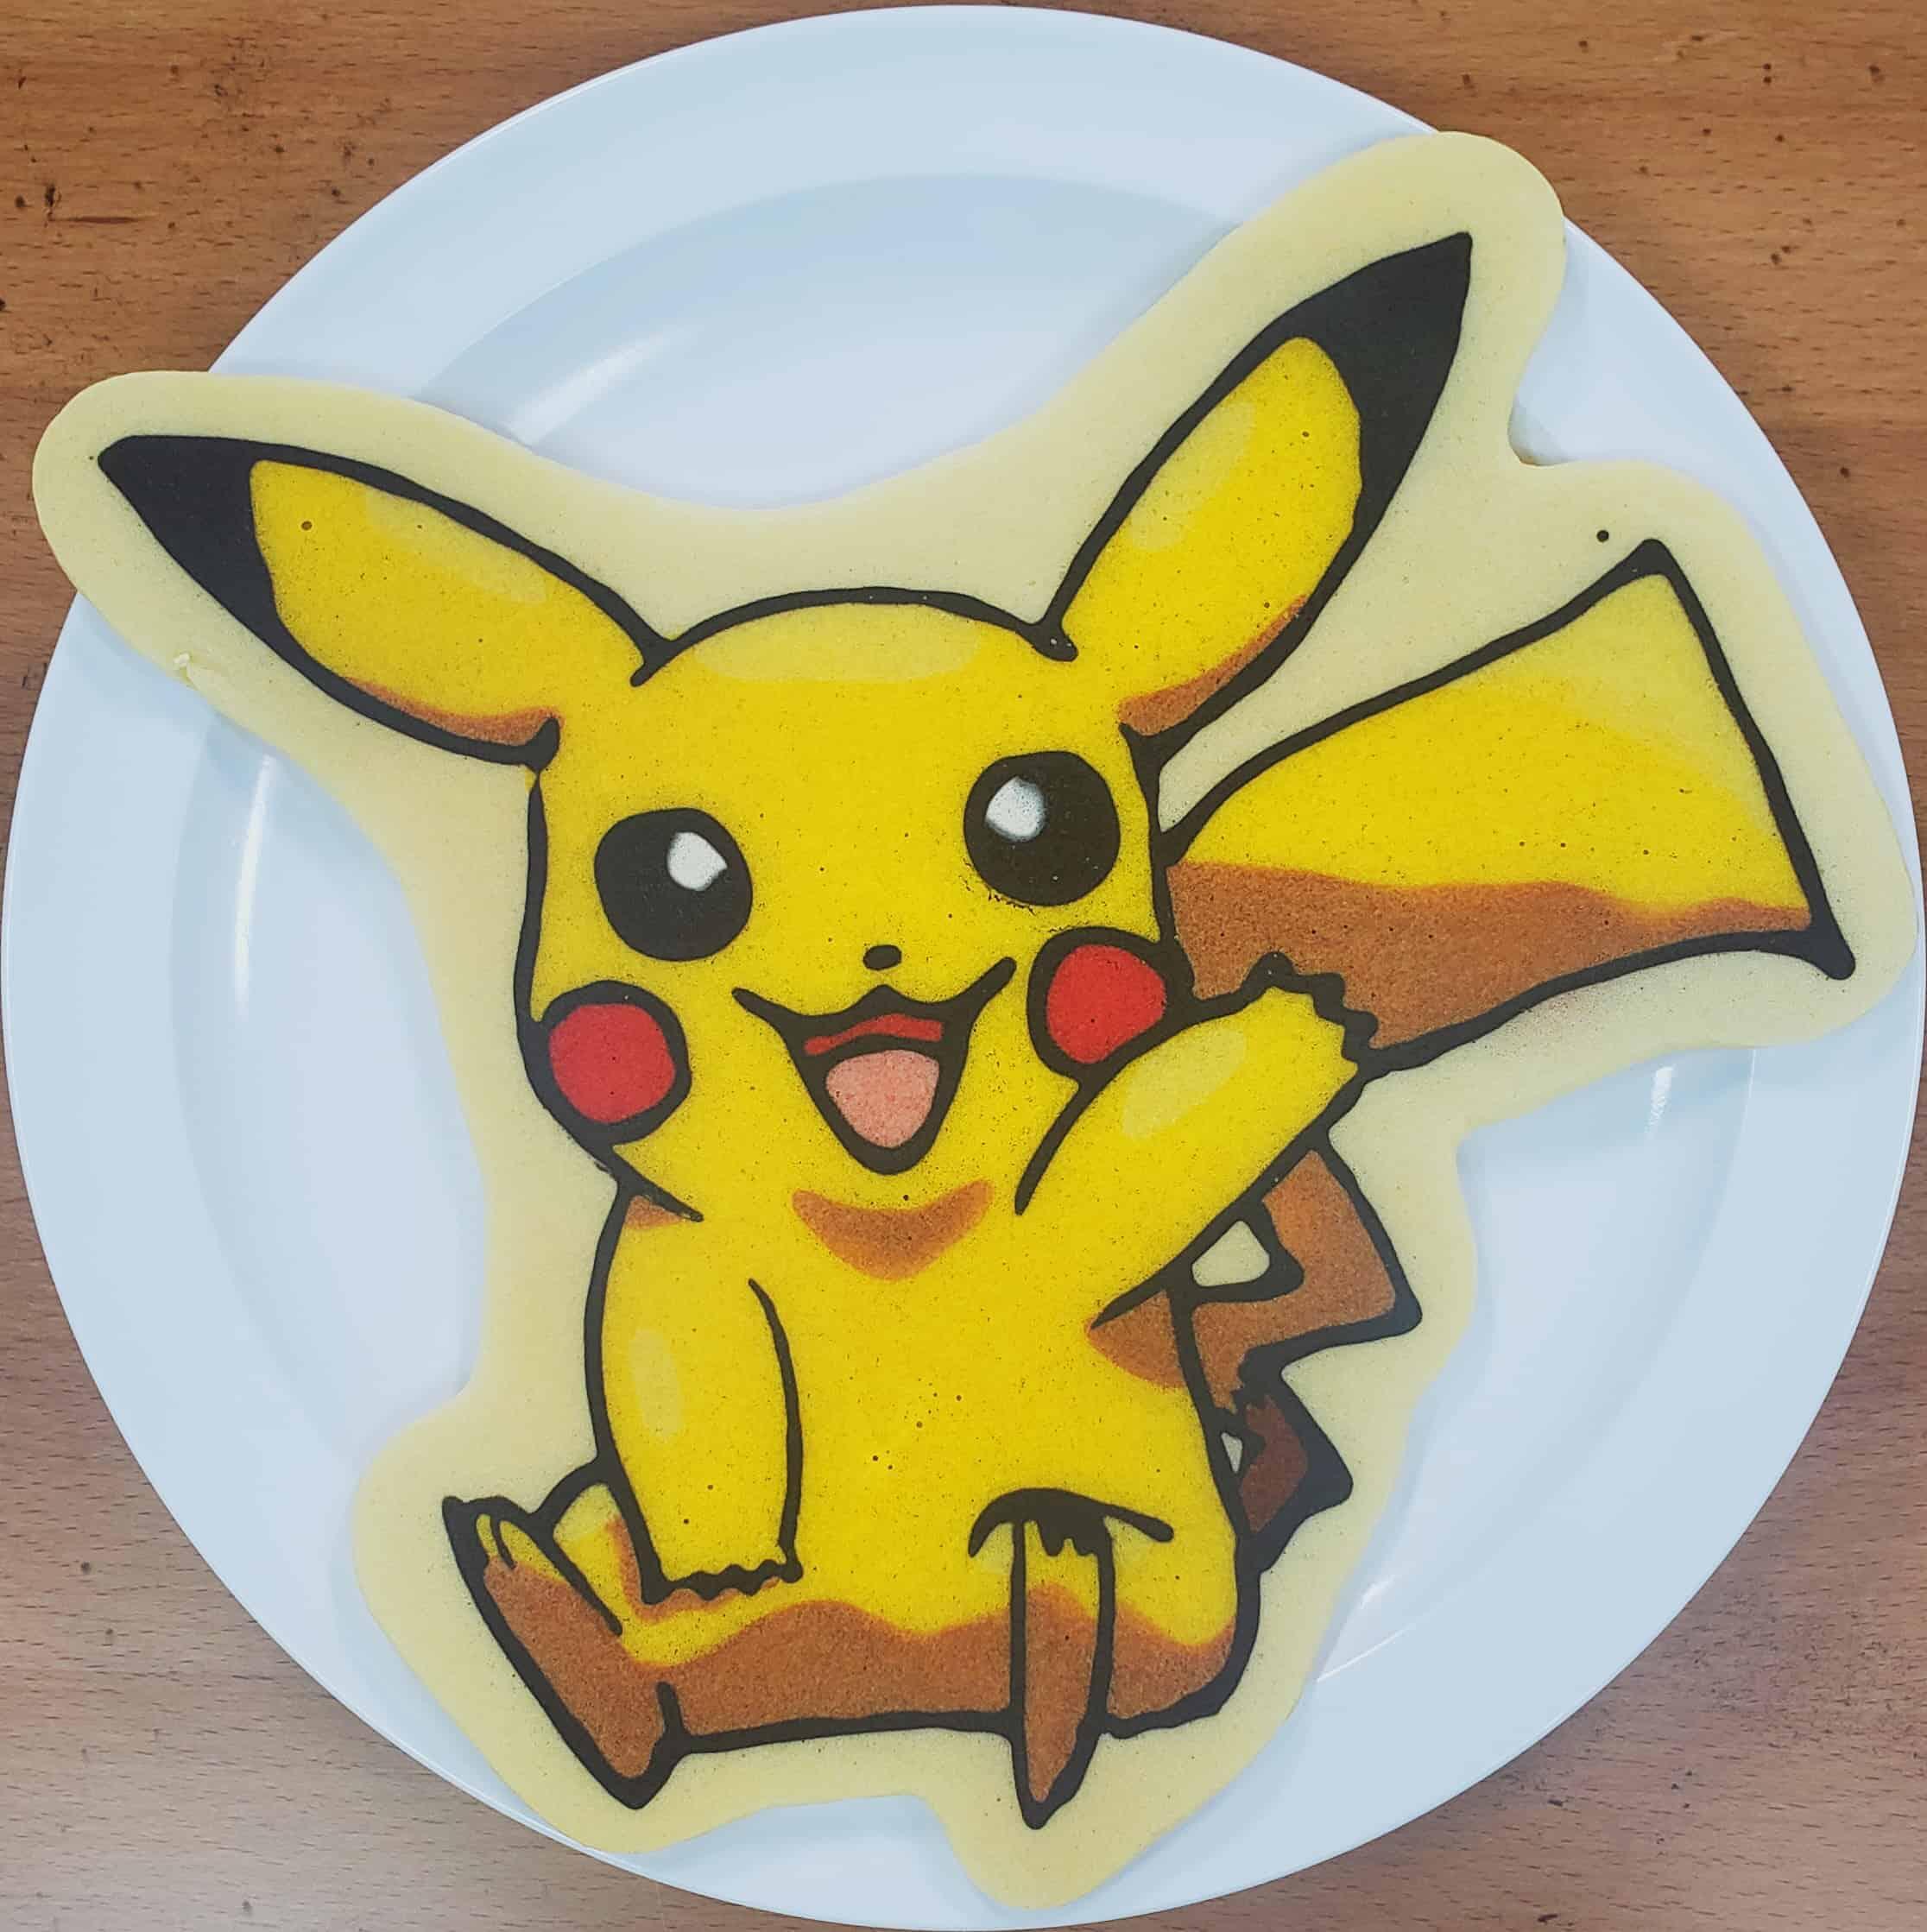
Pikachu (Pokemon) Pancake Art Tutorial
Introduction
Let’s get started making Pikachu Pancake art! Before we begin, you’ll want to mix your batter, pour it into your bottles/batter pens, and prepare your colors. Below is a list of the batter colors we’ll be using – but if you want to see an in-depth guide to how we mix and color our batters, click here!
Batter Colors:
- Black
- Red
- Light Red (One drop red dye)
- Yellow
- Light Yellow (One drop yellow dye)
- Dark Yellow (One drop yellow, one drop brown dye)
- Brown
- White
- Plain
Note: You can simplify this design by doing a solid yellow for the body.
Remember, feel free to customize any part as we go; this is simply a straightforward tutorial. Be as creative as you want!
It's the most famous pokemon pal of all time! From the pokedex: "Its nature is to store up electricity. Forests where nests of Pikachu live are dangerous, since the trees are so often struck by lightning."
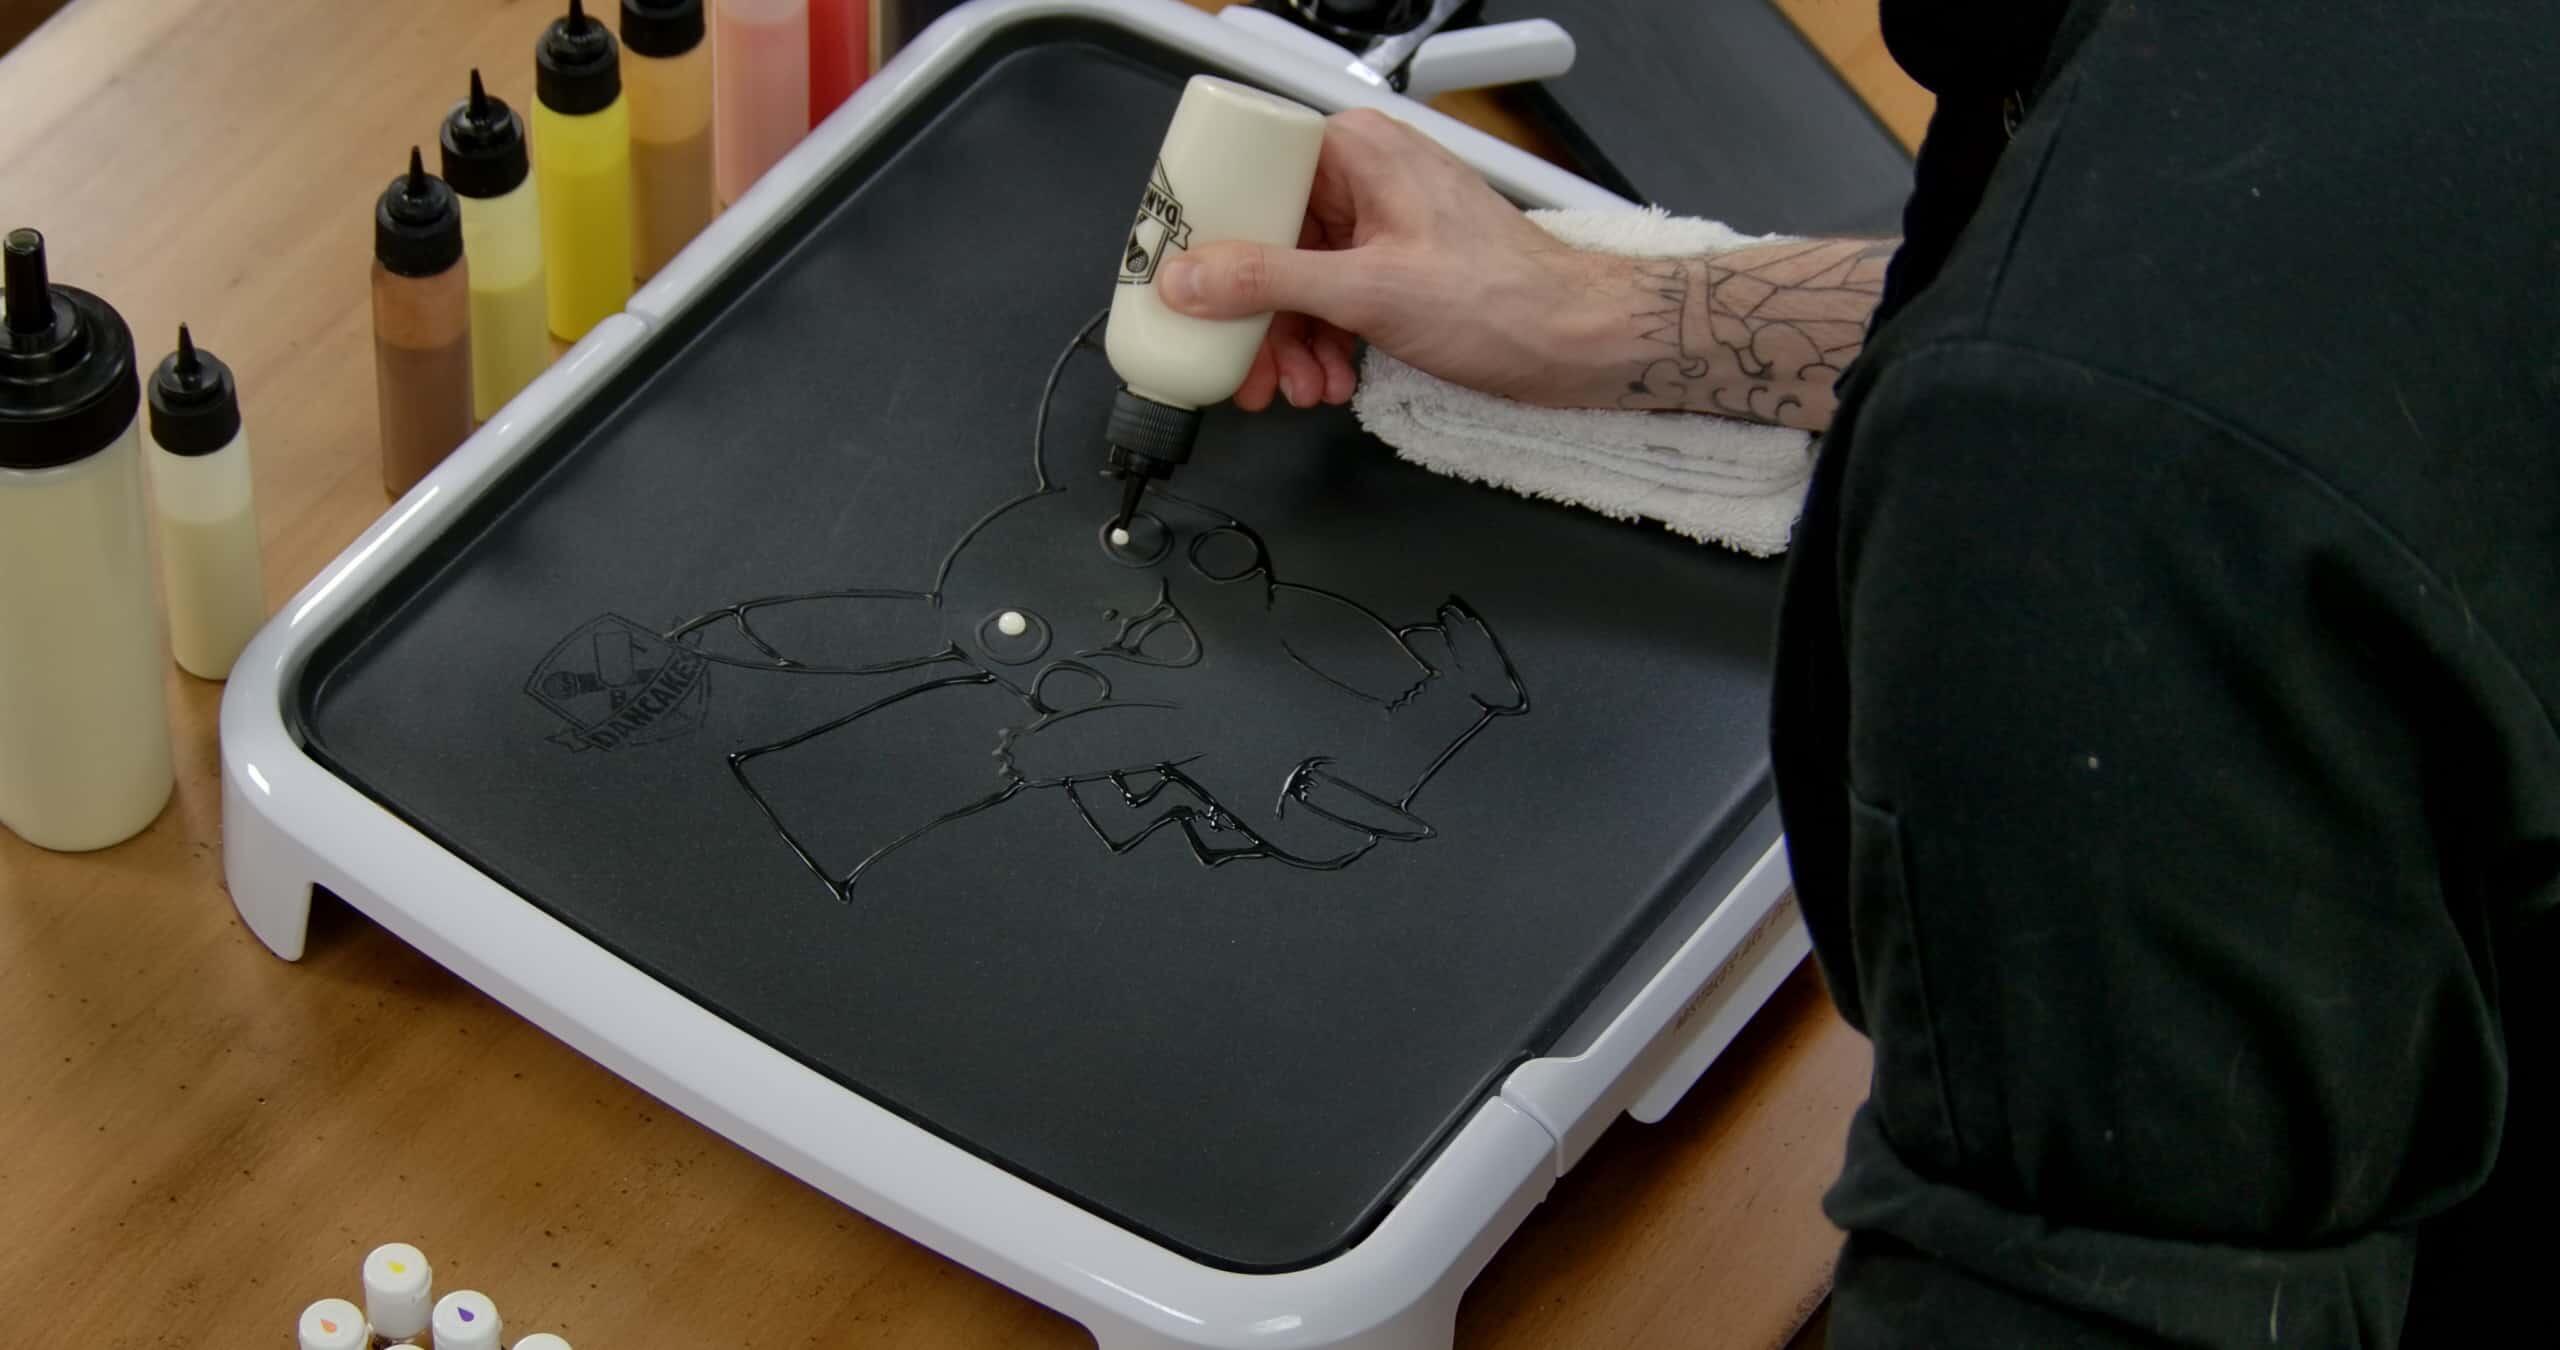
Step 1
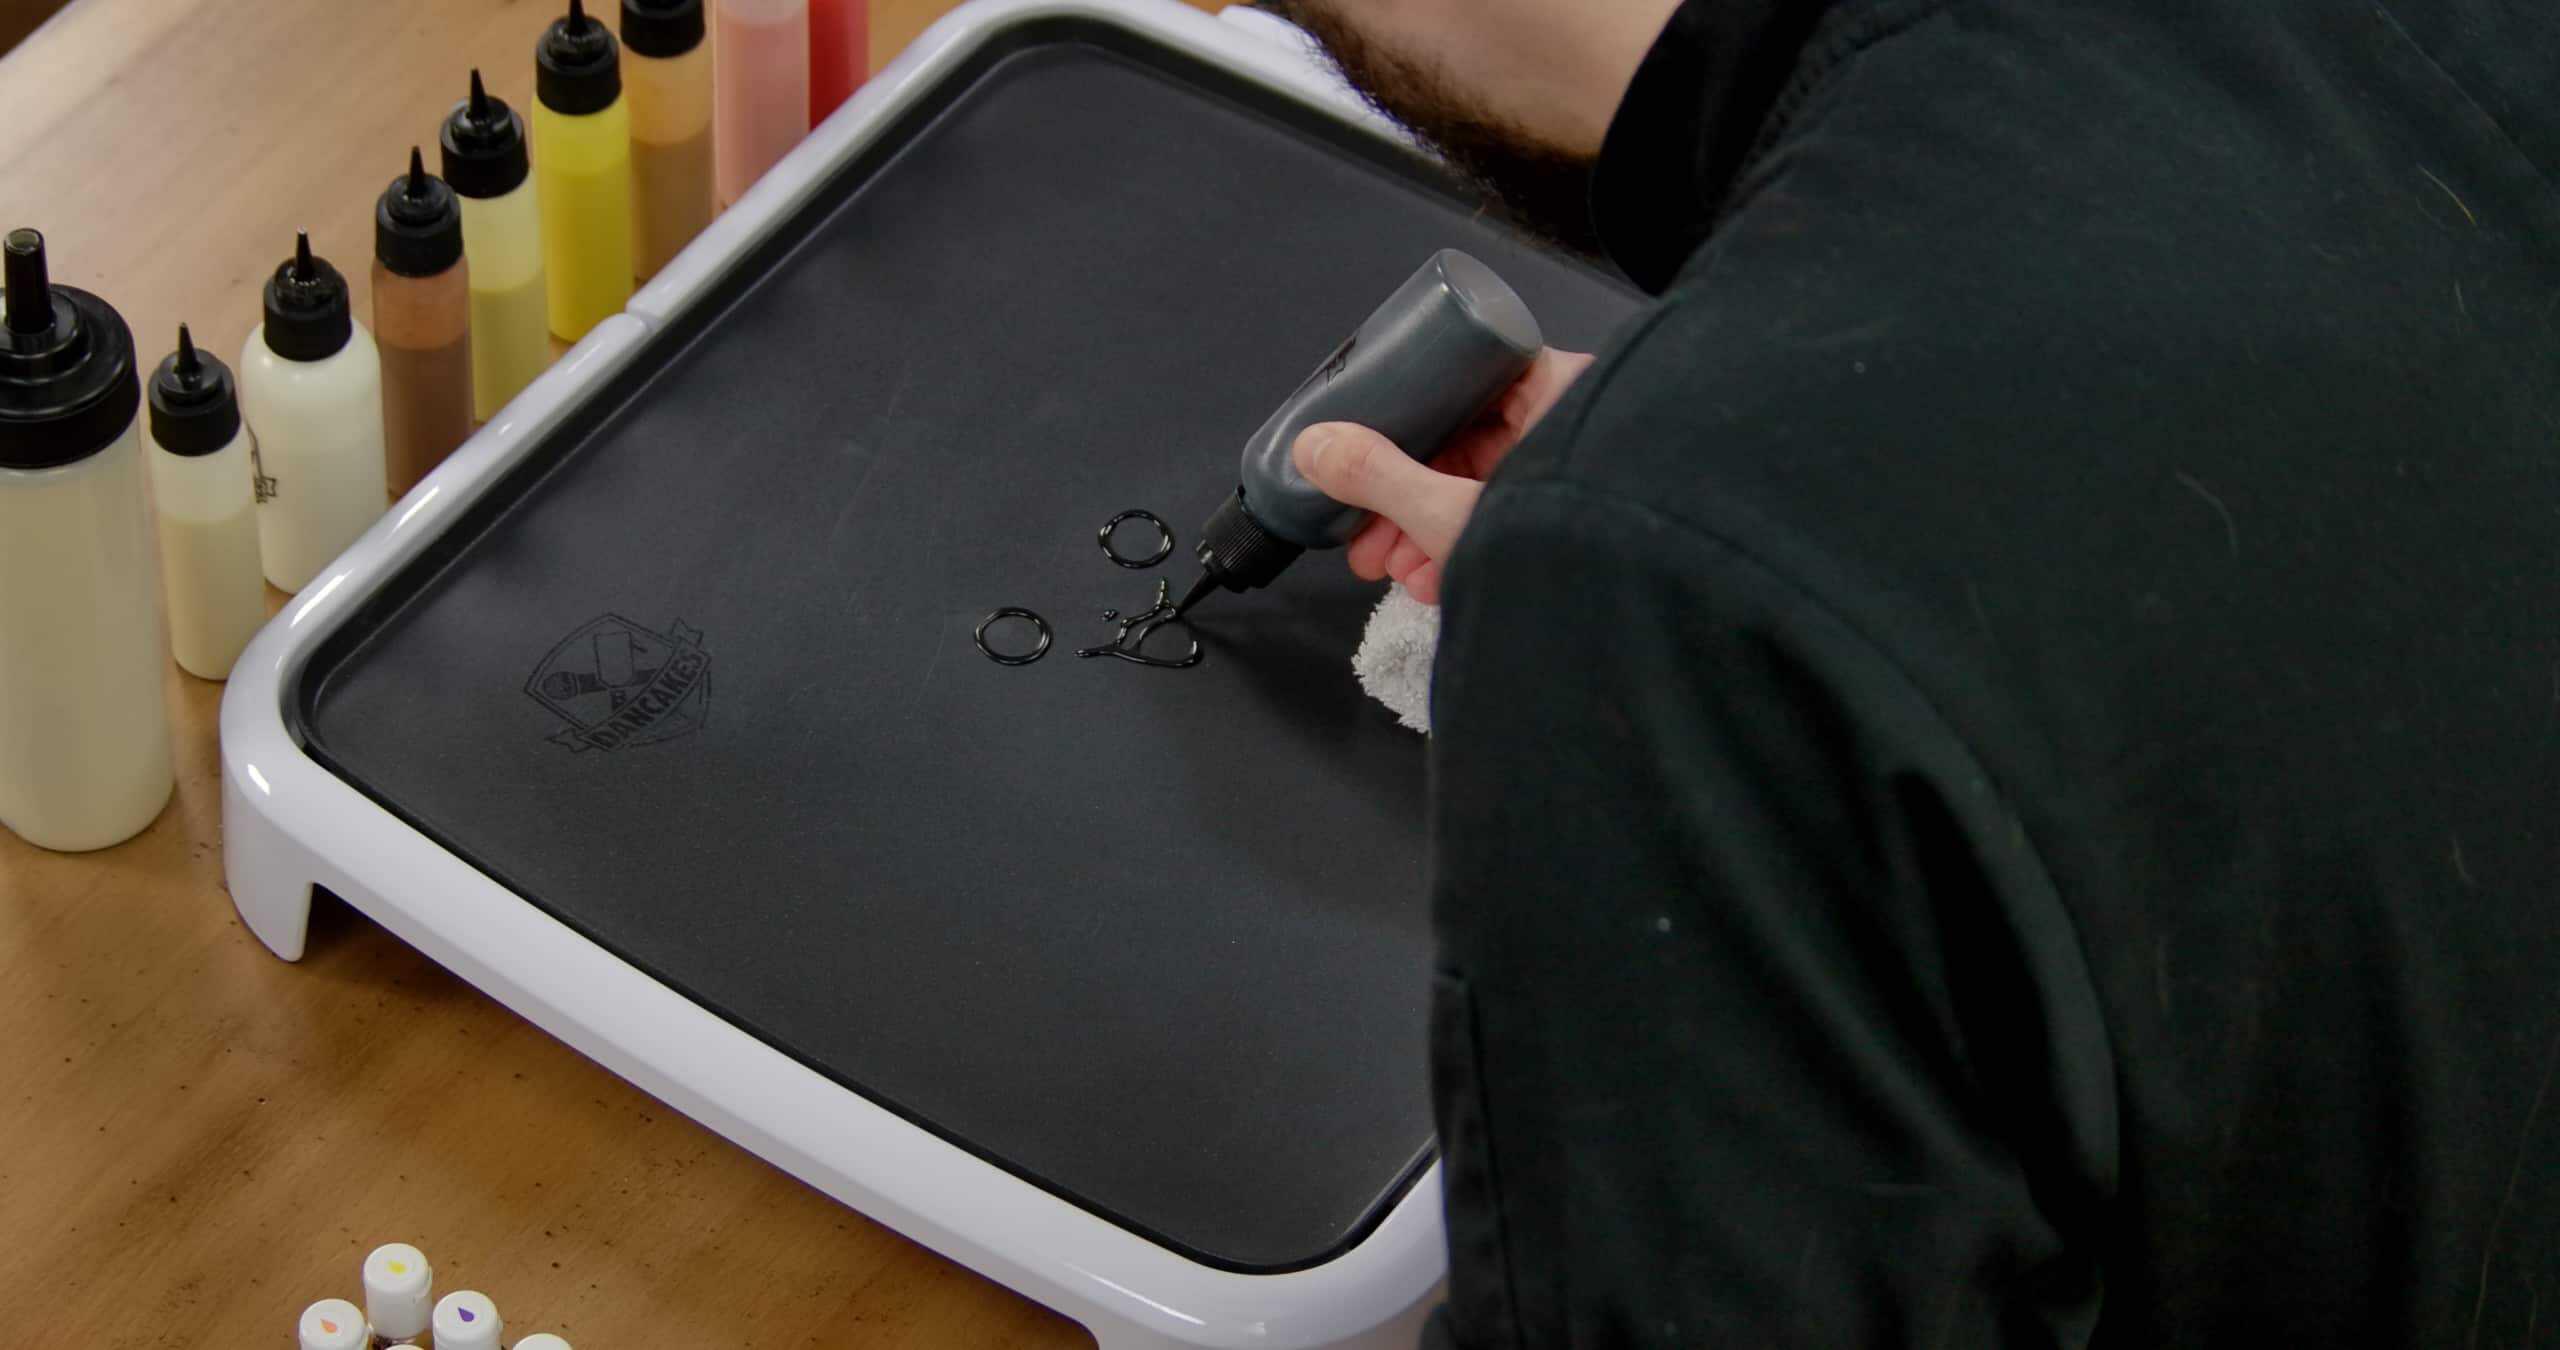
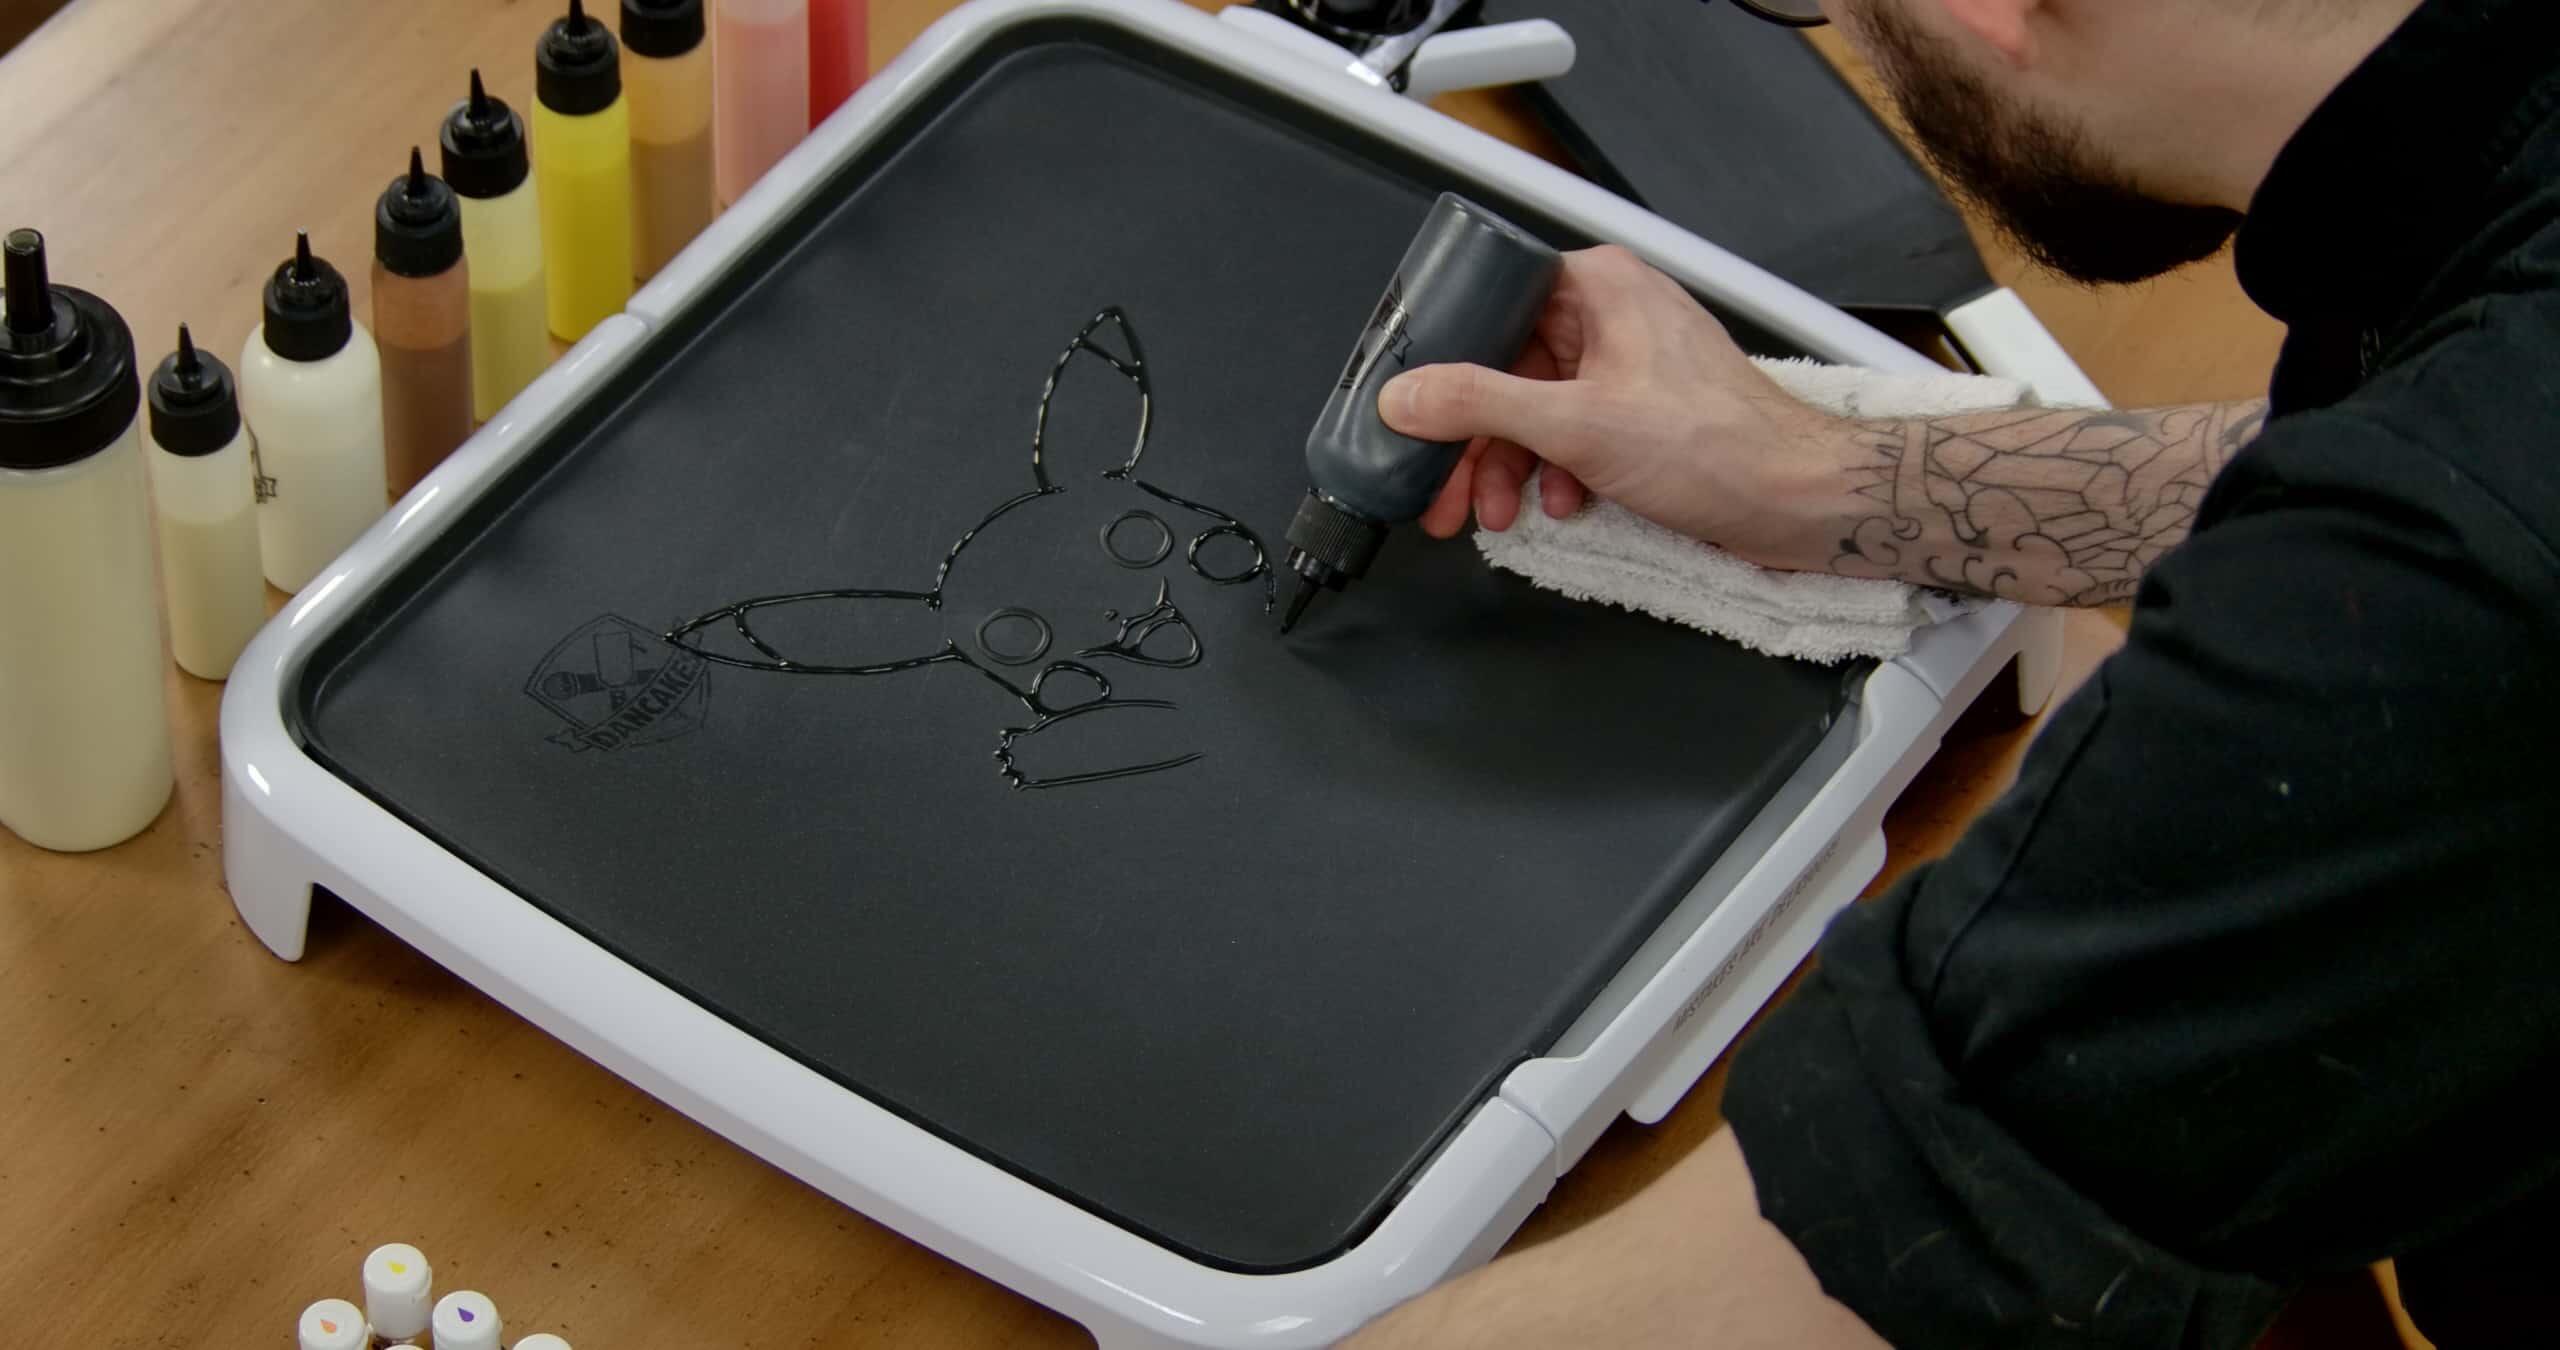
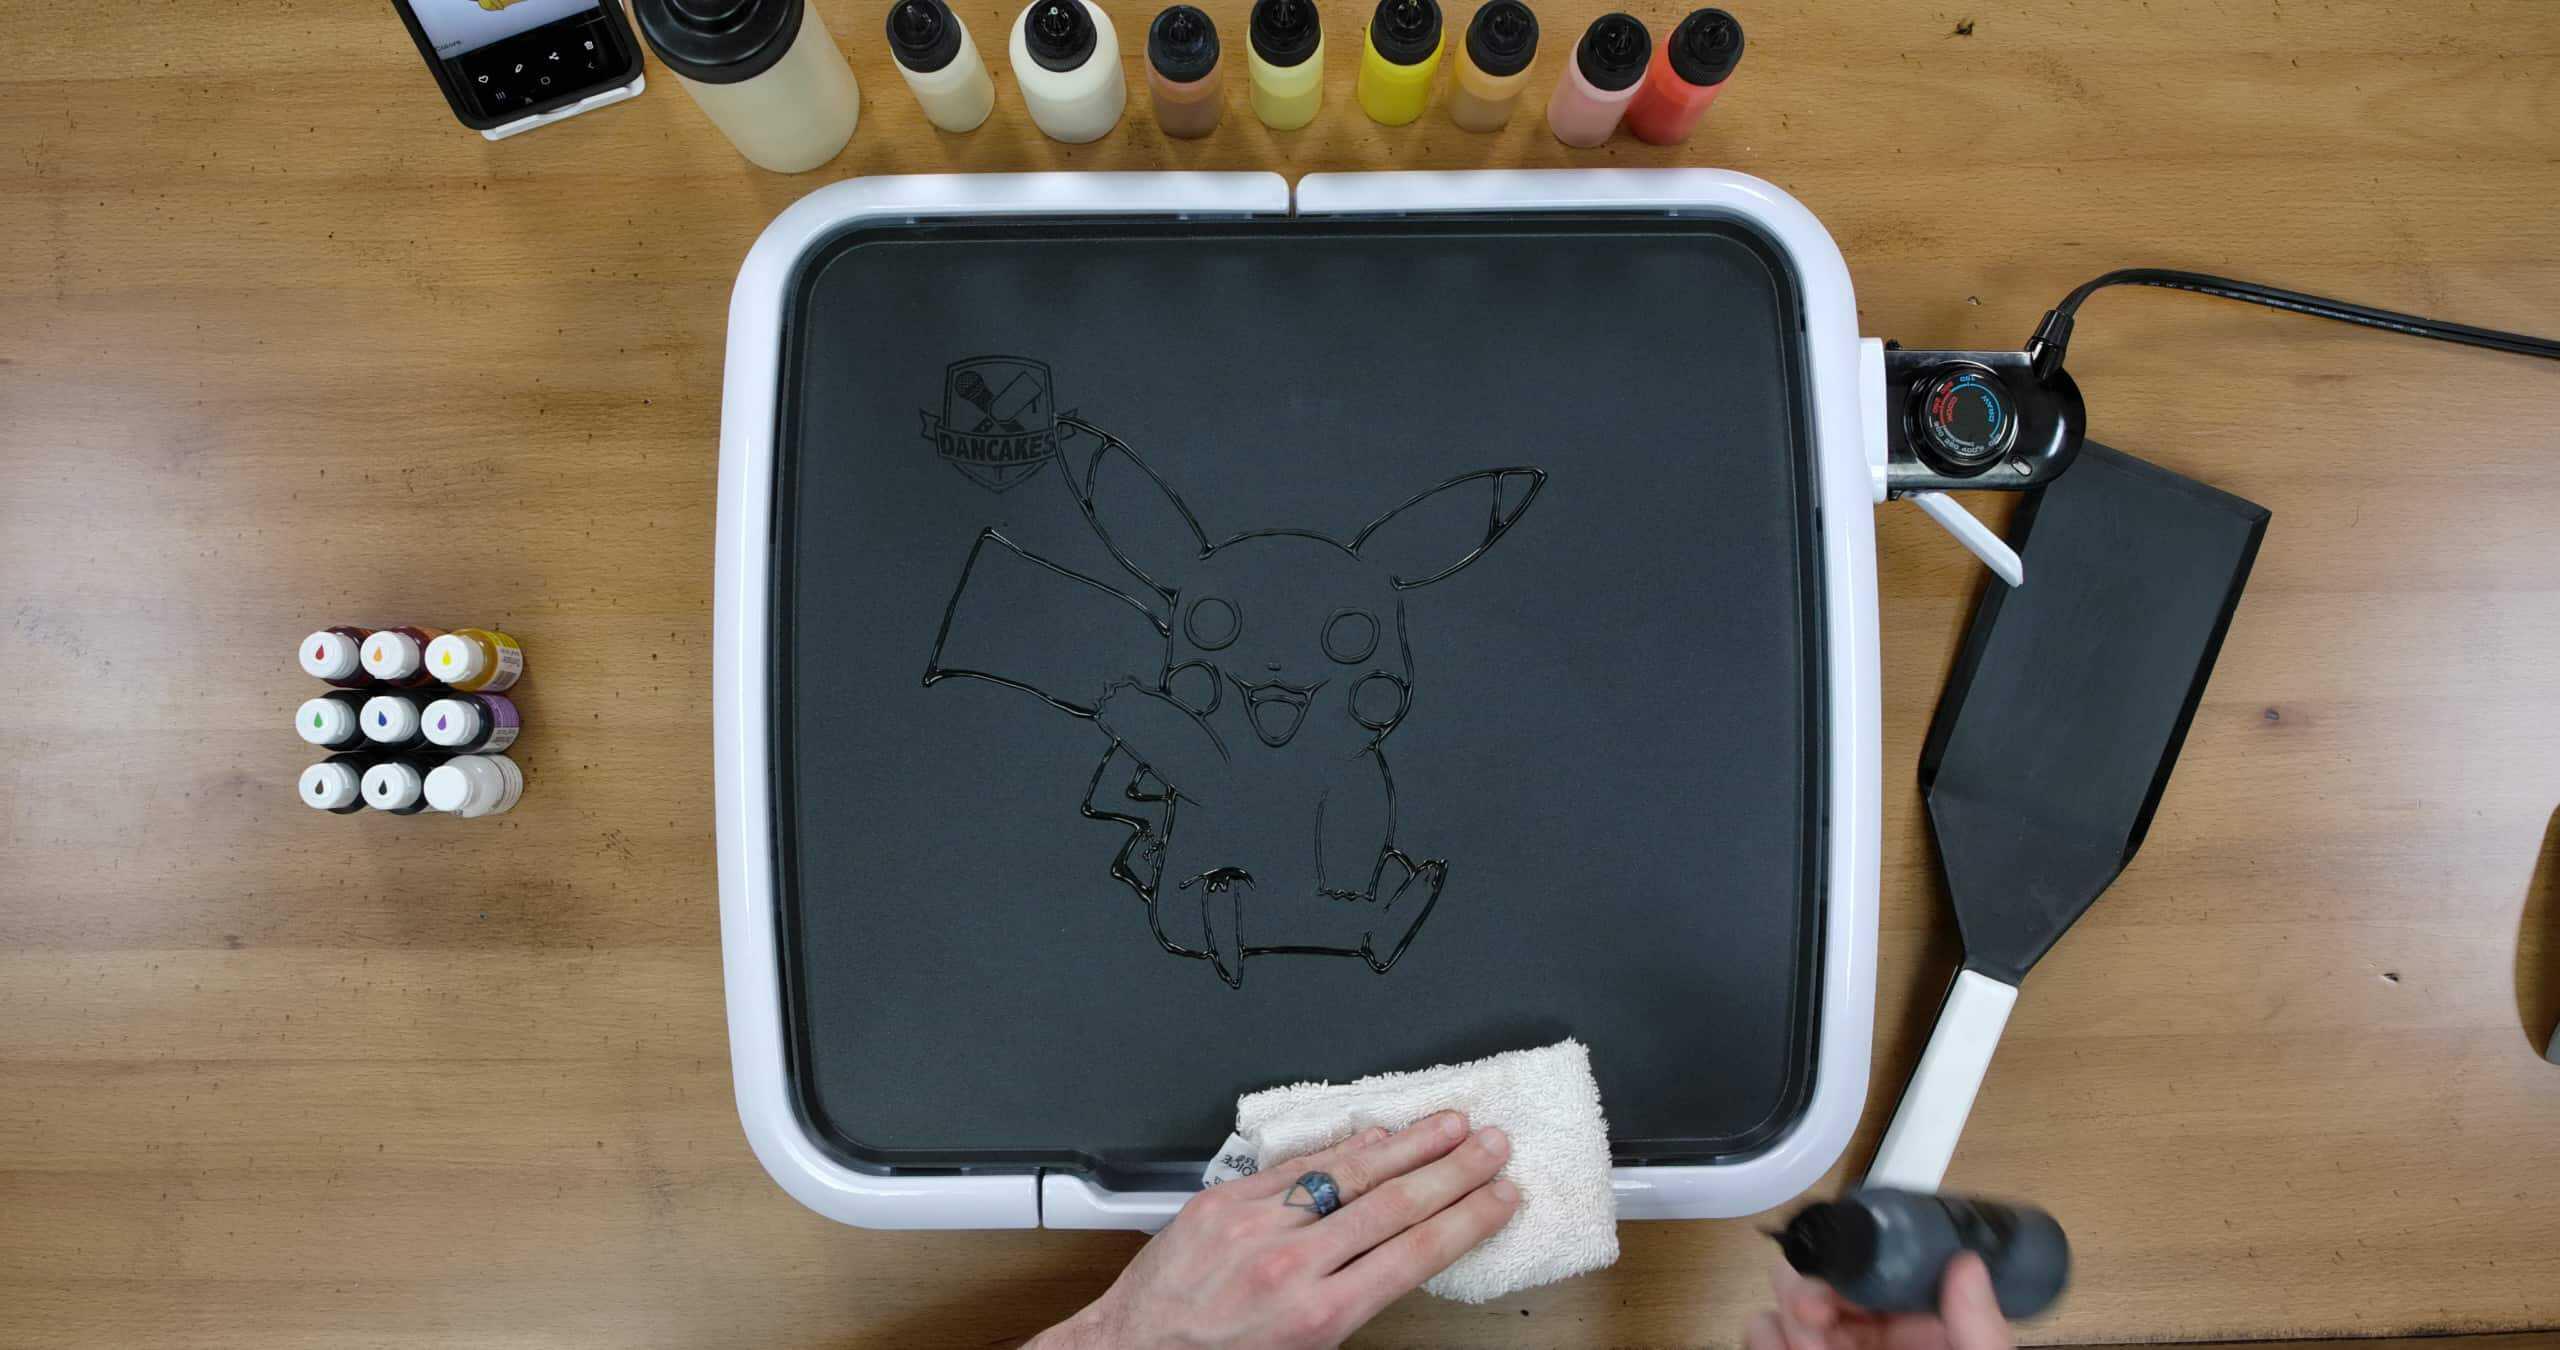
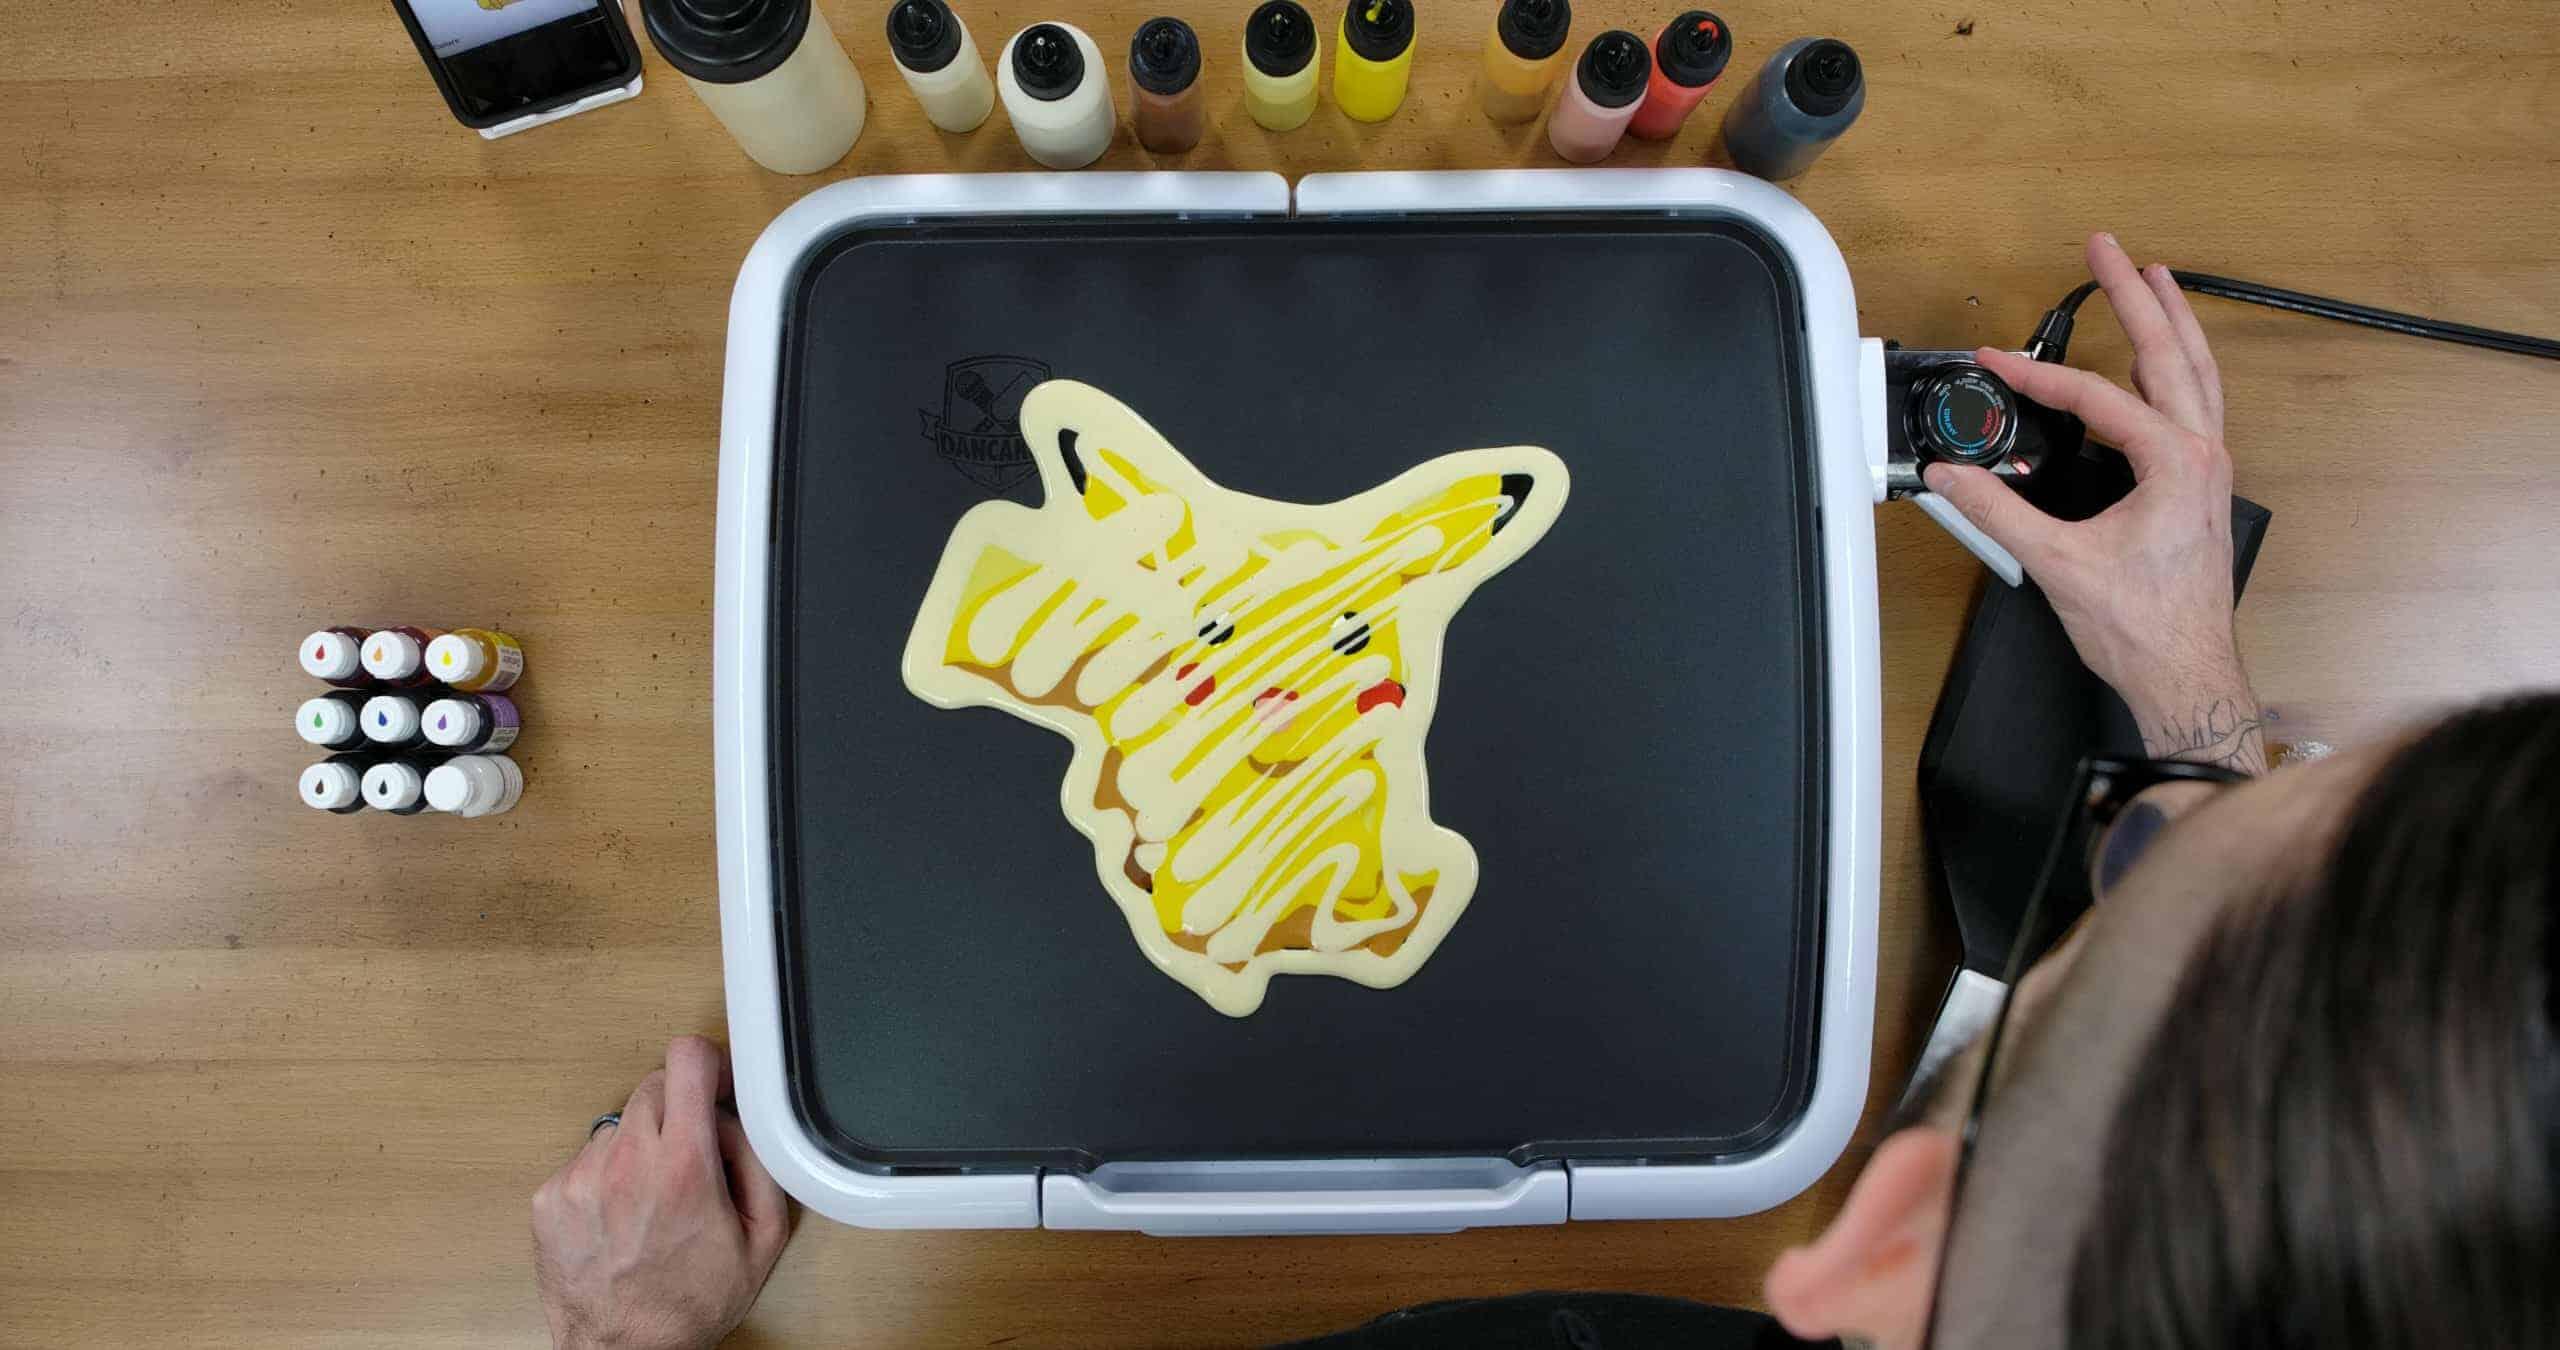
With your griddle/pan off, begin by drawing the outline of Pikachu with your black pancake batter. We recommend starting with the eyes, and keeping them fairly small (about the size of an american quarter coin). Remember, you don’t want to make the pancake too big to flip! The bigger they are, the more chance of breakage and burning. If you are worried about yours being too big as you go or don’t want to do so much detail, feel free to just make Pikachu’s face! Use the reference image, and take your time! Remember, you can use paper towels or Q-tips to wipe up any mistakes you may make. I also keep a towel on my drawing hand side to occasionally wipe off the tip of the bottle, and to rest my hand while I draw.
Step 2
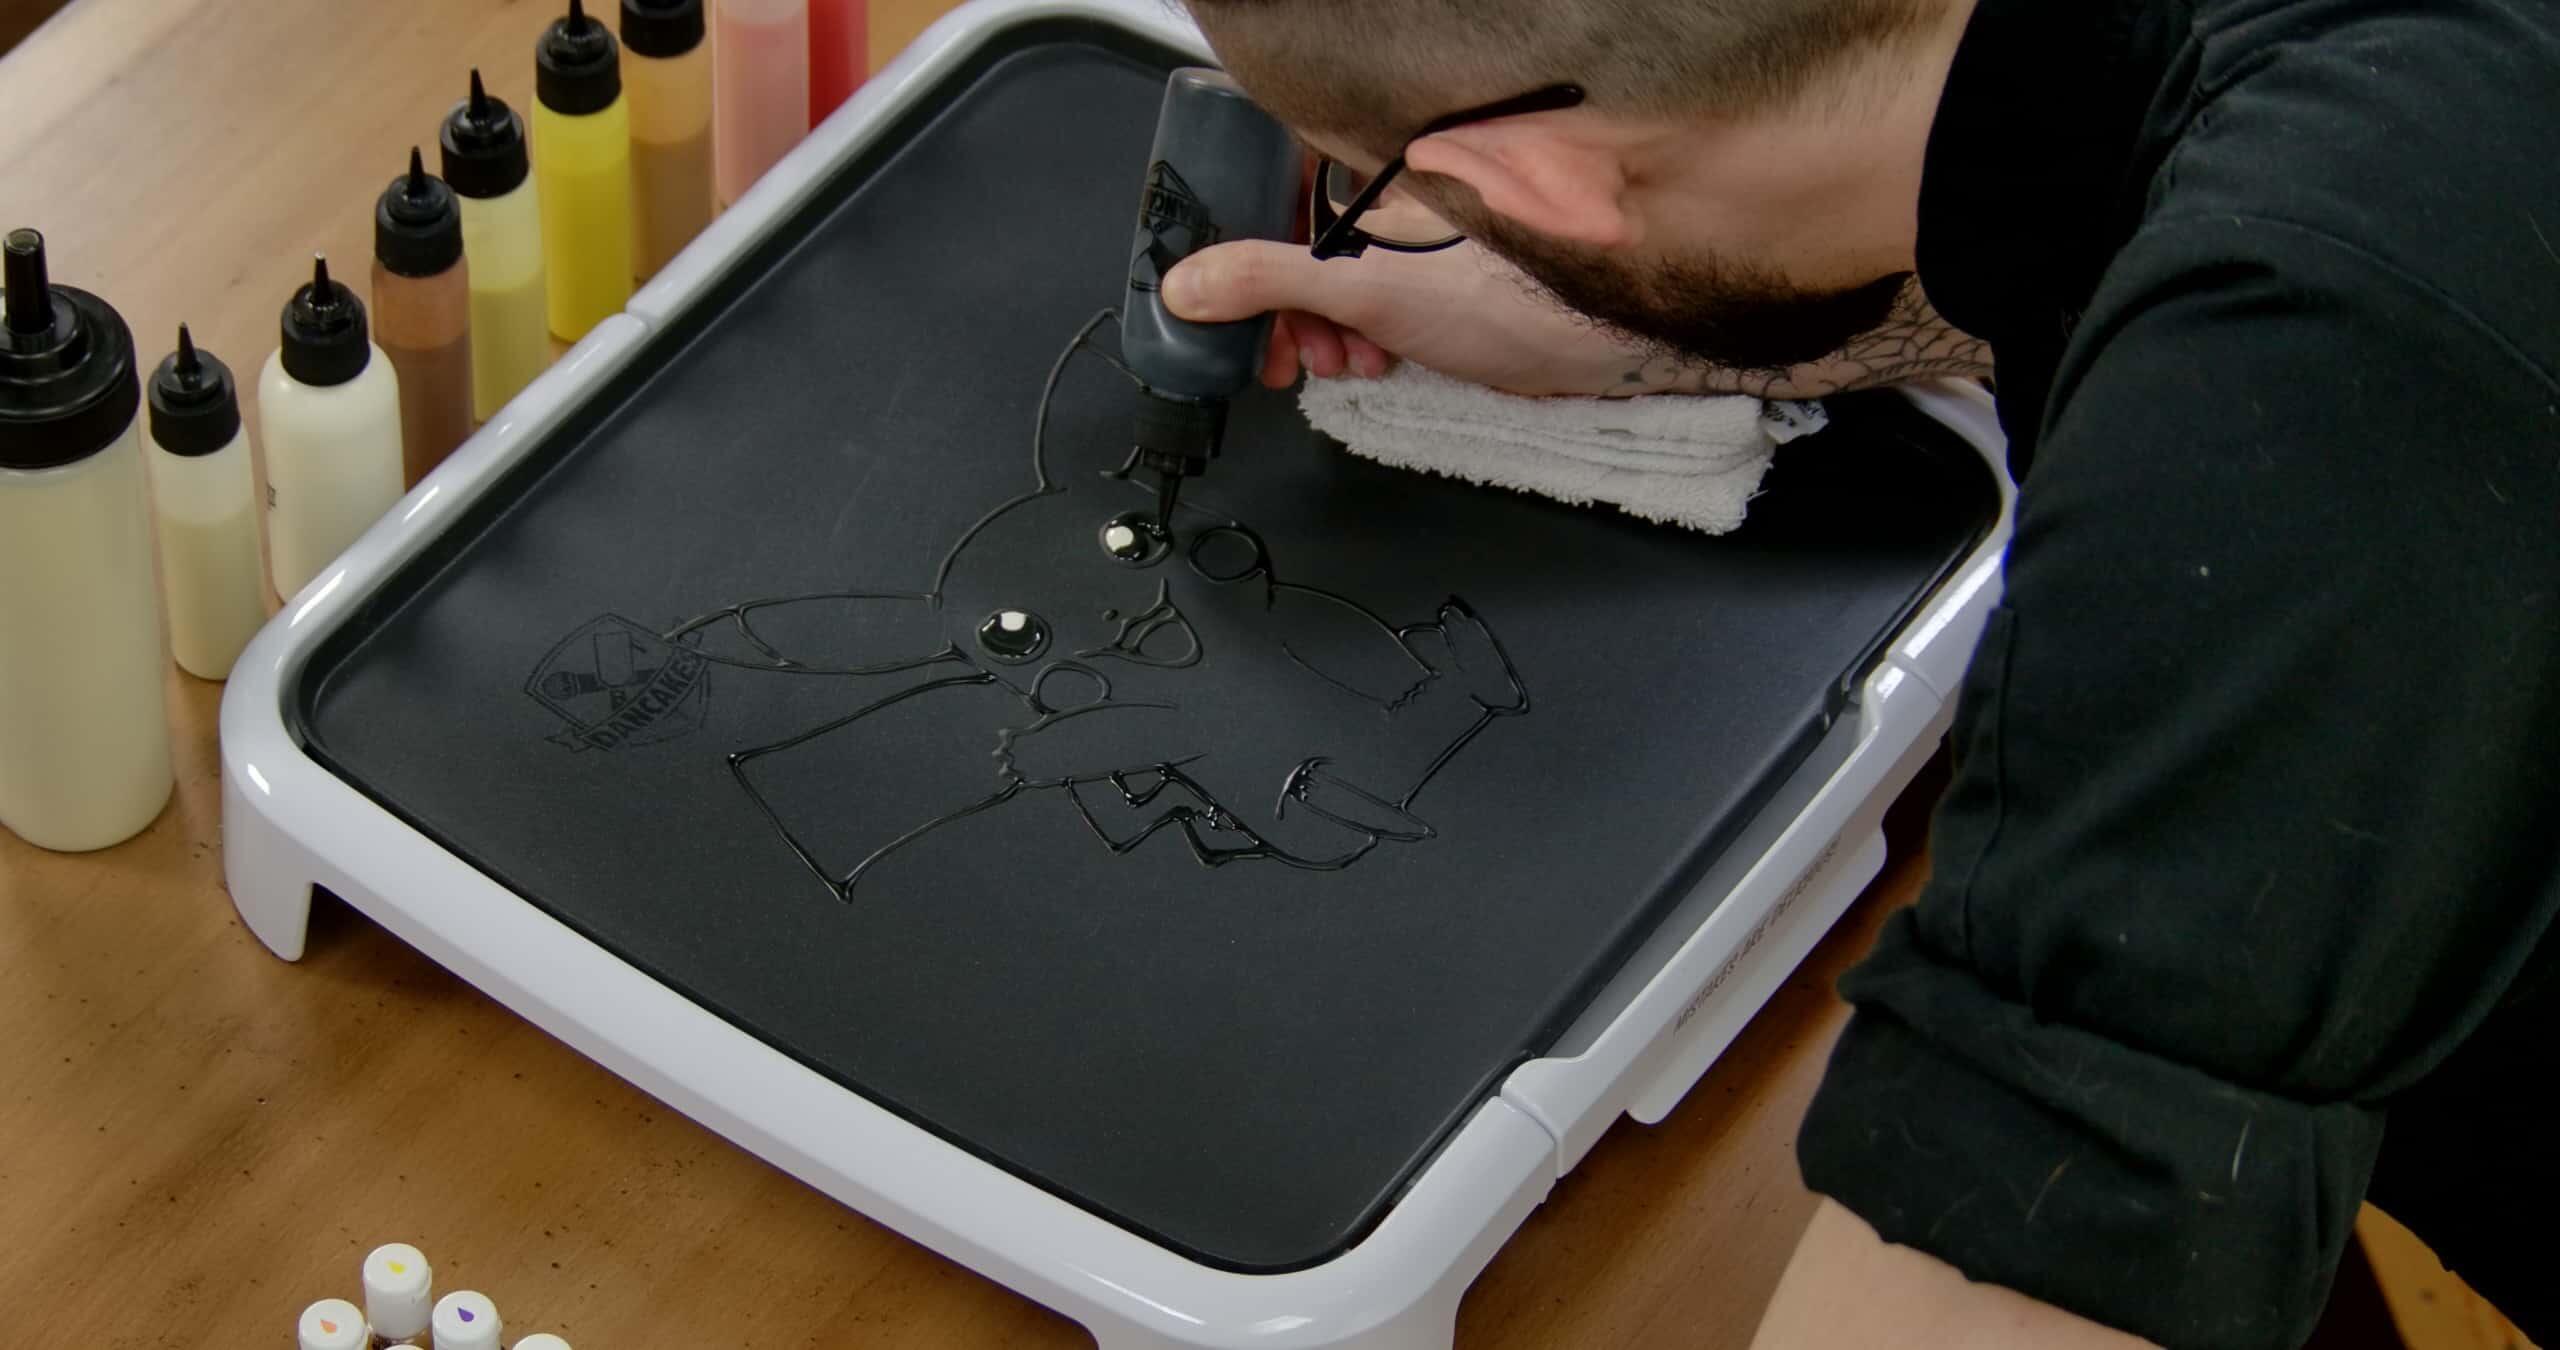
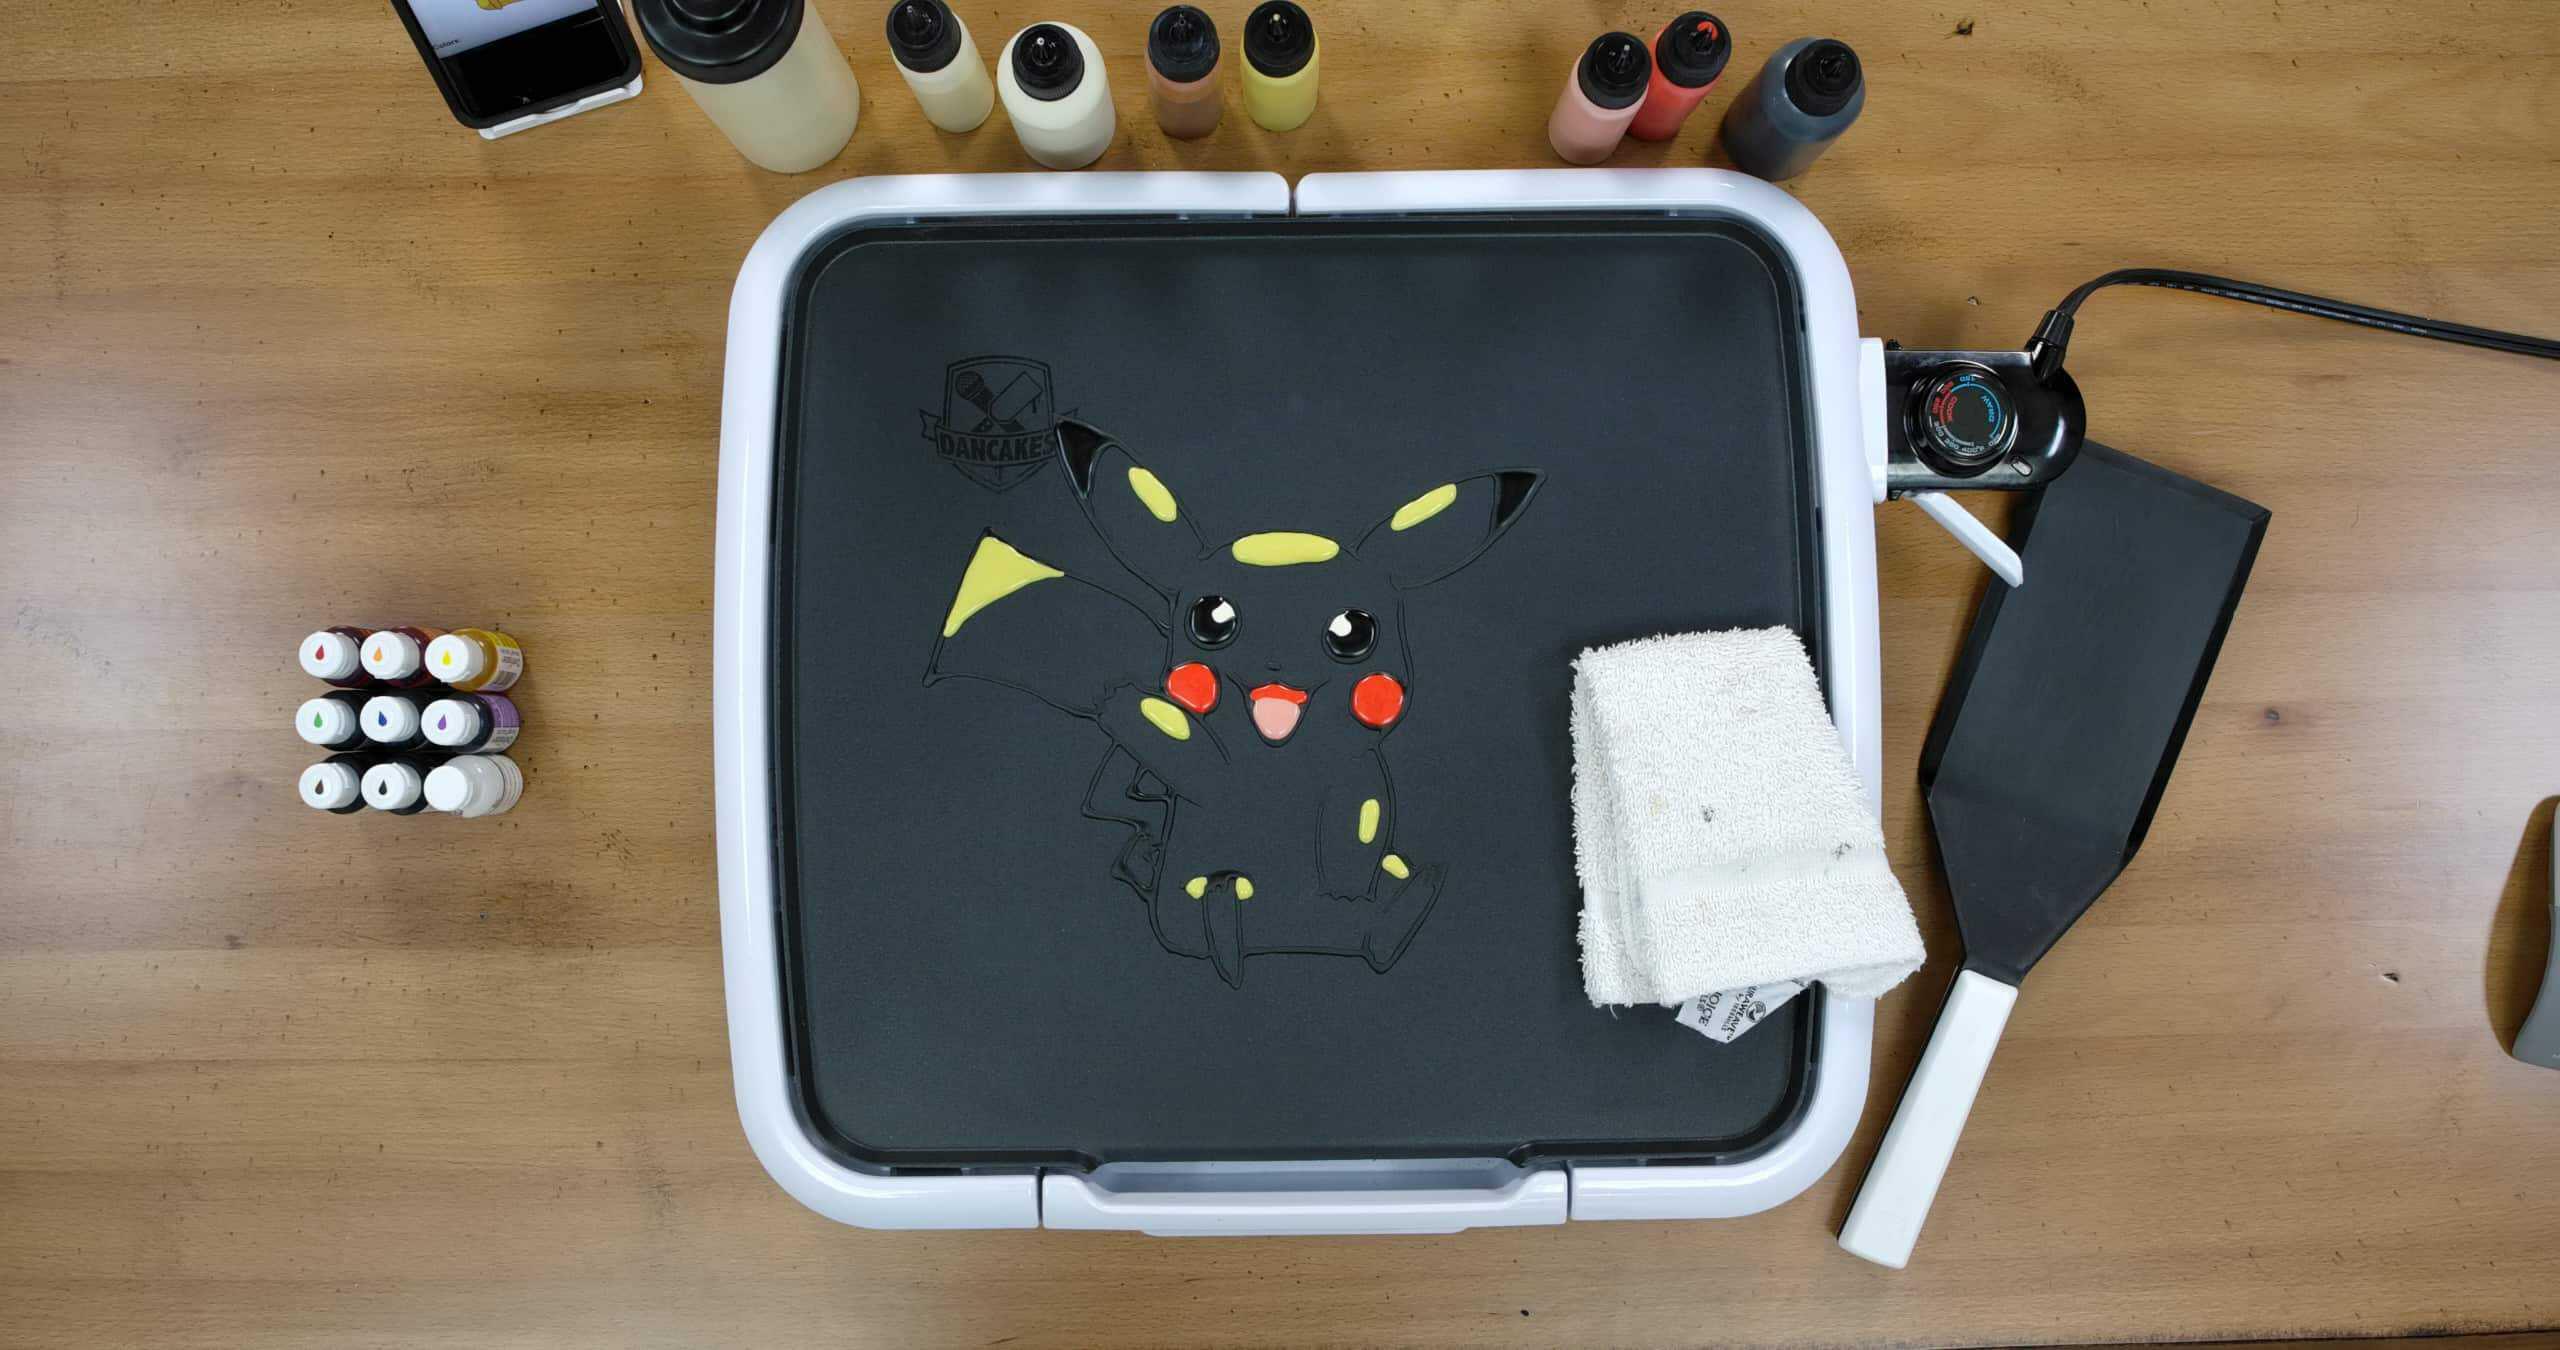
Once you have your outline, we’ll start by filling in Pikachu’s eyes. Using your white batter, make a small circle in each eye. Put them looking up and centered, even a little cross-eyed. Then, color in the rest of Pikachu’s eyes with your black batter. Then, as long as you’re holding that black batter, go ahead and color in the tips of Pikachu’s ears – all black! Good stuff.
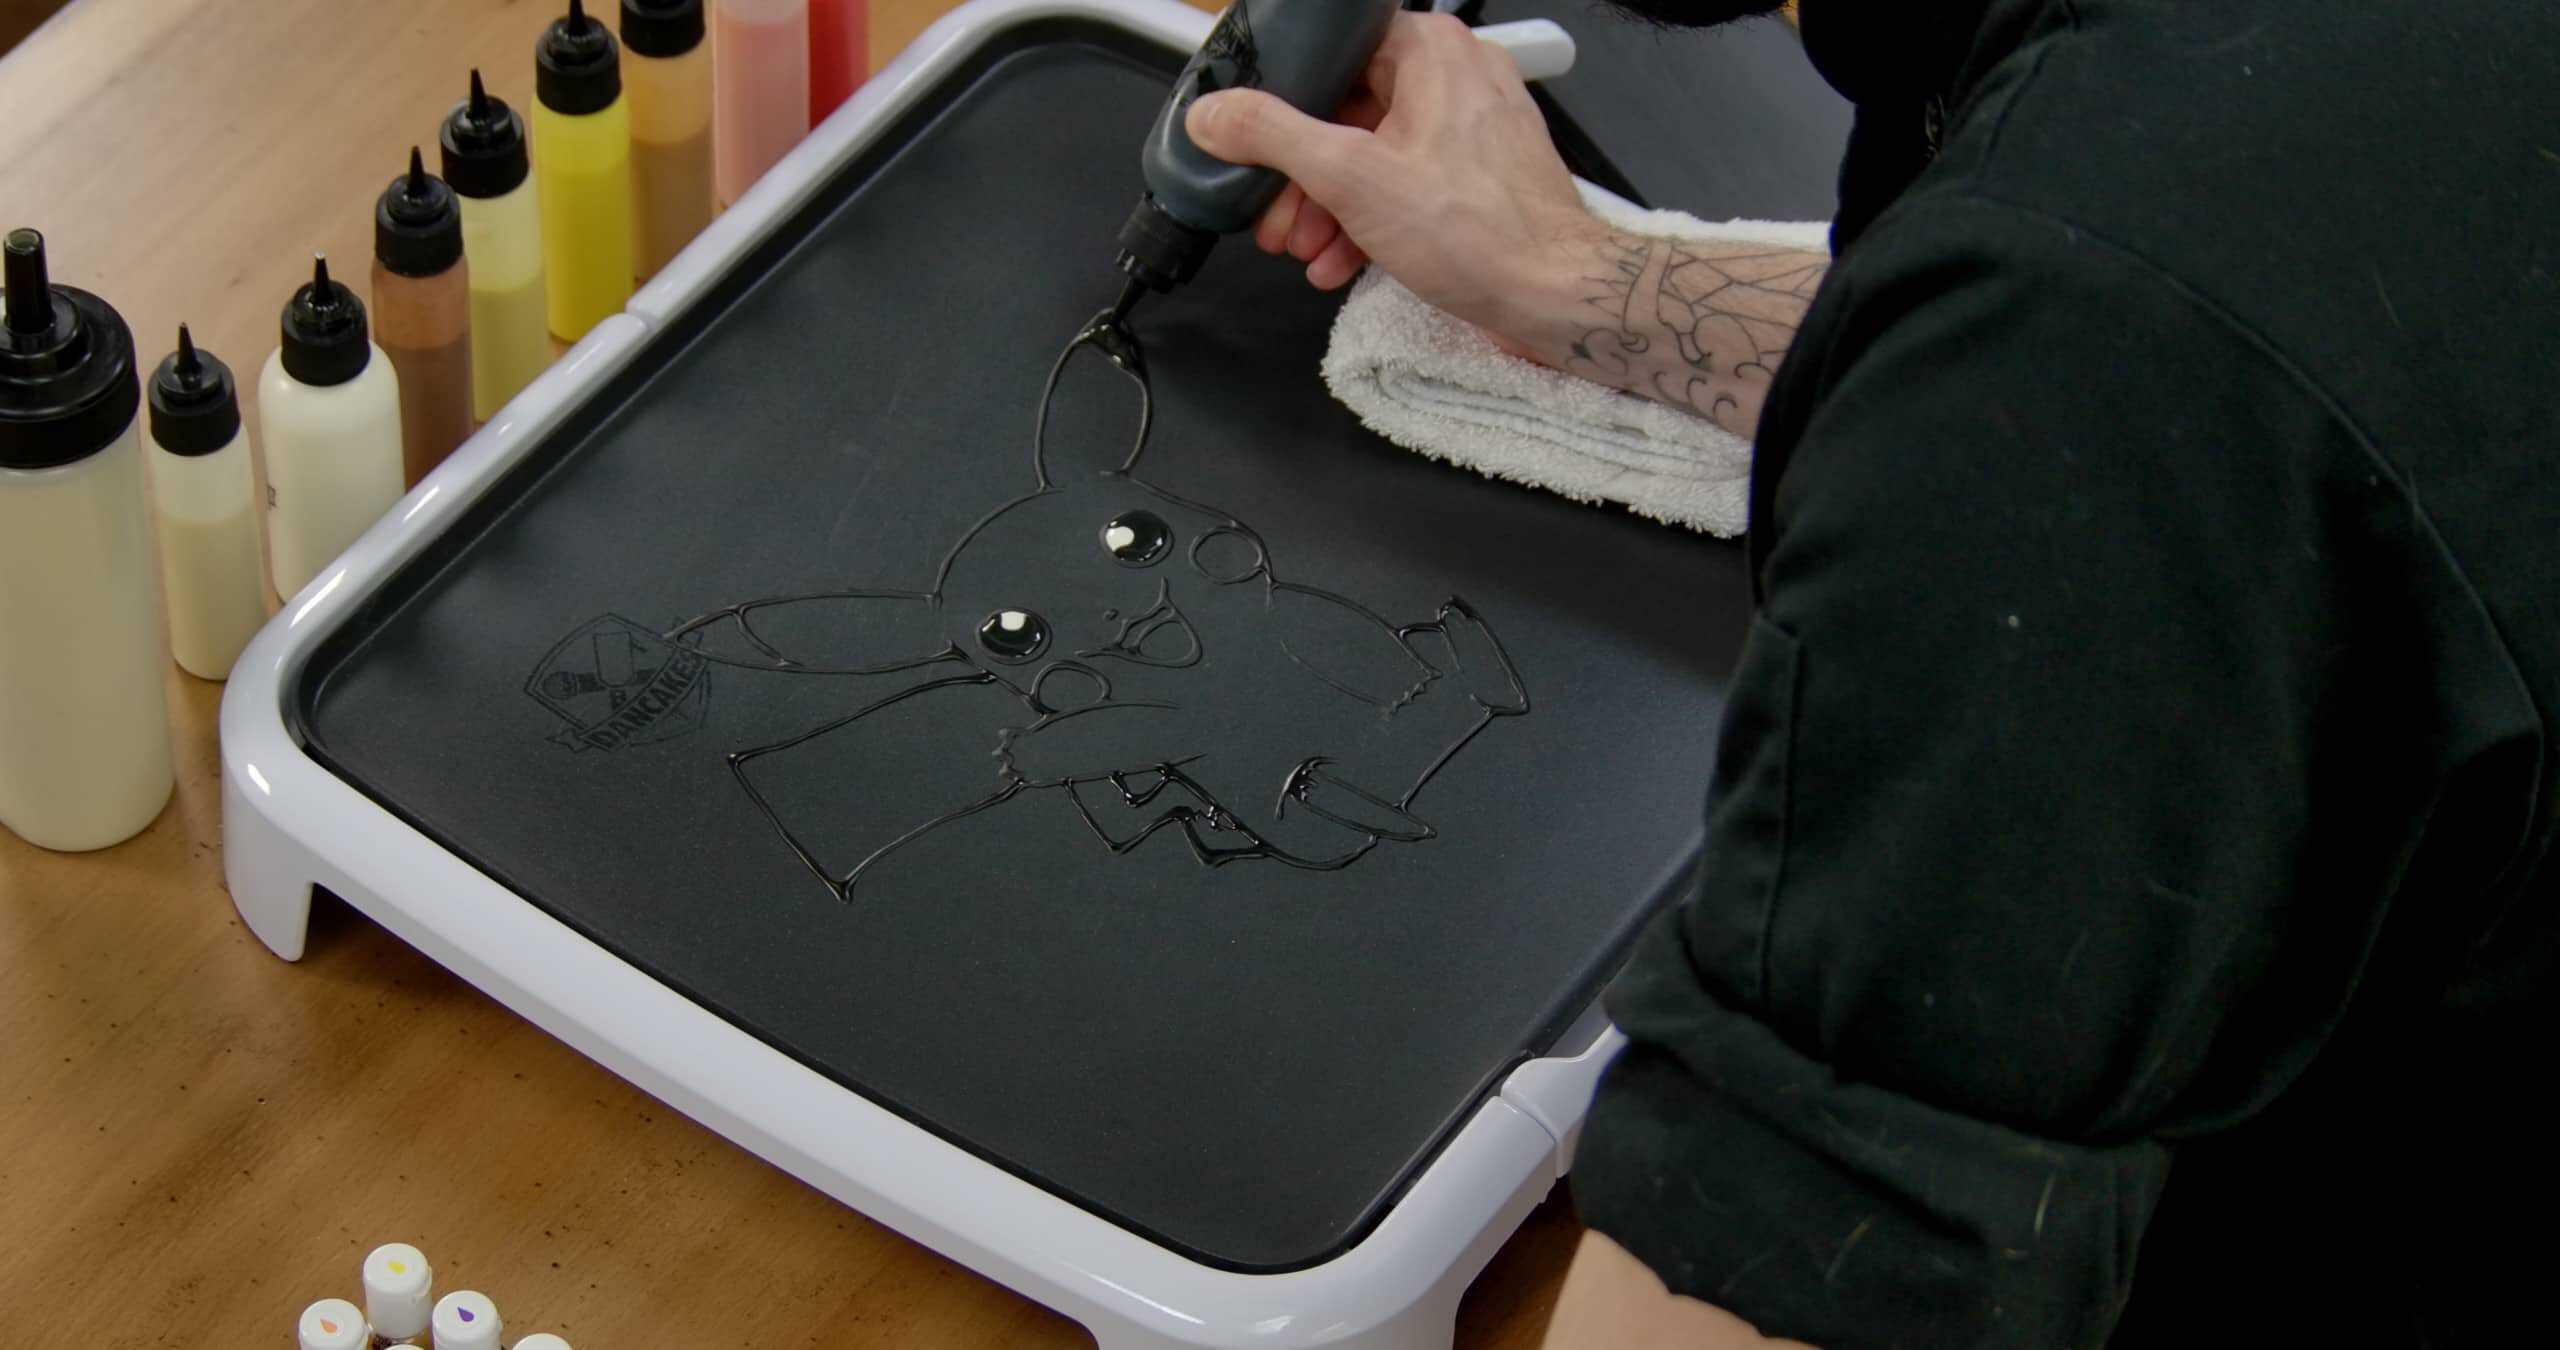
Step 3
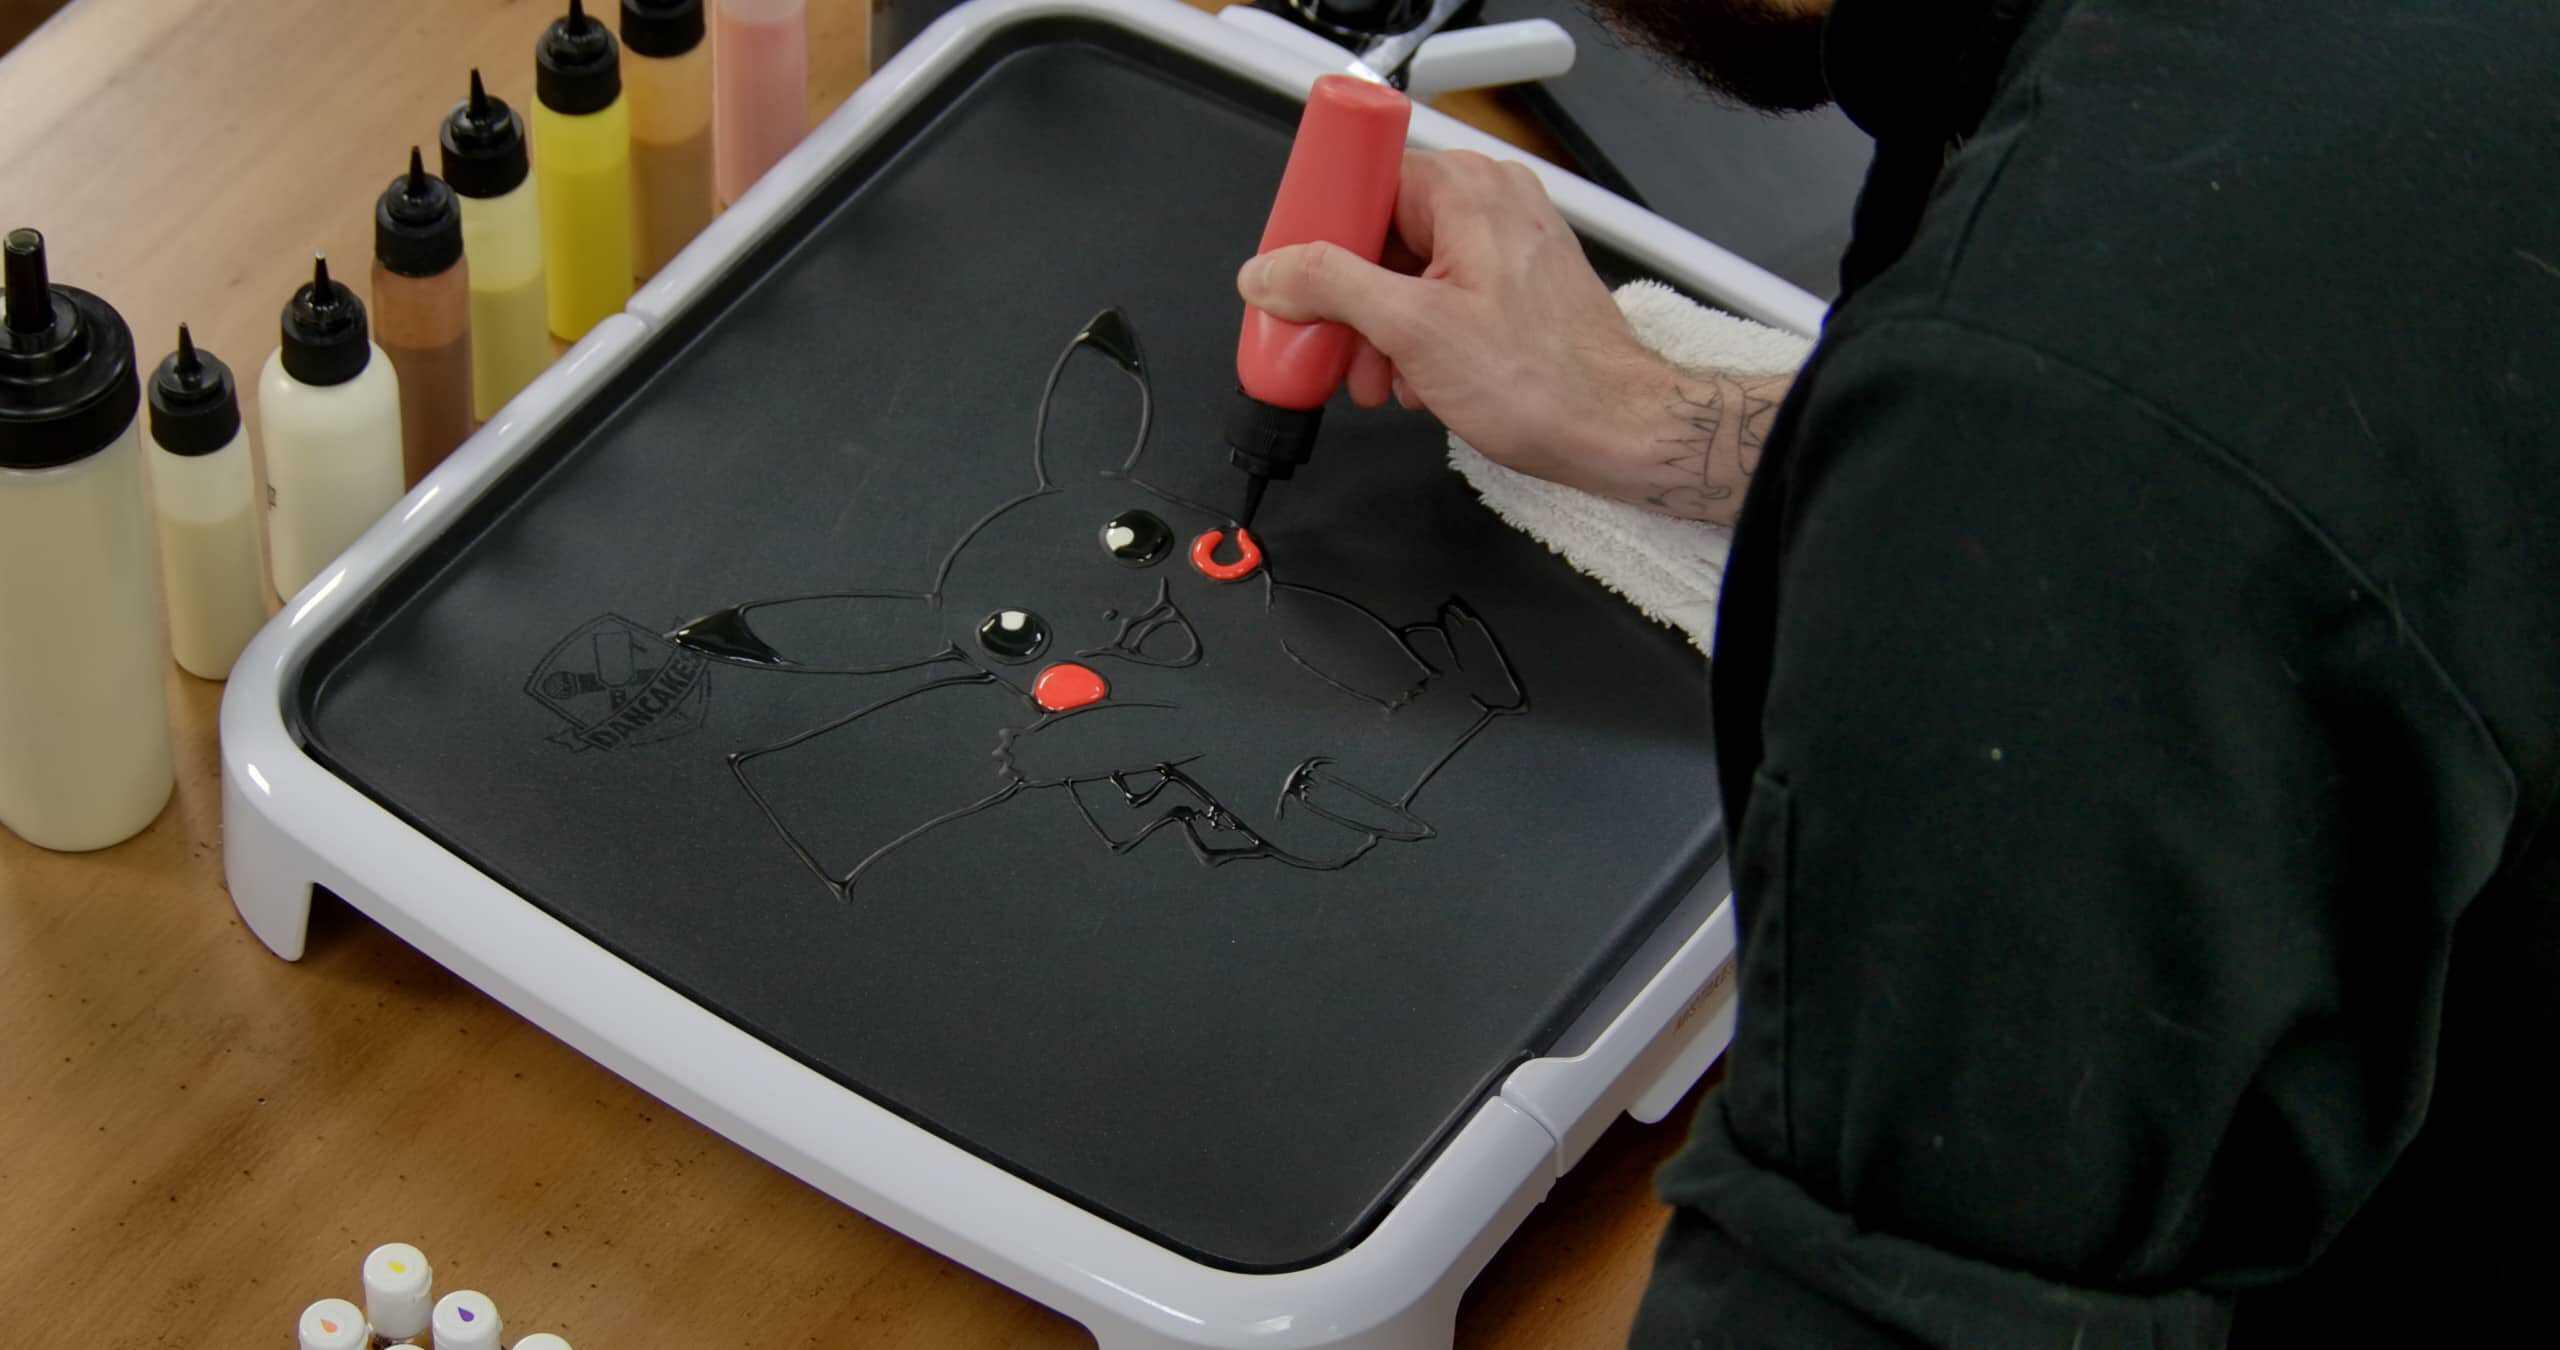
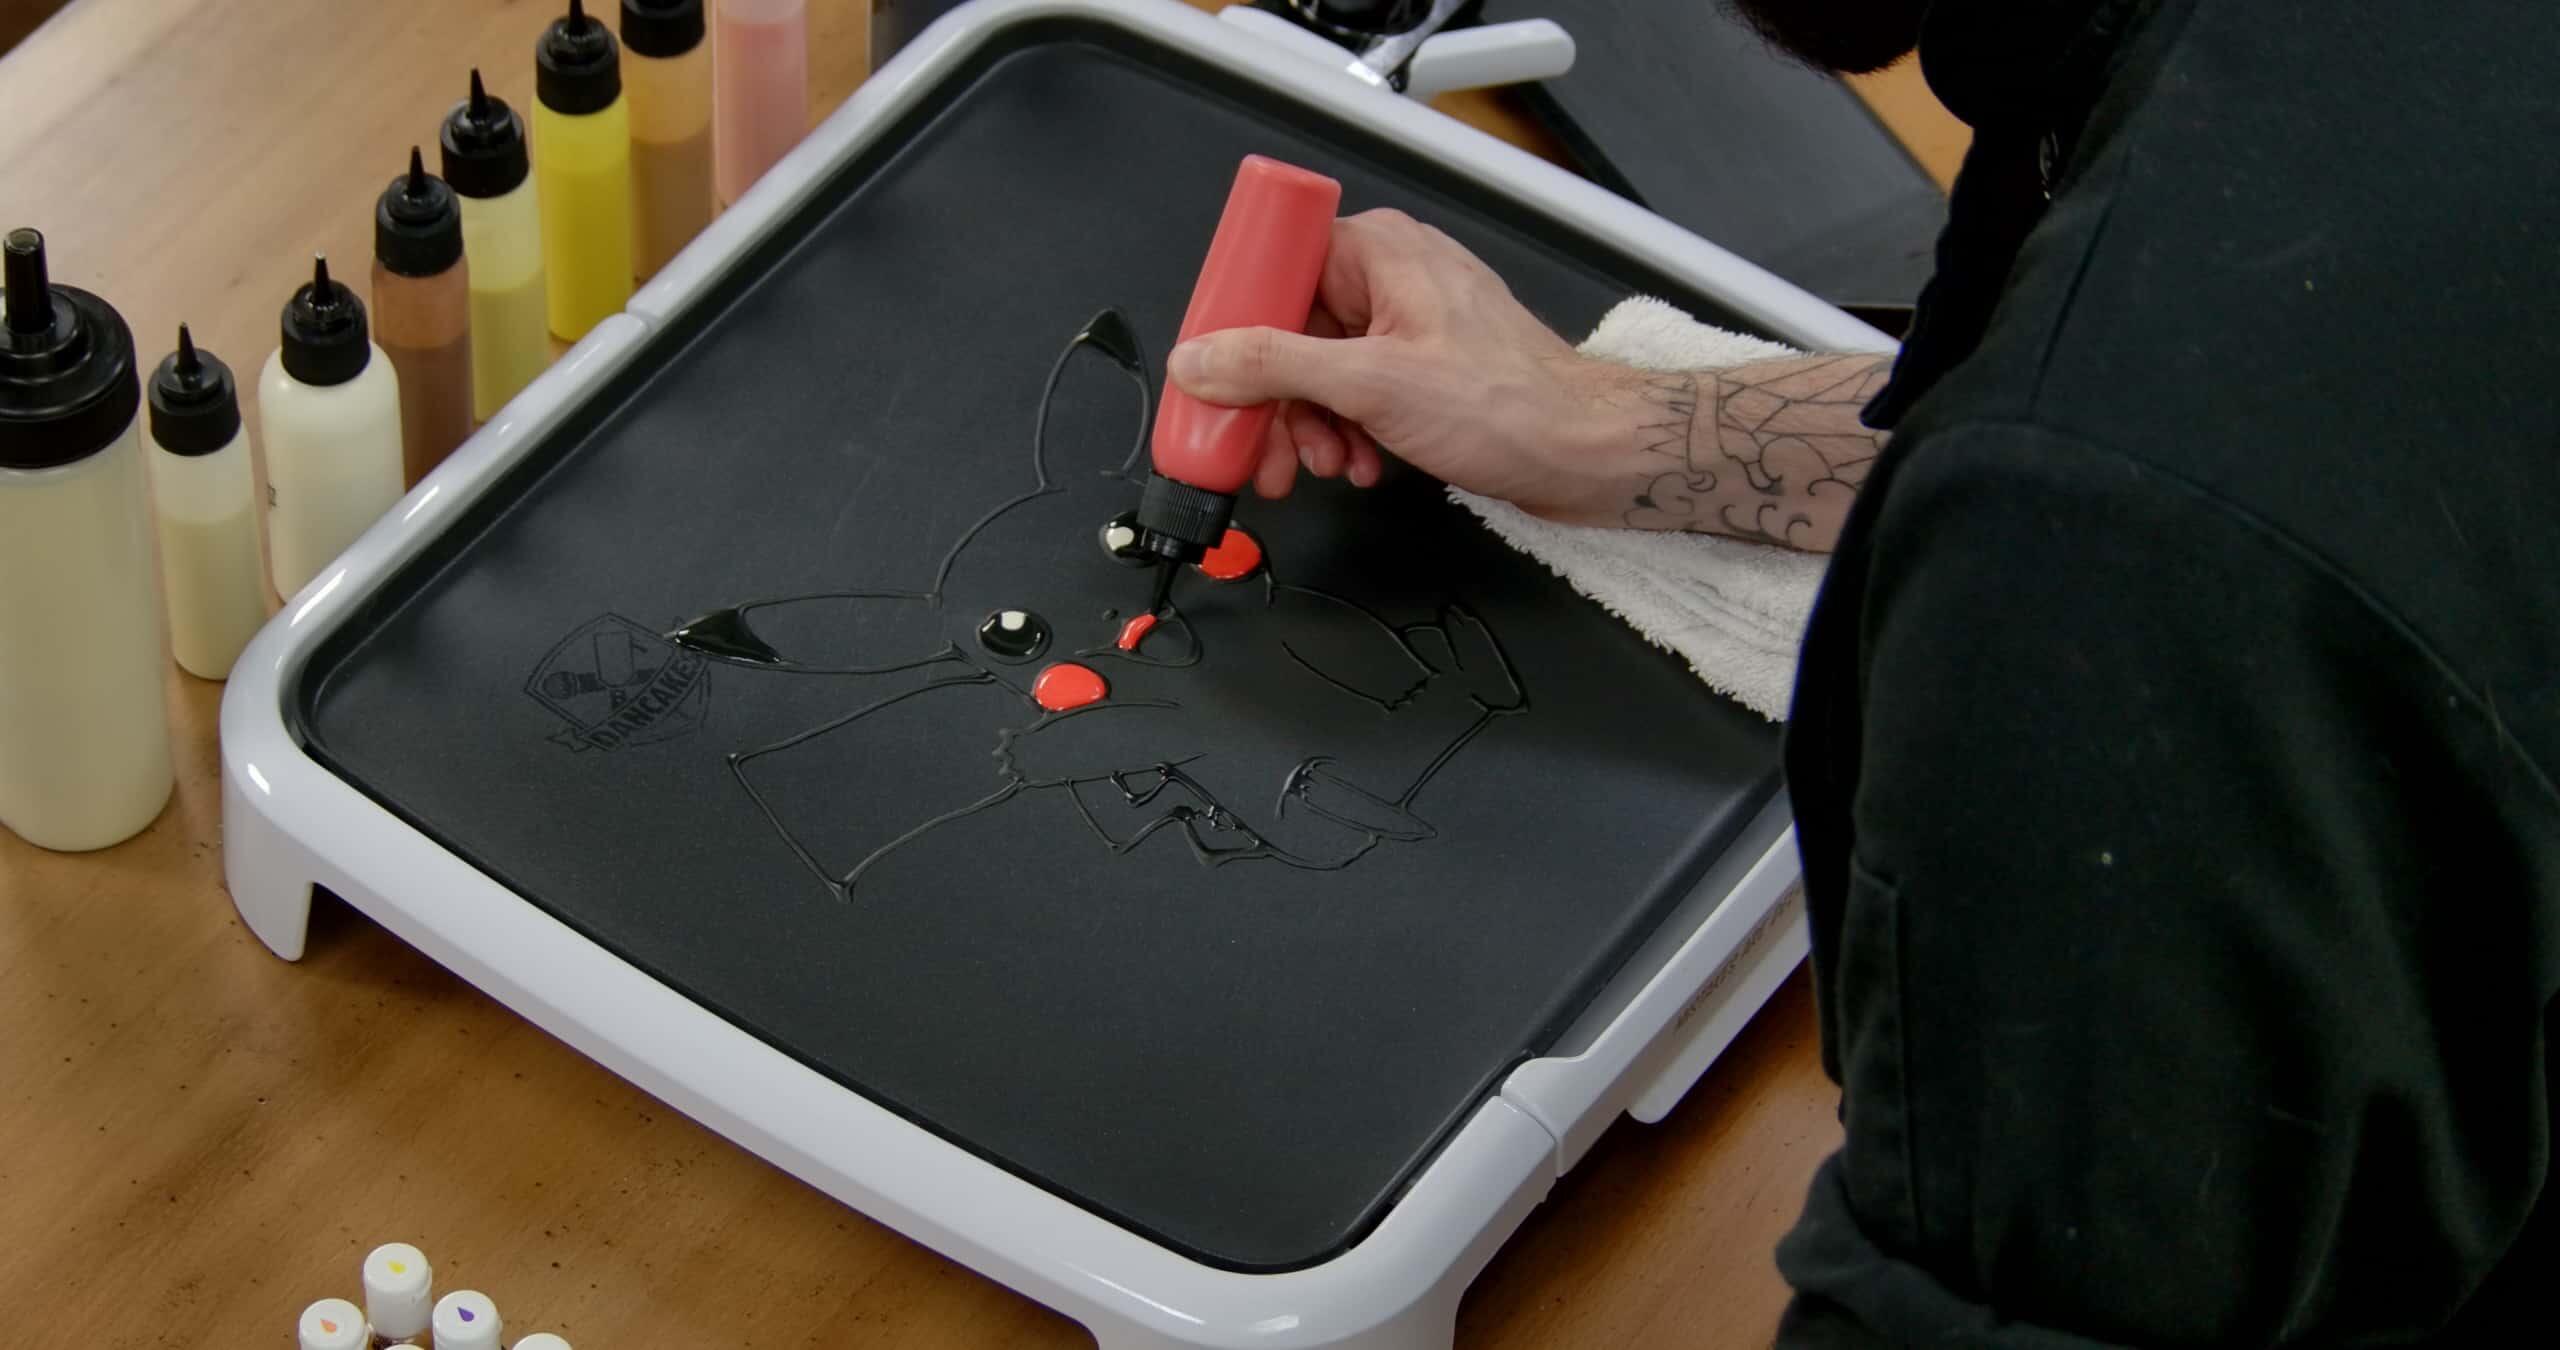
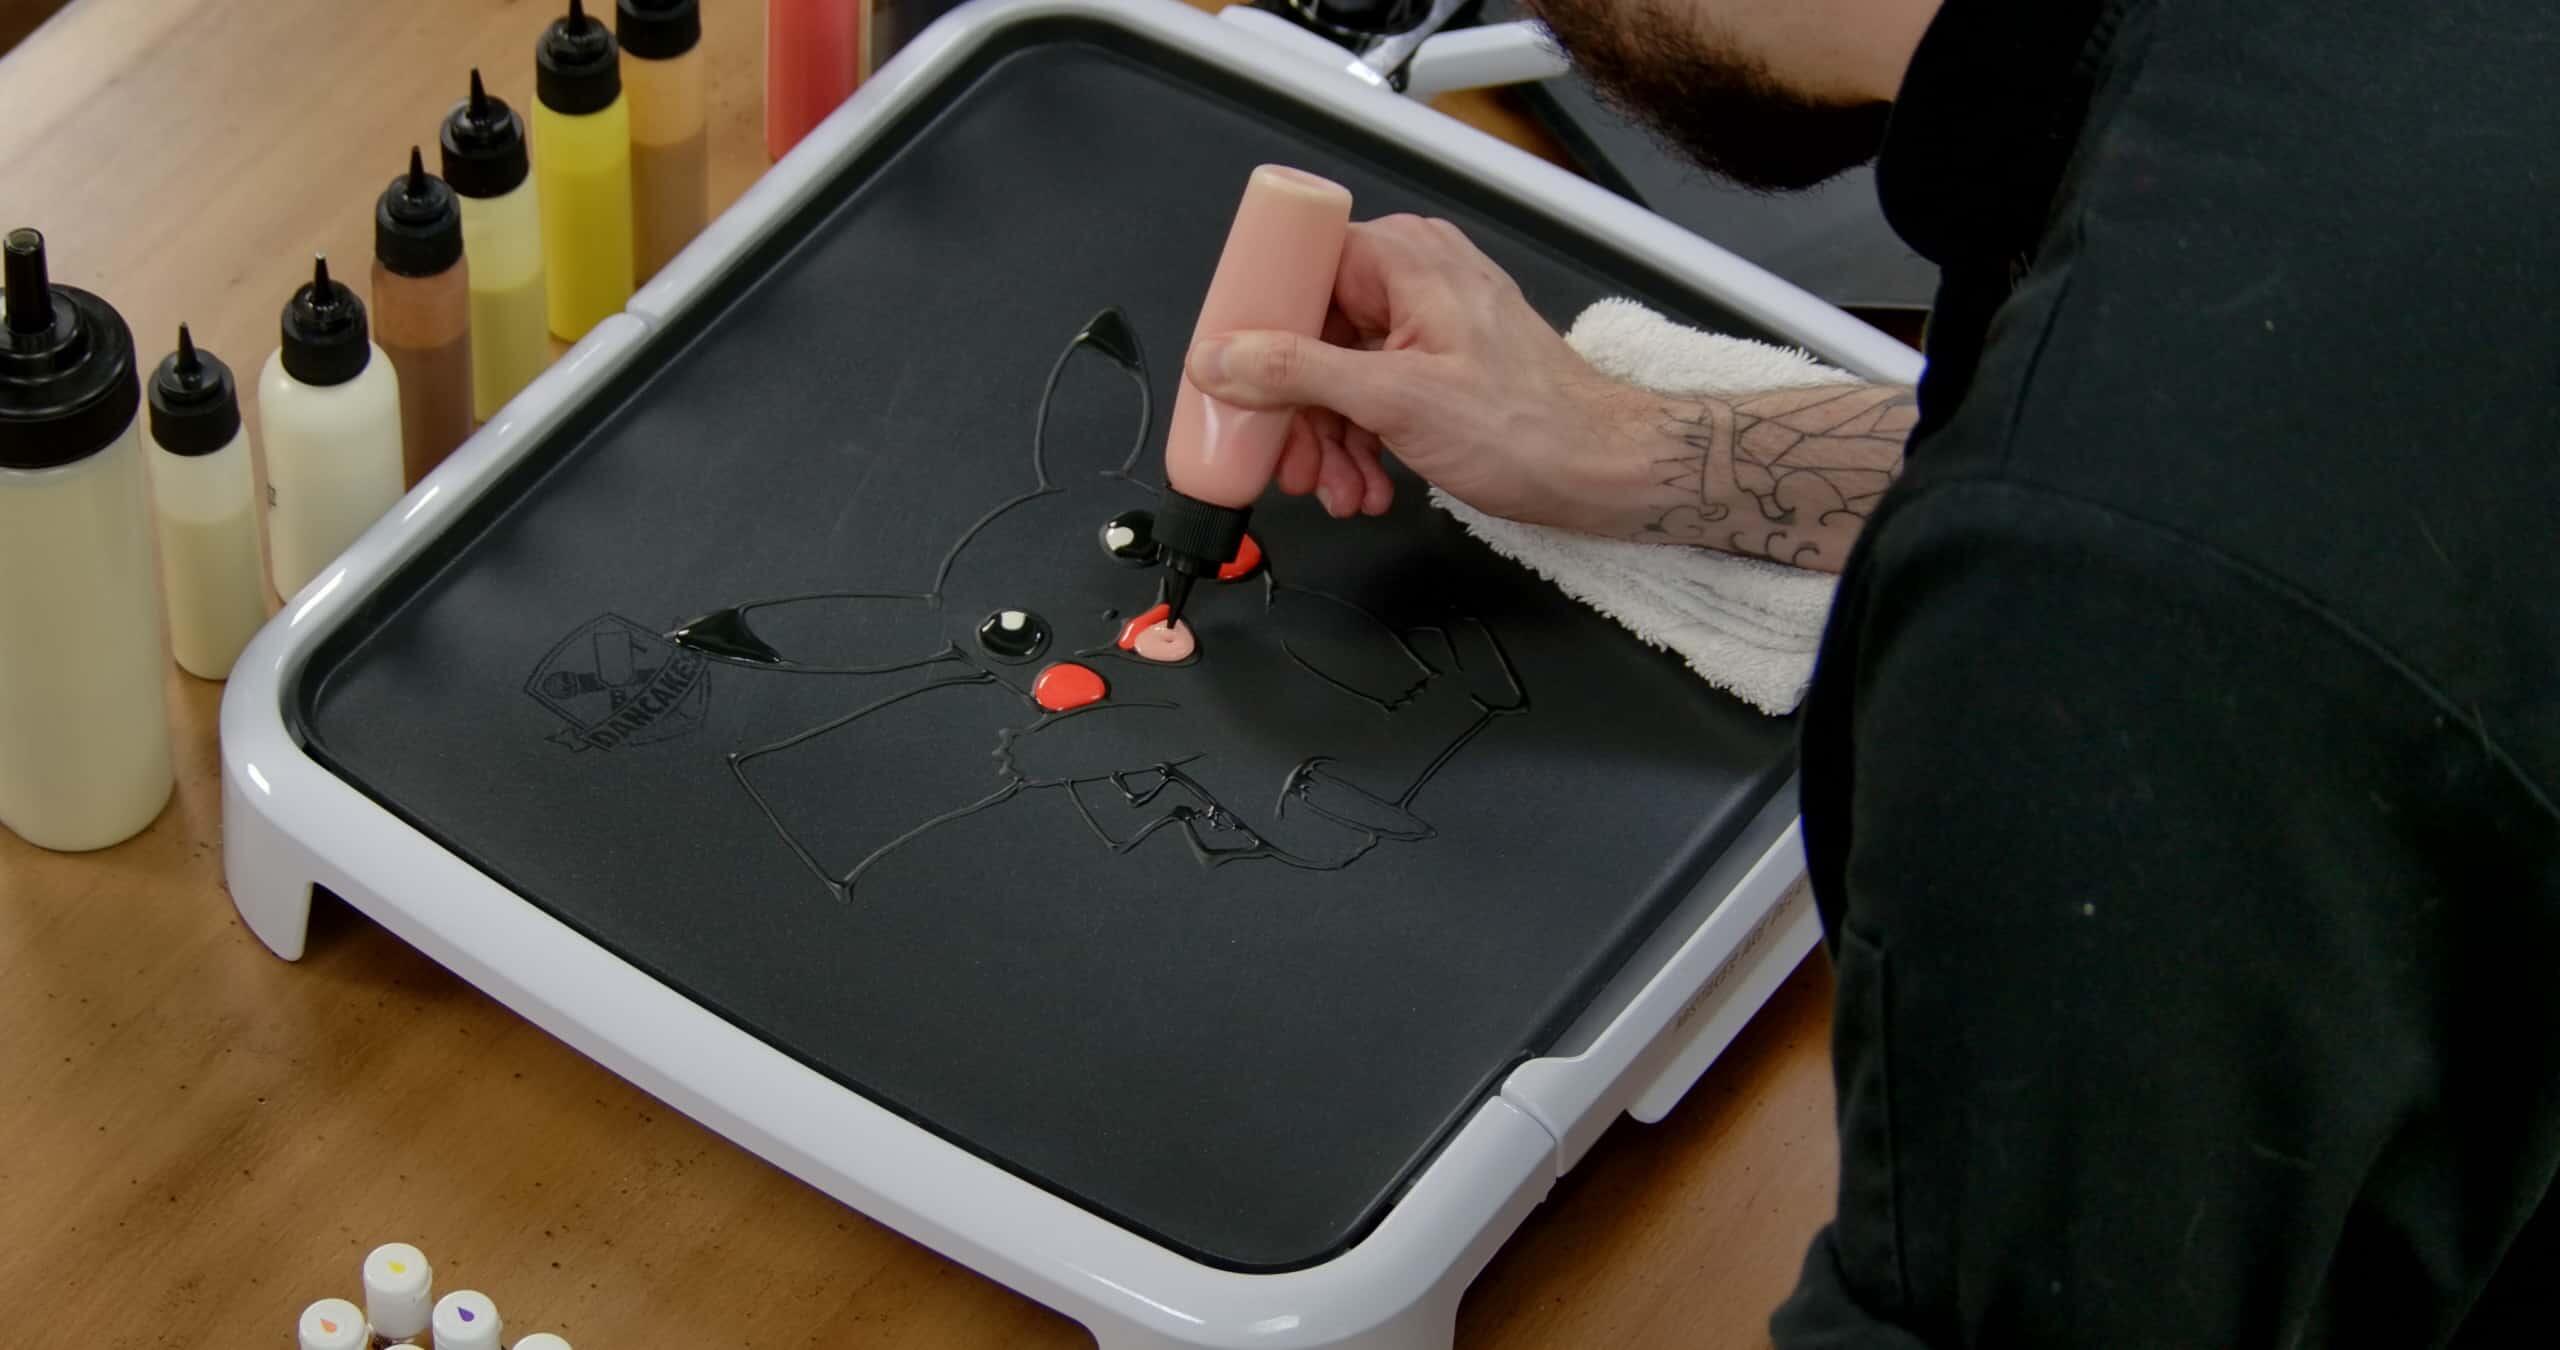
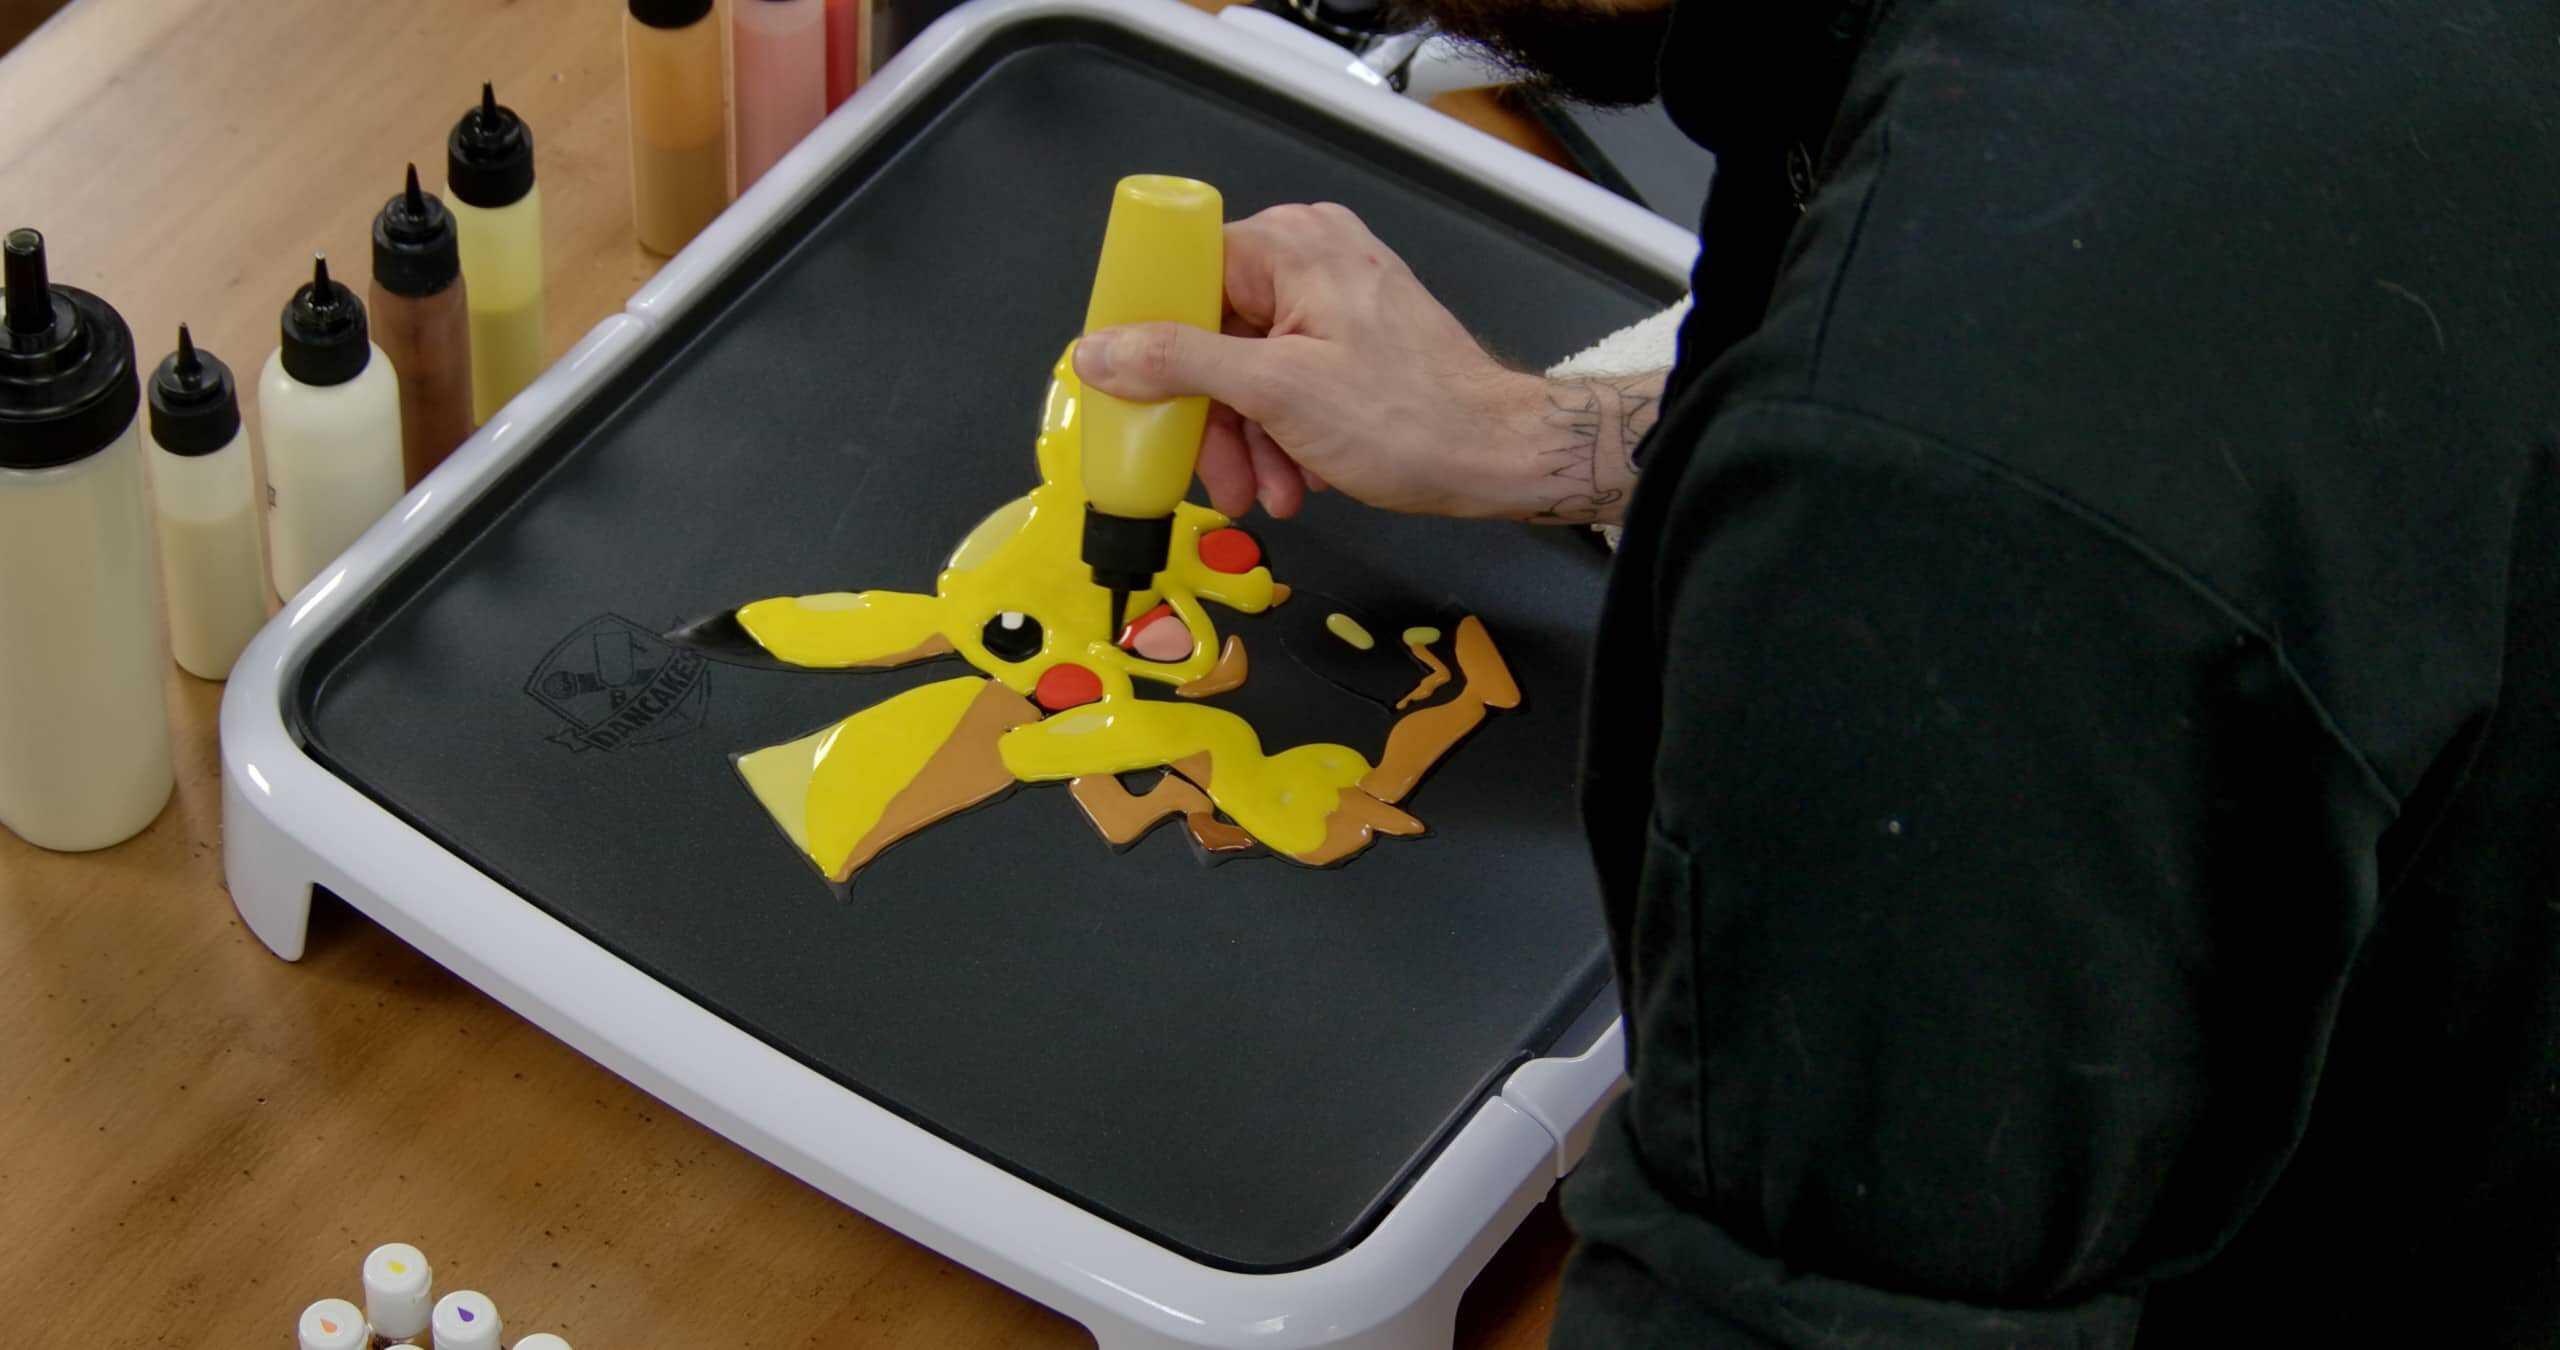
Now we’ll fill in his cheeks with red batter. Once you’ve done that, use the red and fill in the space in his mouth, above his tongue. Then fill in the tongue with pink/light red. The reference image has slightly different shades of red, but we’re doing two easy shades to simplify. But feel free to get as complex as you want!
Step 4
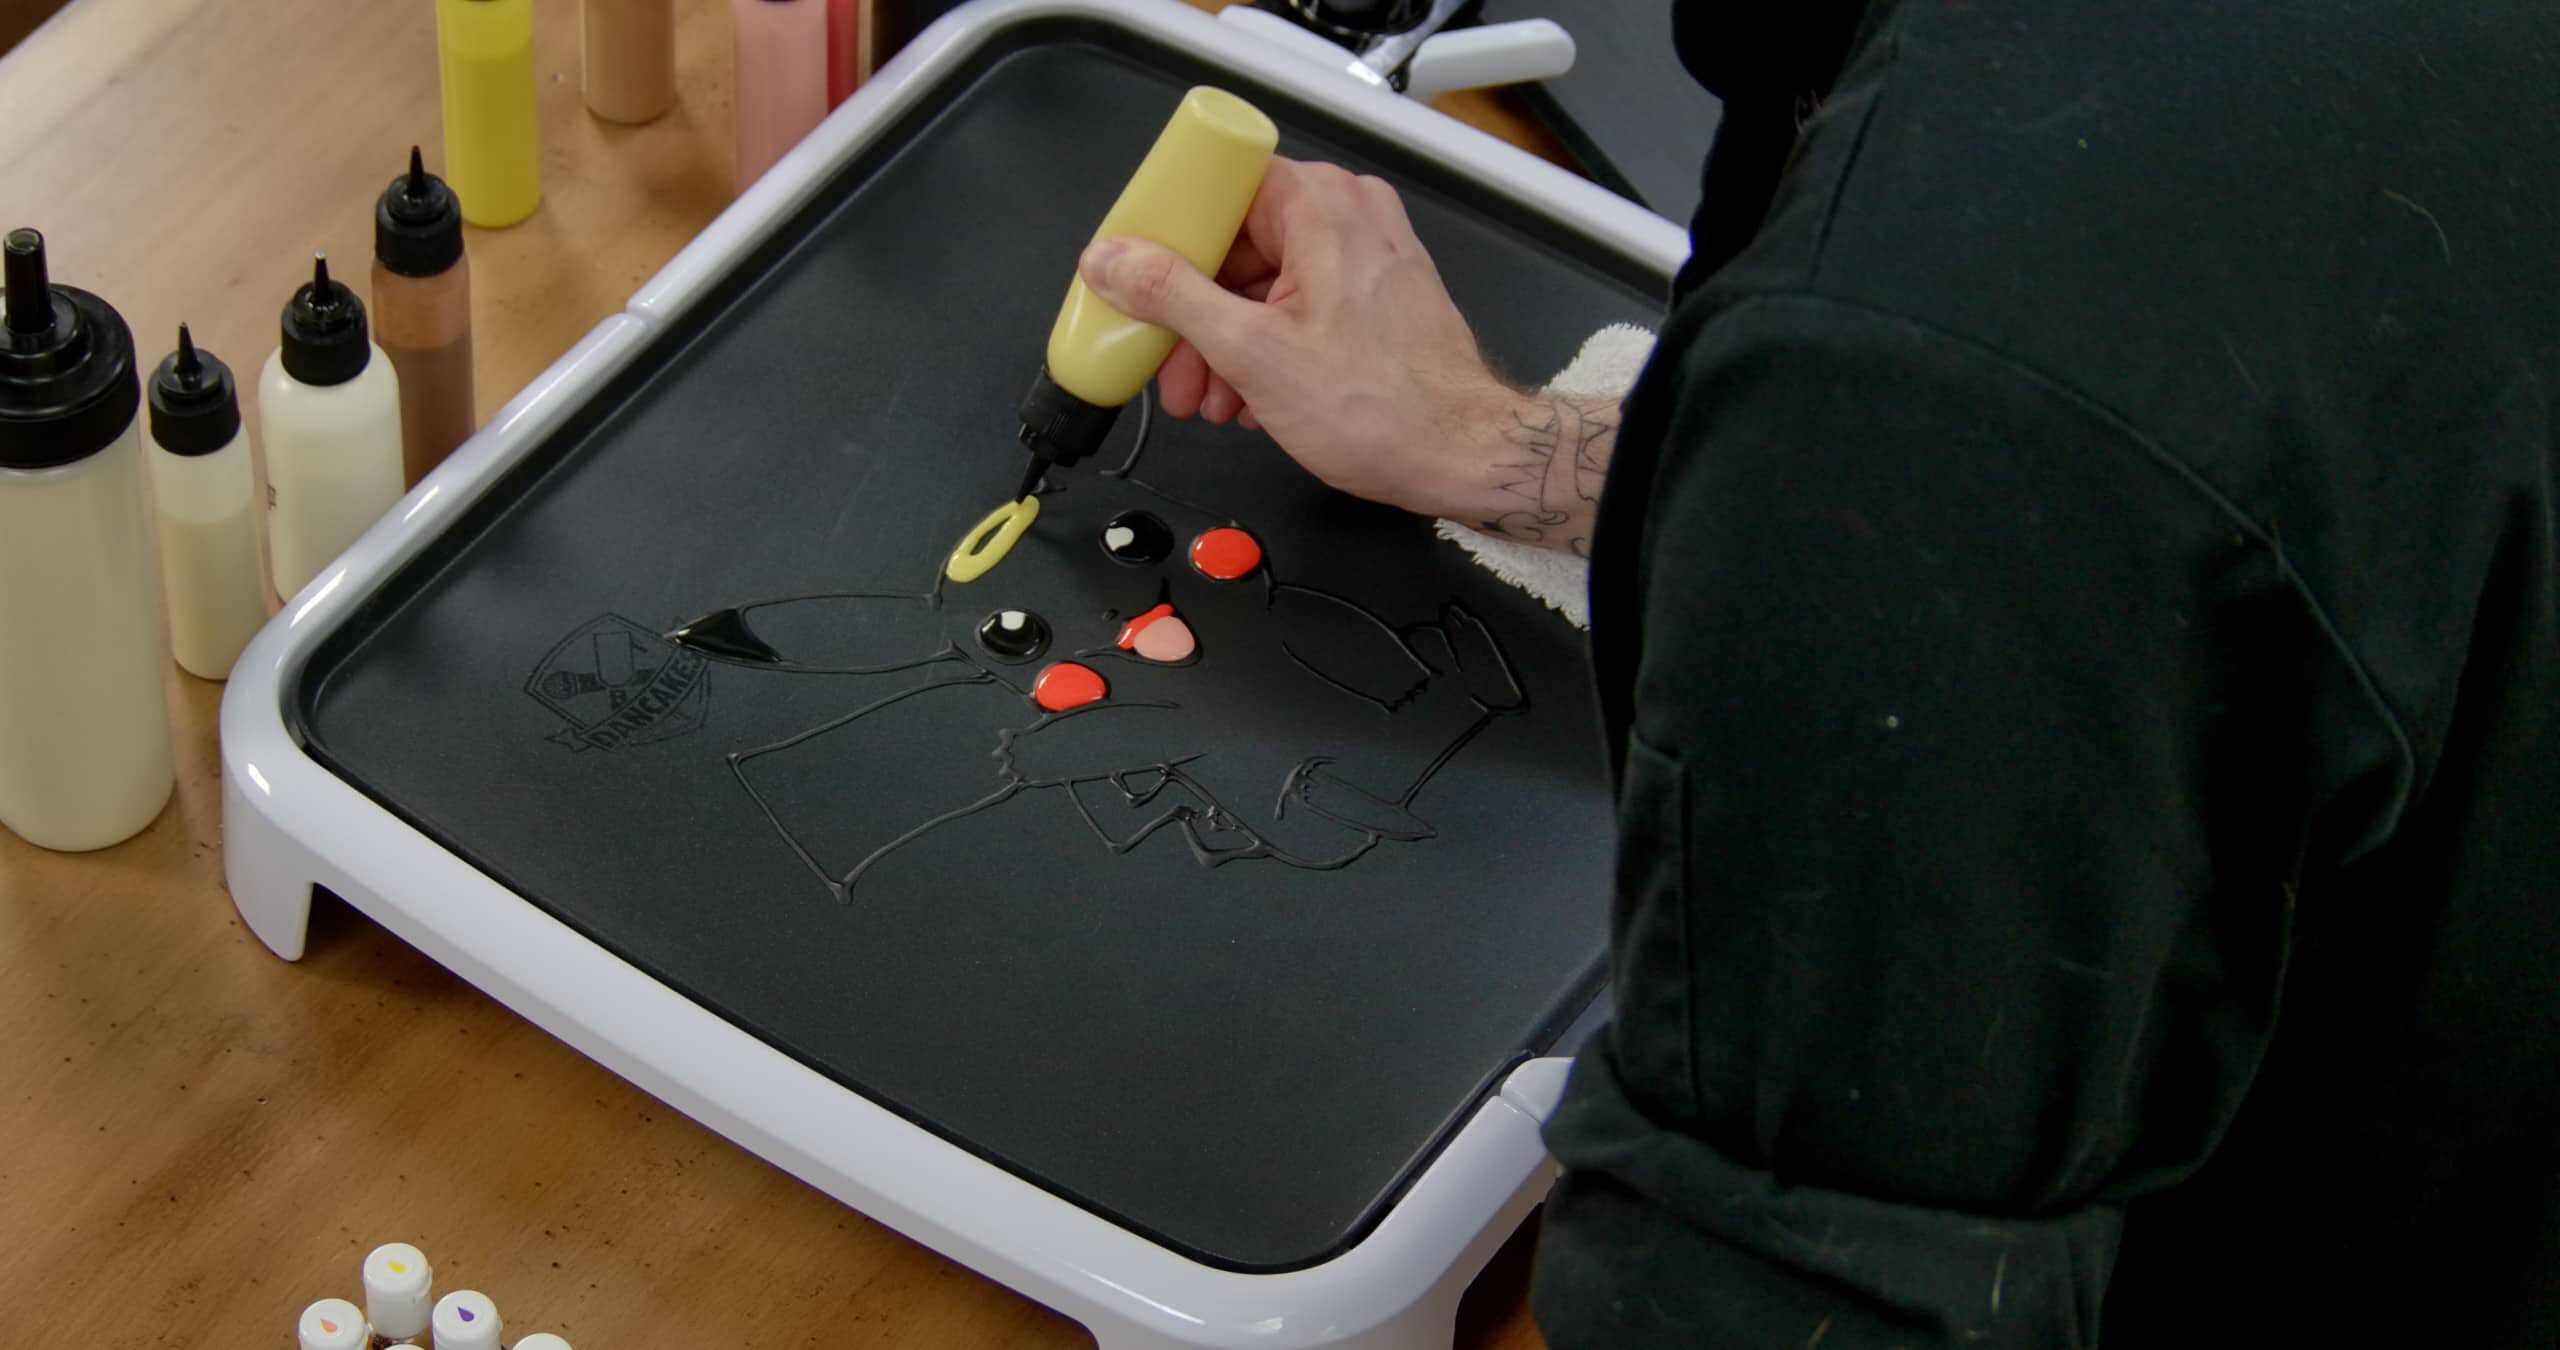
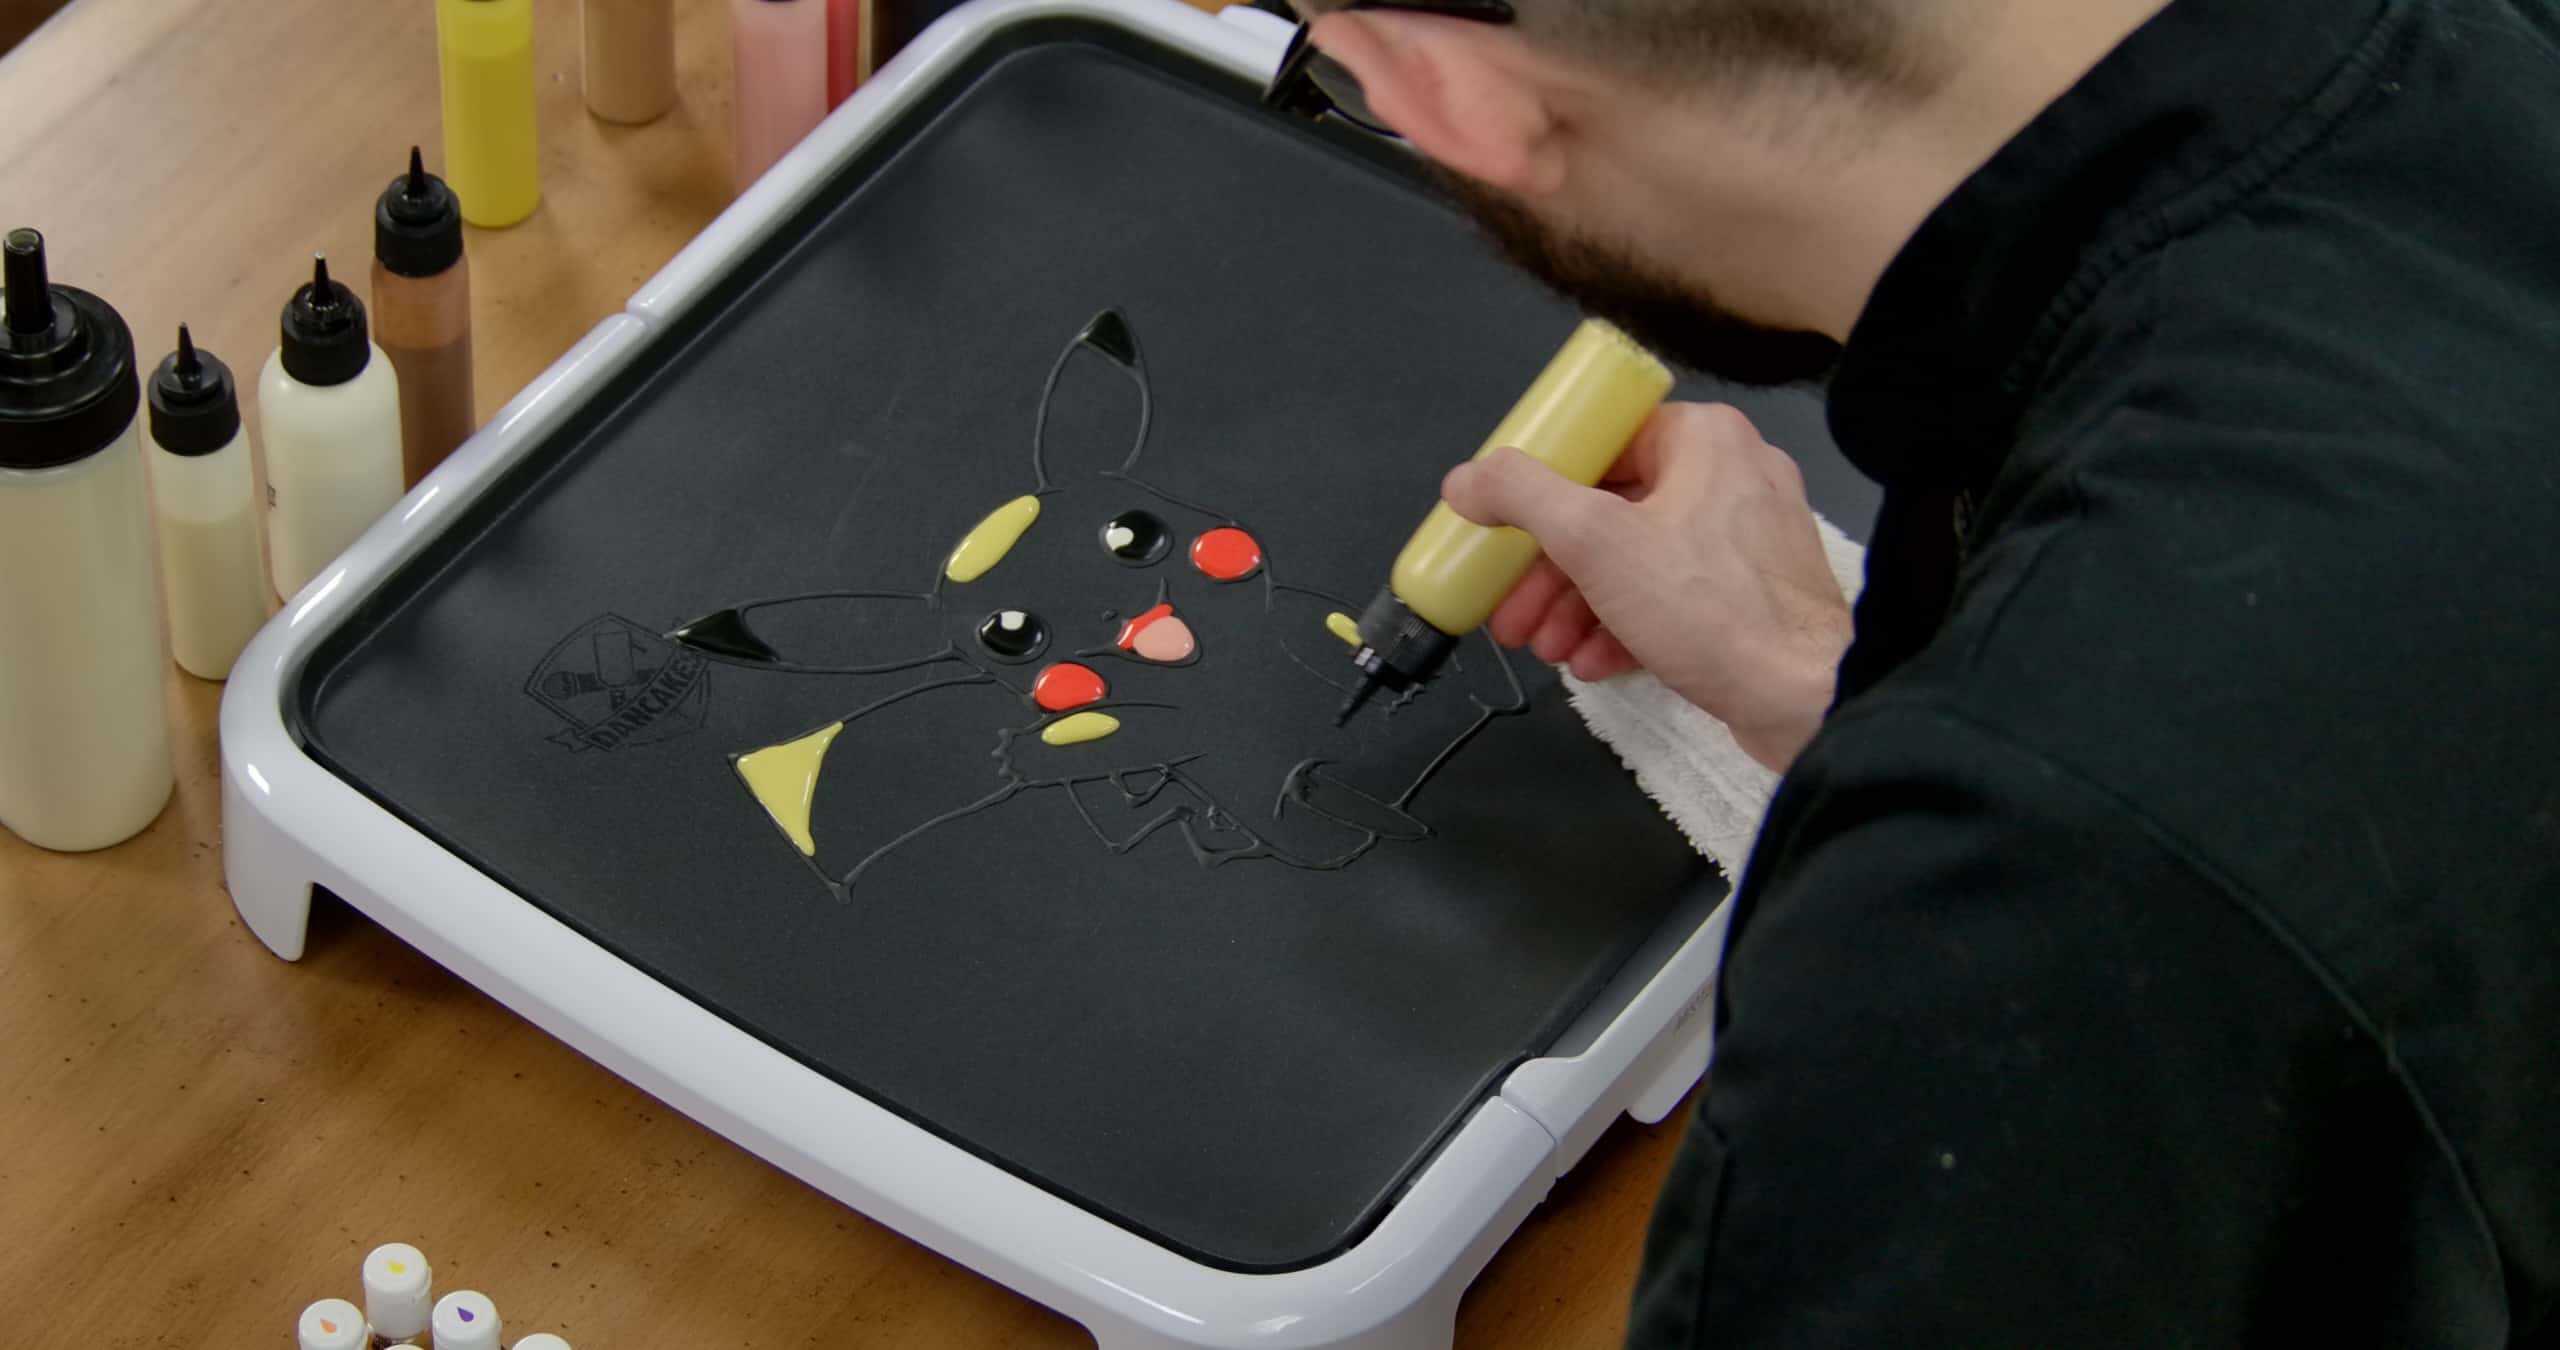
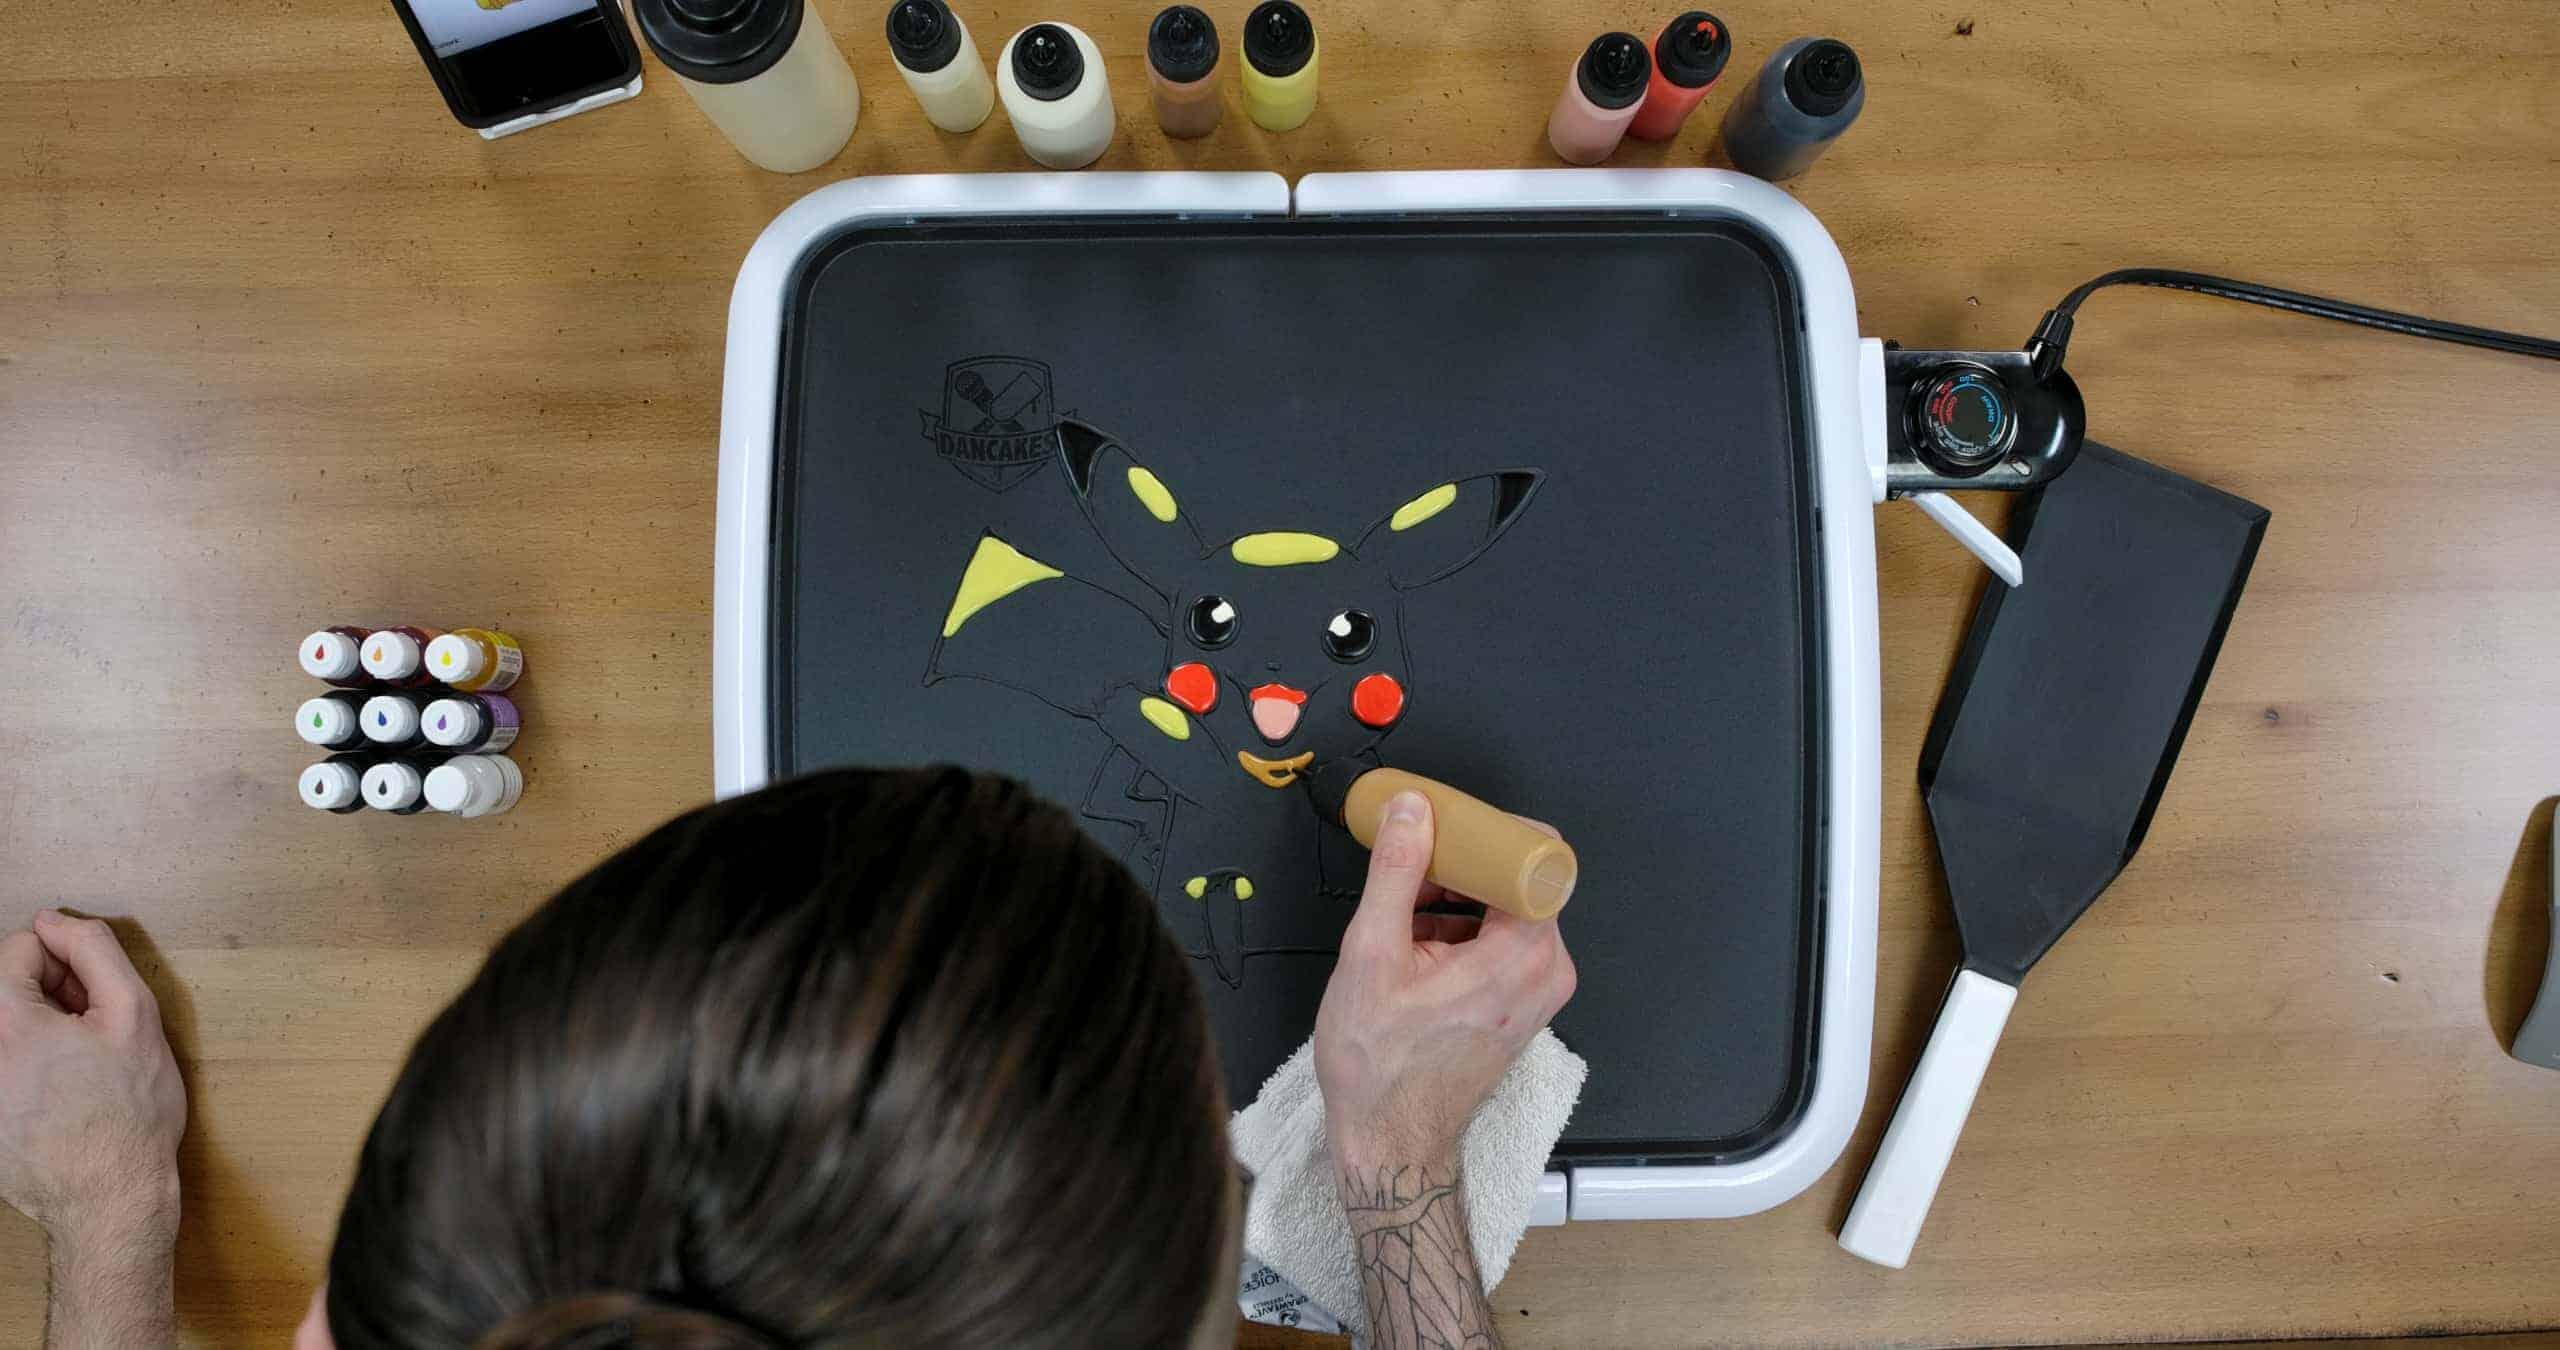
Now we’ll add in the highlights. Remember that these are where the light hits Pikachu the most! We’ll assume that light is hitting Pikachu from above, so we’ll add highlights to the top parts of him. With your plain/light yellow, draw a flat oval on top of Pikachu’s head and on the tops of his ears. Draw a line along the top of the left arm (Any directions using right or left will be from your perspective, not Pikachu’s). Draw a line on the inside of the right arm, draw a curved line along the top of the knees, and lastly, lay a line of highlight on the top of Pikachu’s tail.
Step 5

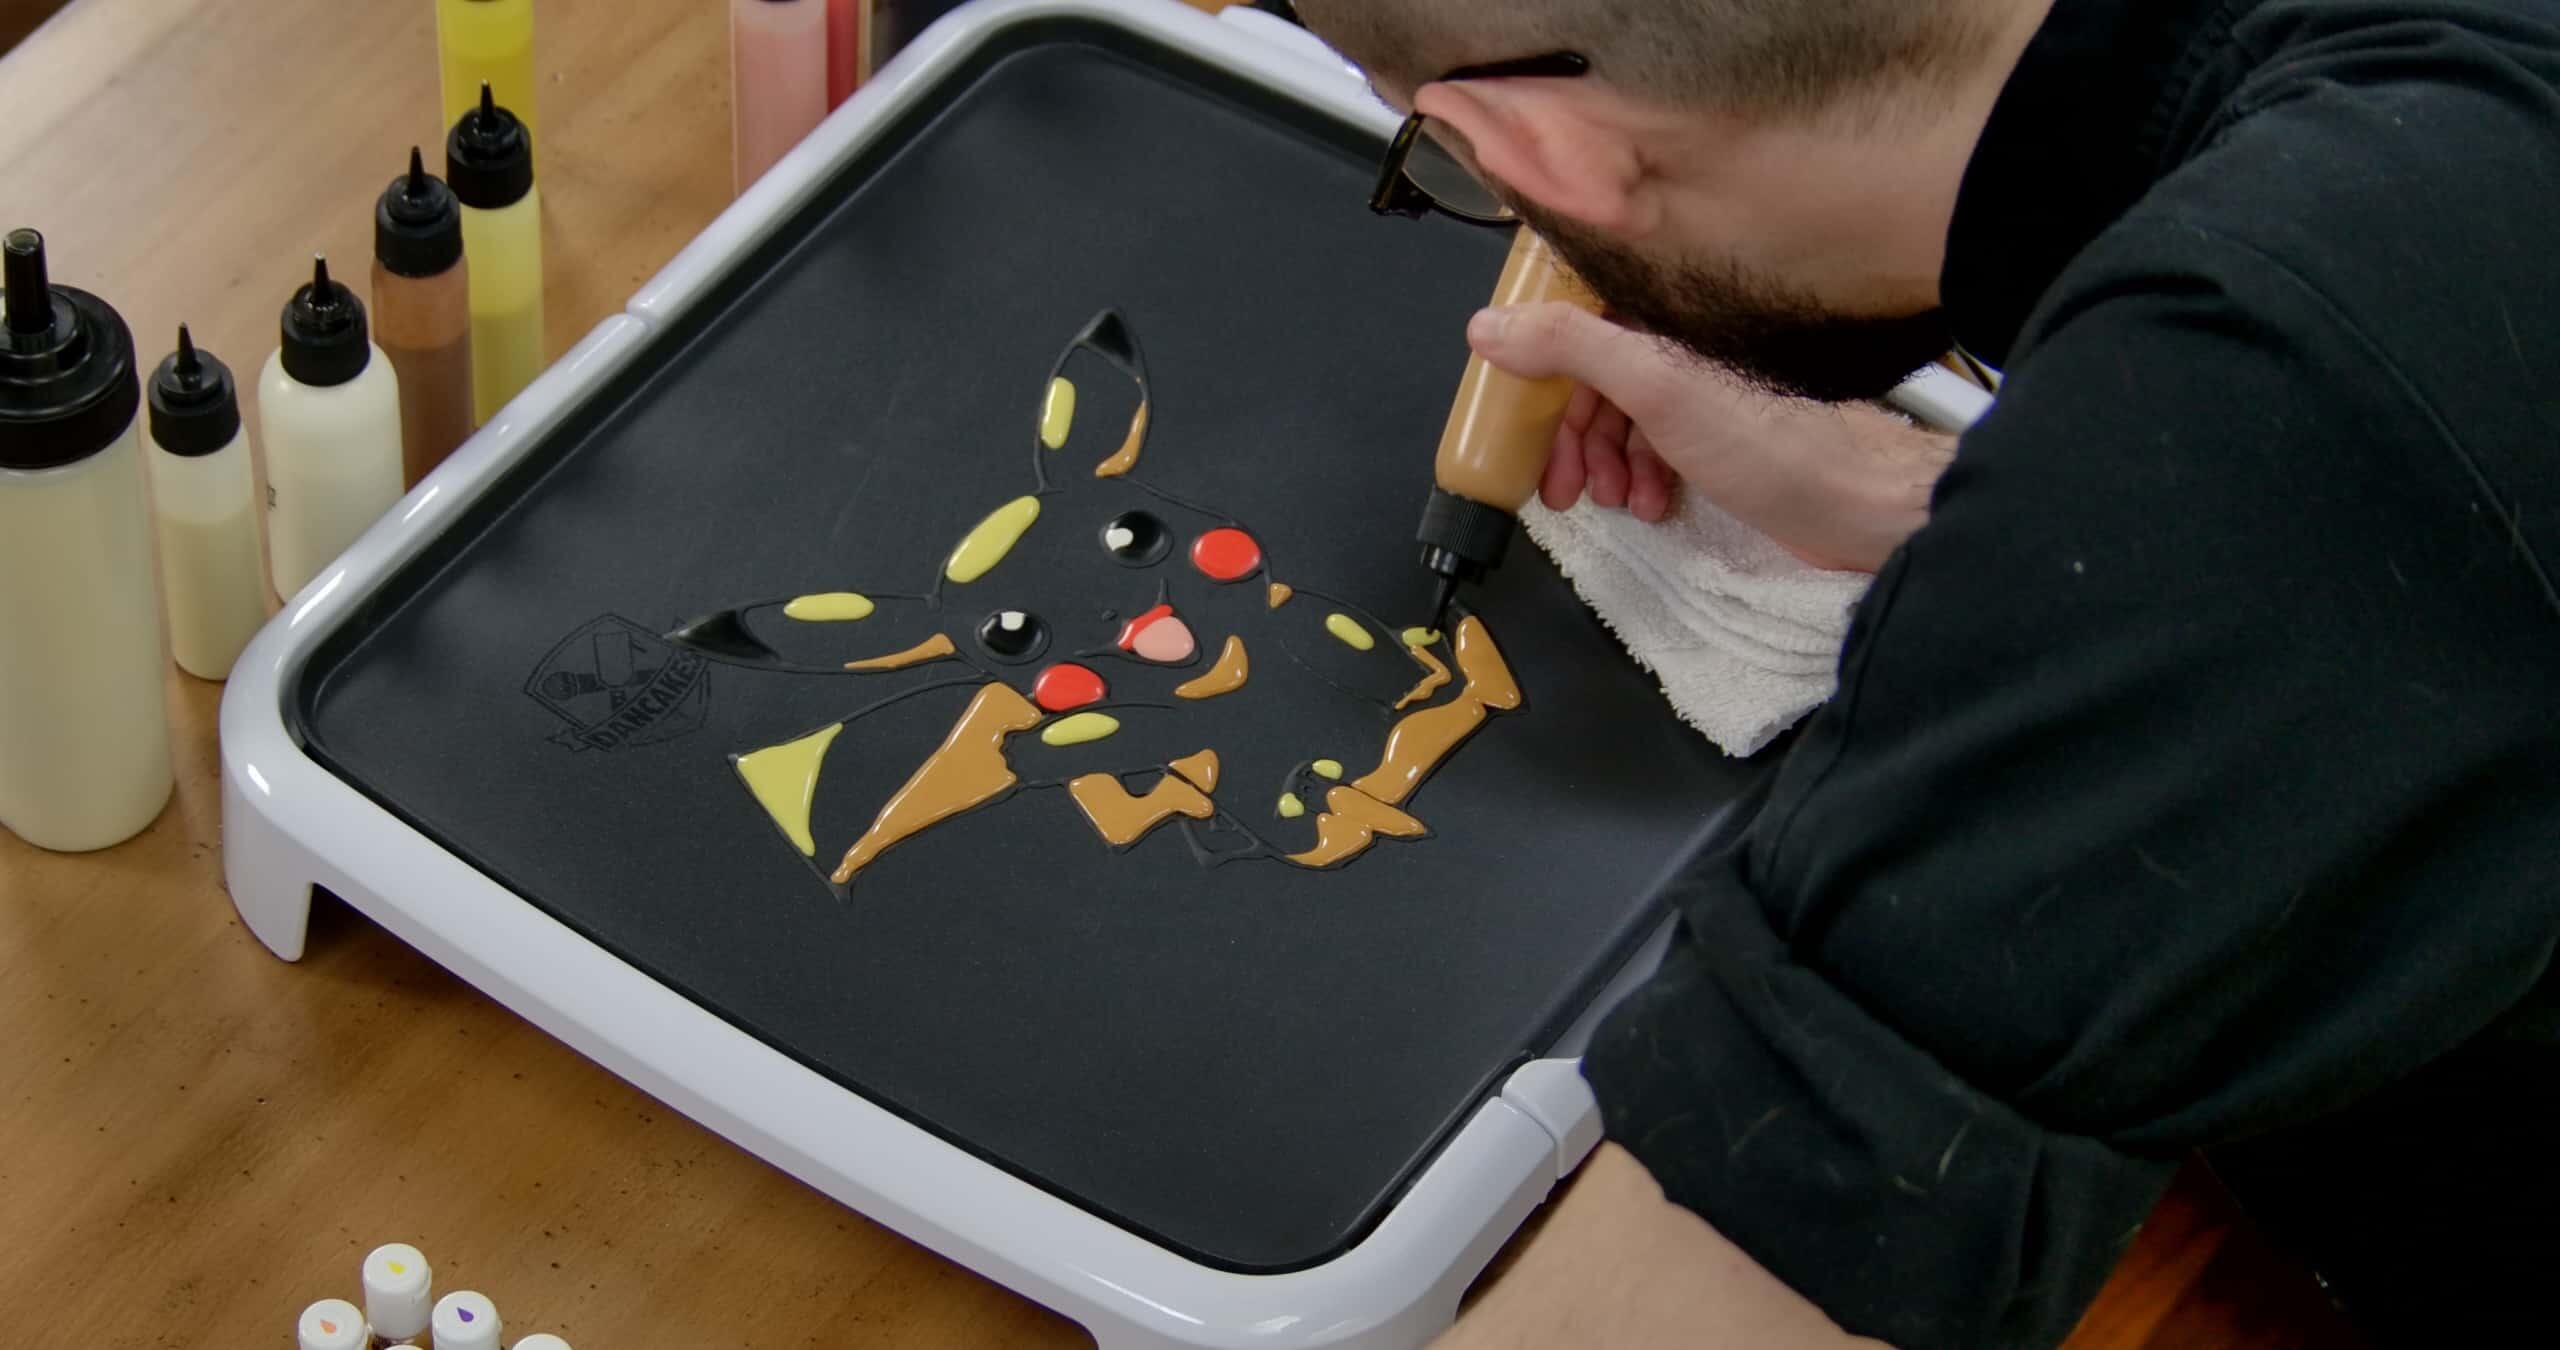
Now we’ll add the shadows. Remember that these are the places where the light hits Pikachu the least, almost like the opposite of the highlights. Assuming that the light source is coming from the top, the shadows will fall under Pikachu. Use your dark yellow to fill the space under Pikachu’s legs, feet, tummy, and chin. You can also apply thin shadows to the underside of their ears and arms. Lastly, we’ll shade the tail. But first, use your right brown to color the base of Pikachu’s tail. Once you’ve done that, fill the tail with show until you almost reach the top.
Step 6
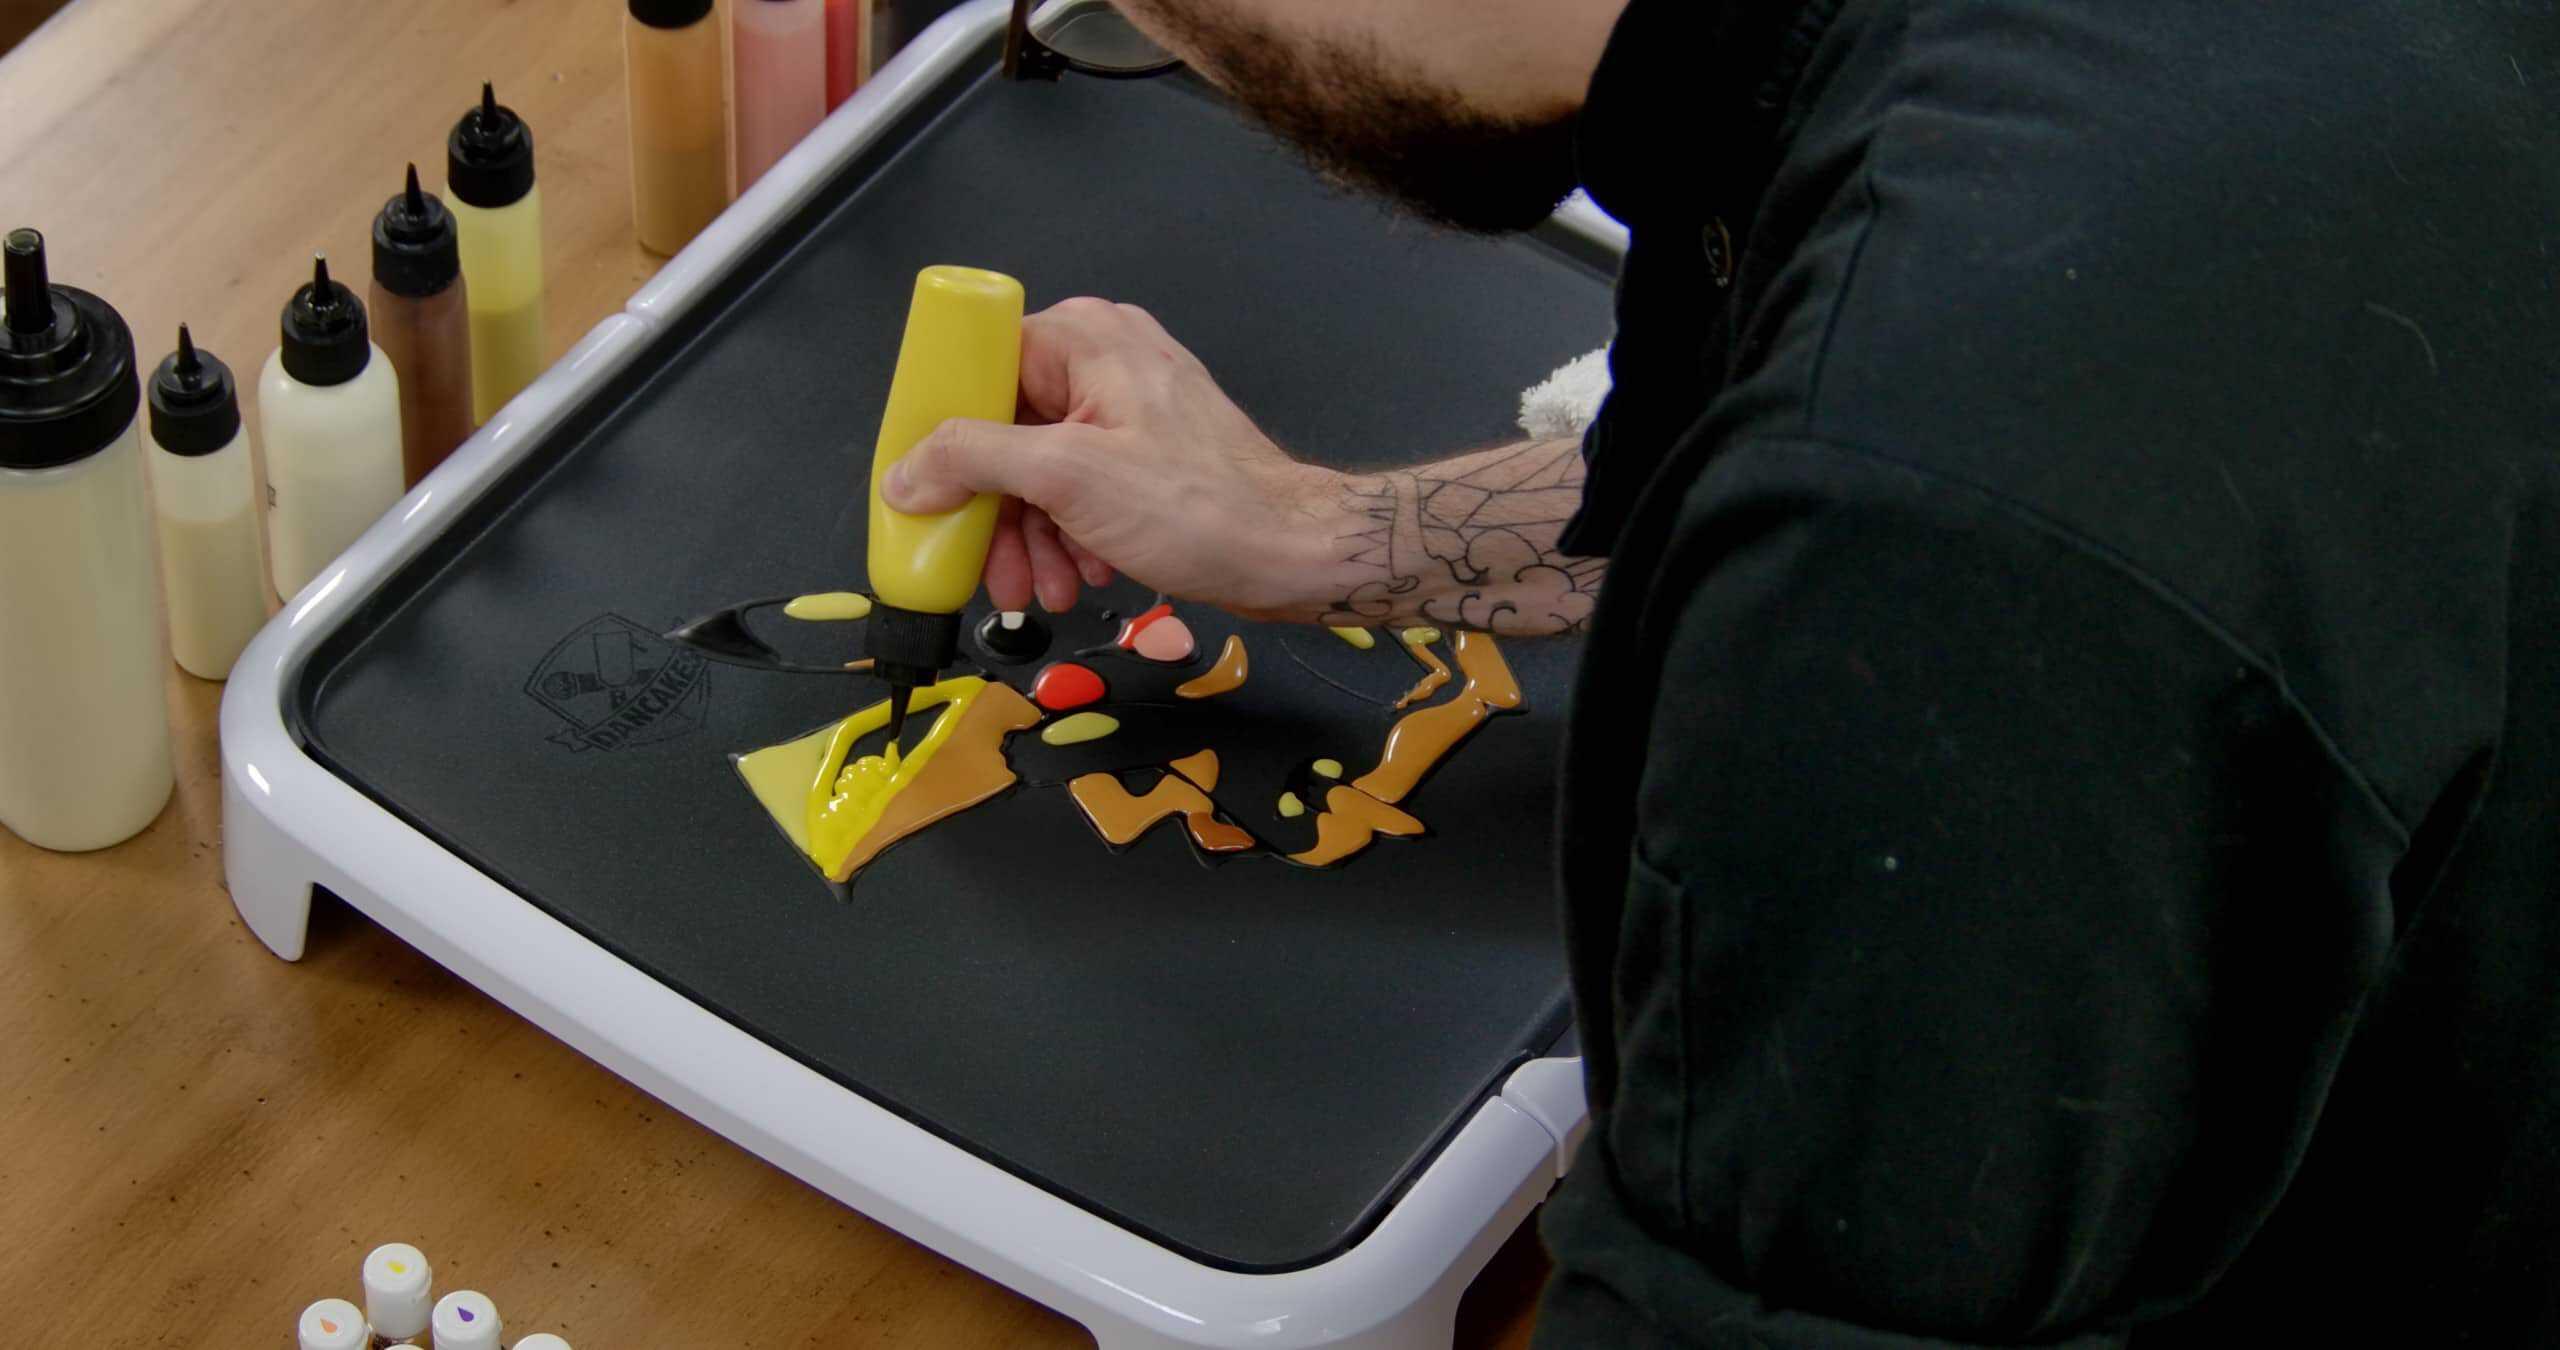

All that’s left to do now is fill in the rest! Fill the remainder of Pikachu with yellow, careful to stay within the lines. There’s a lot of yellow going on here, so you might run low on your yellow batter. That’s okay! If you need to mix a little bit more yellow batter you can do so on the fly, and if your batter doesn’t perfectly match the rest of the yellow you’ve used, that’s alright. Perfection is a false ideal!!
Step 7
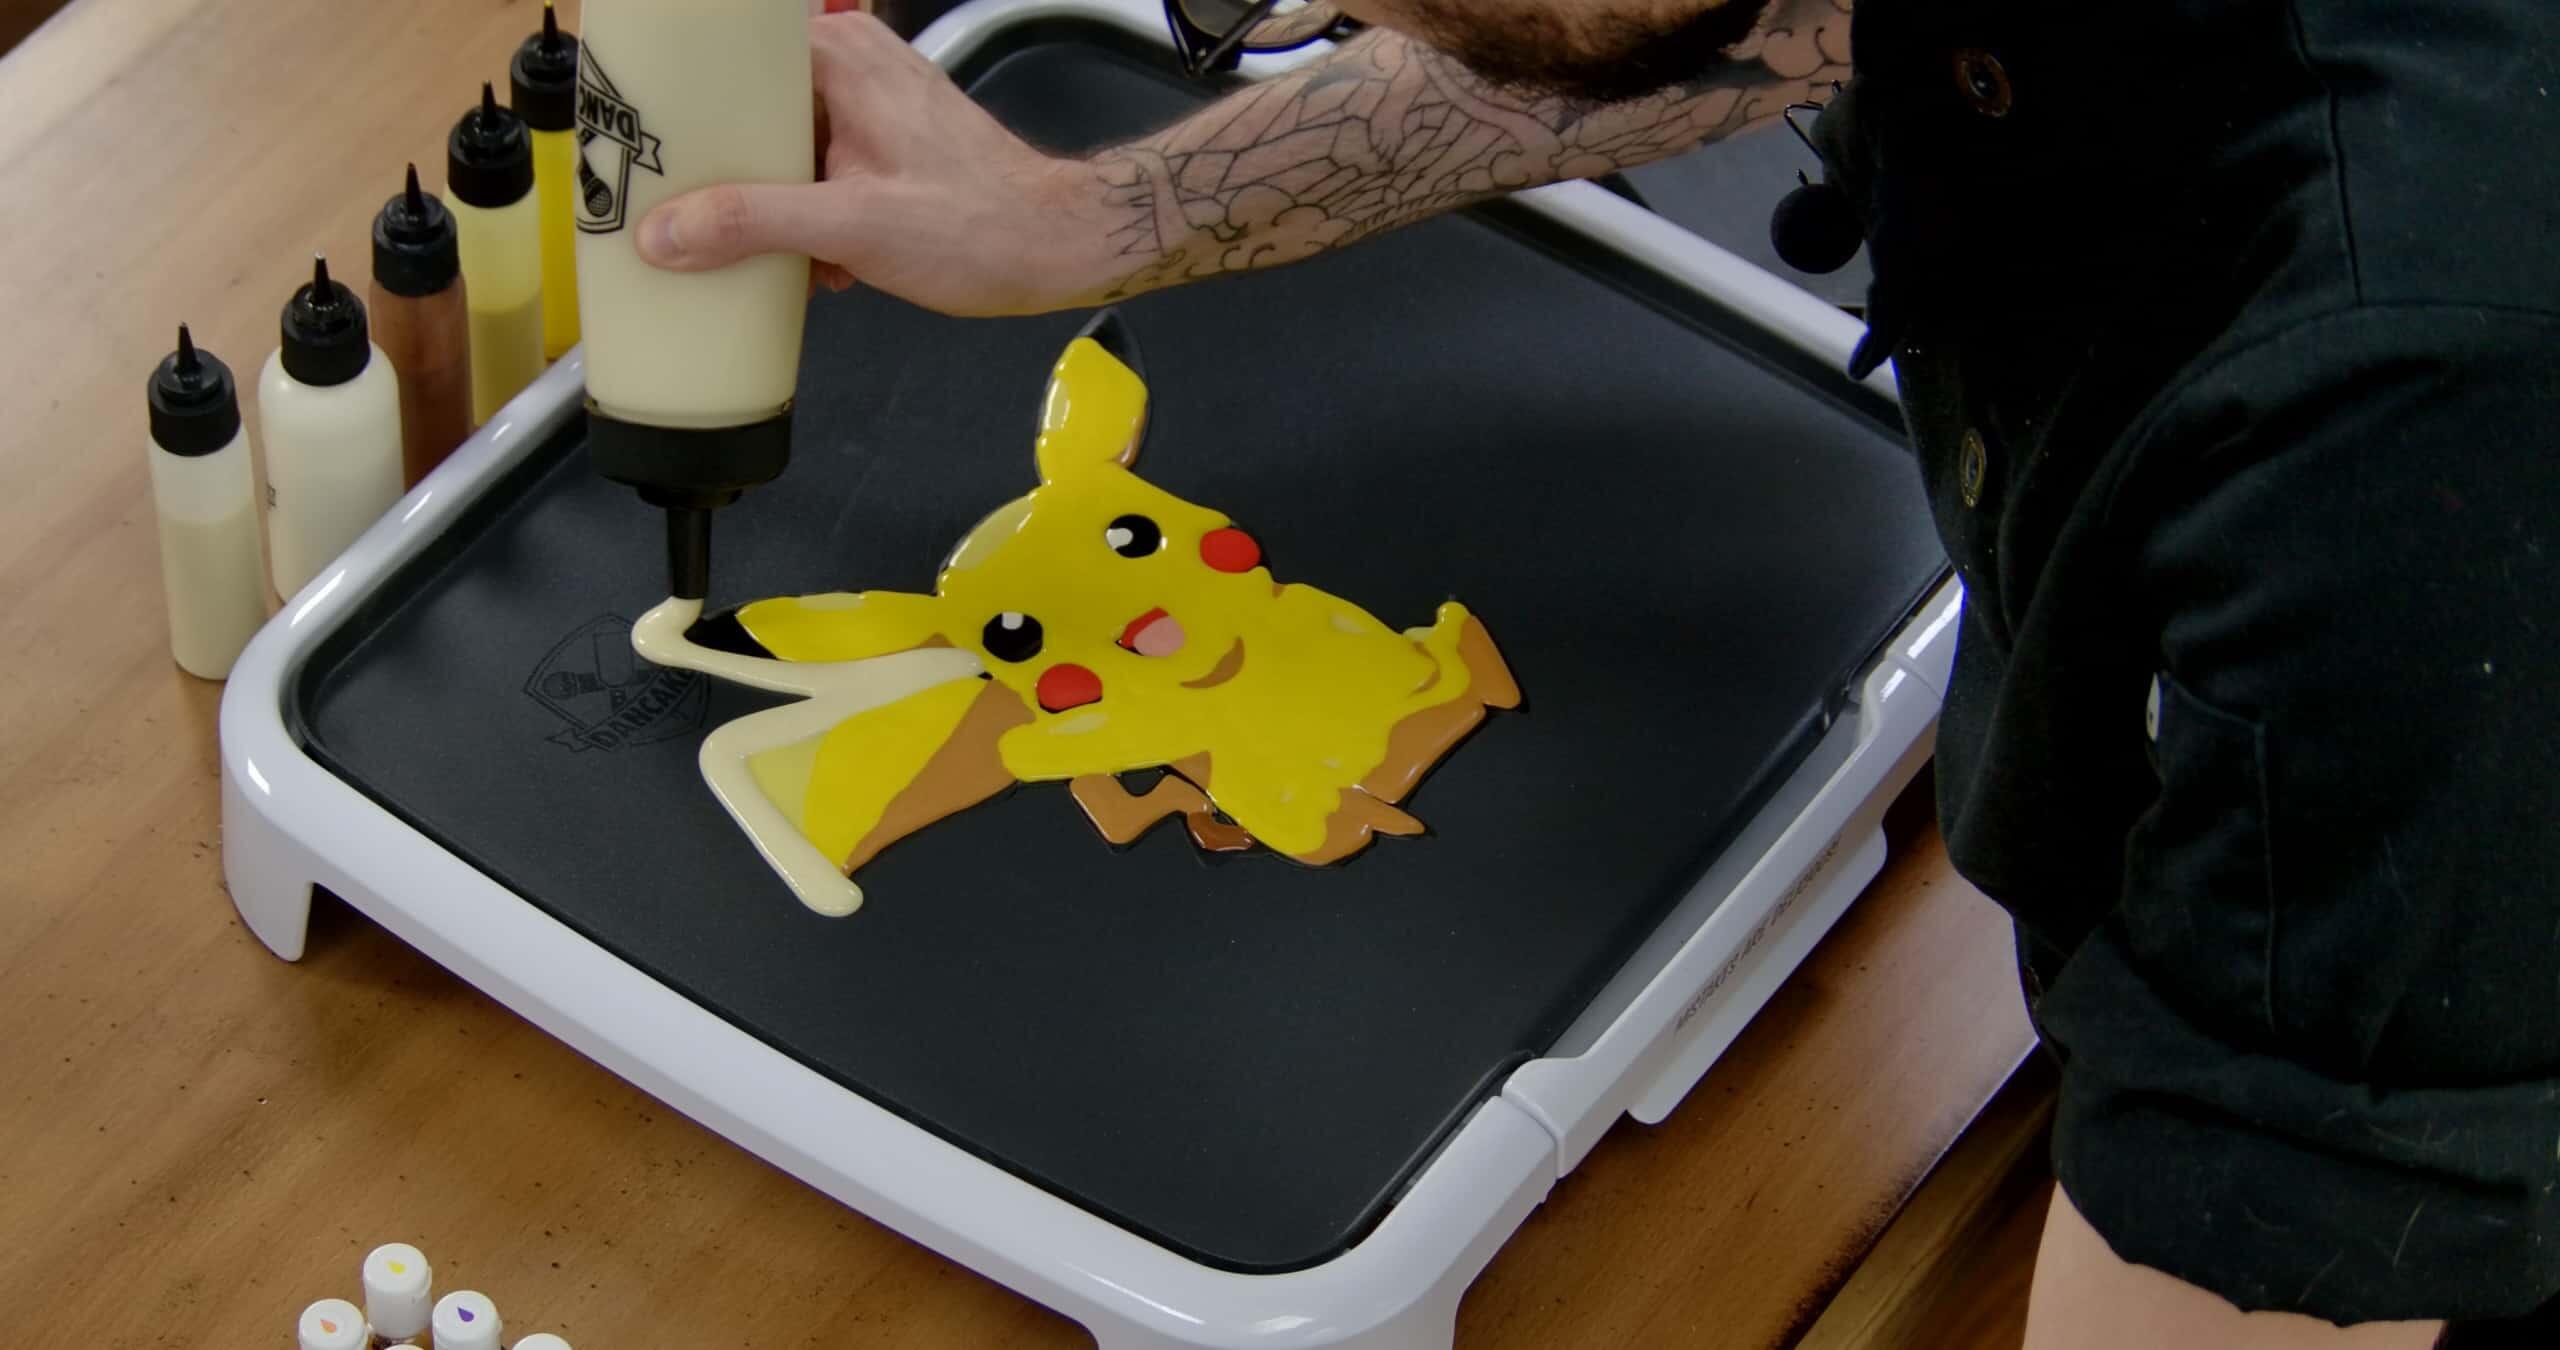
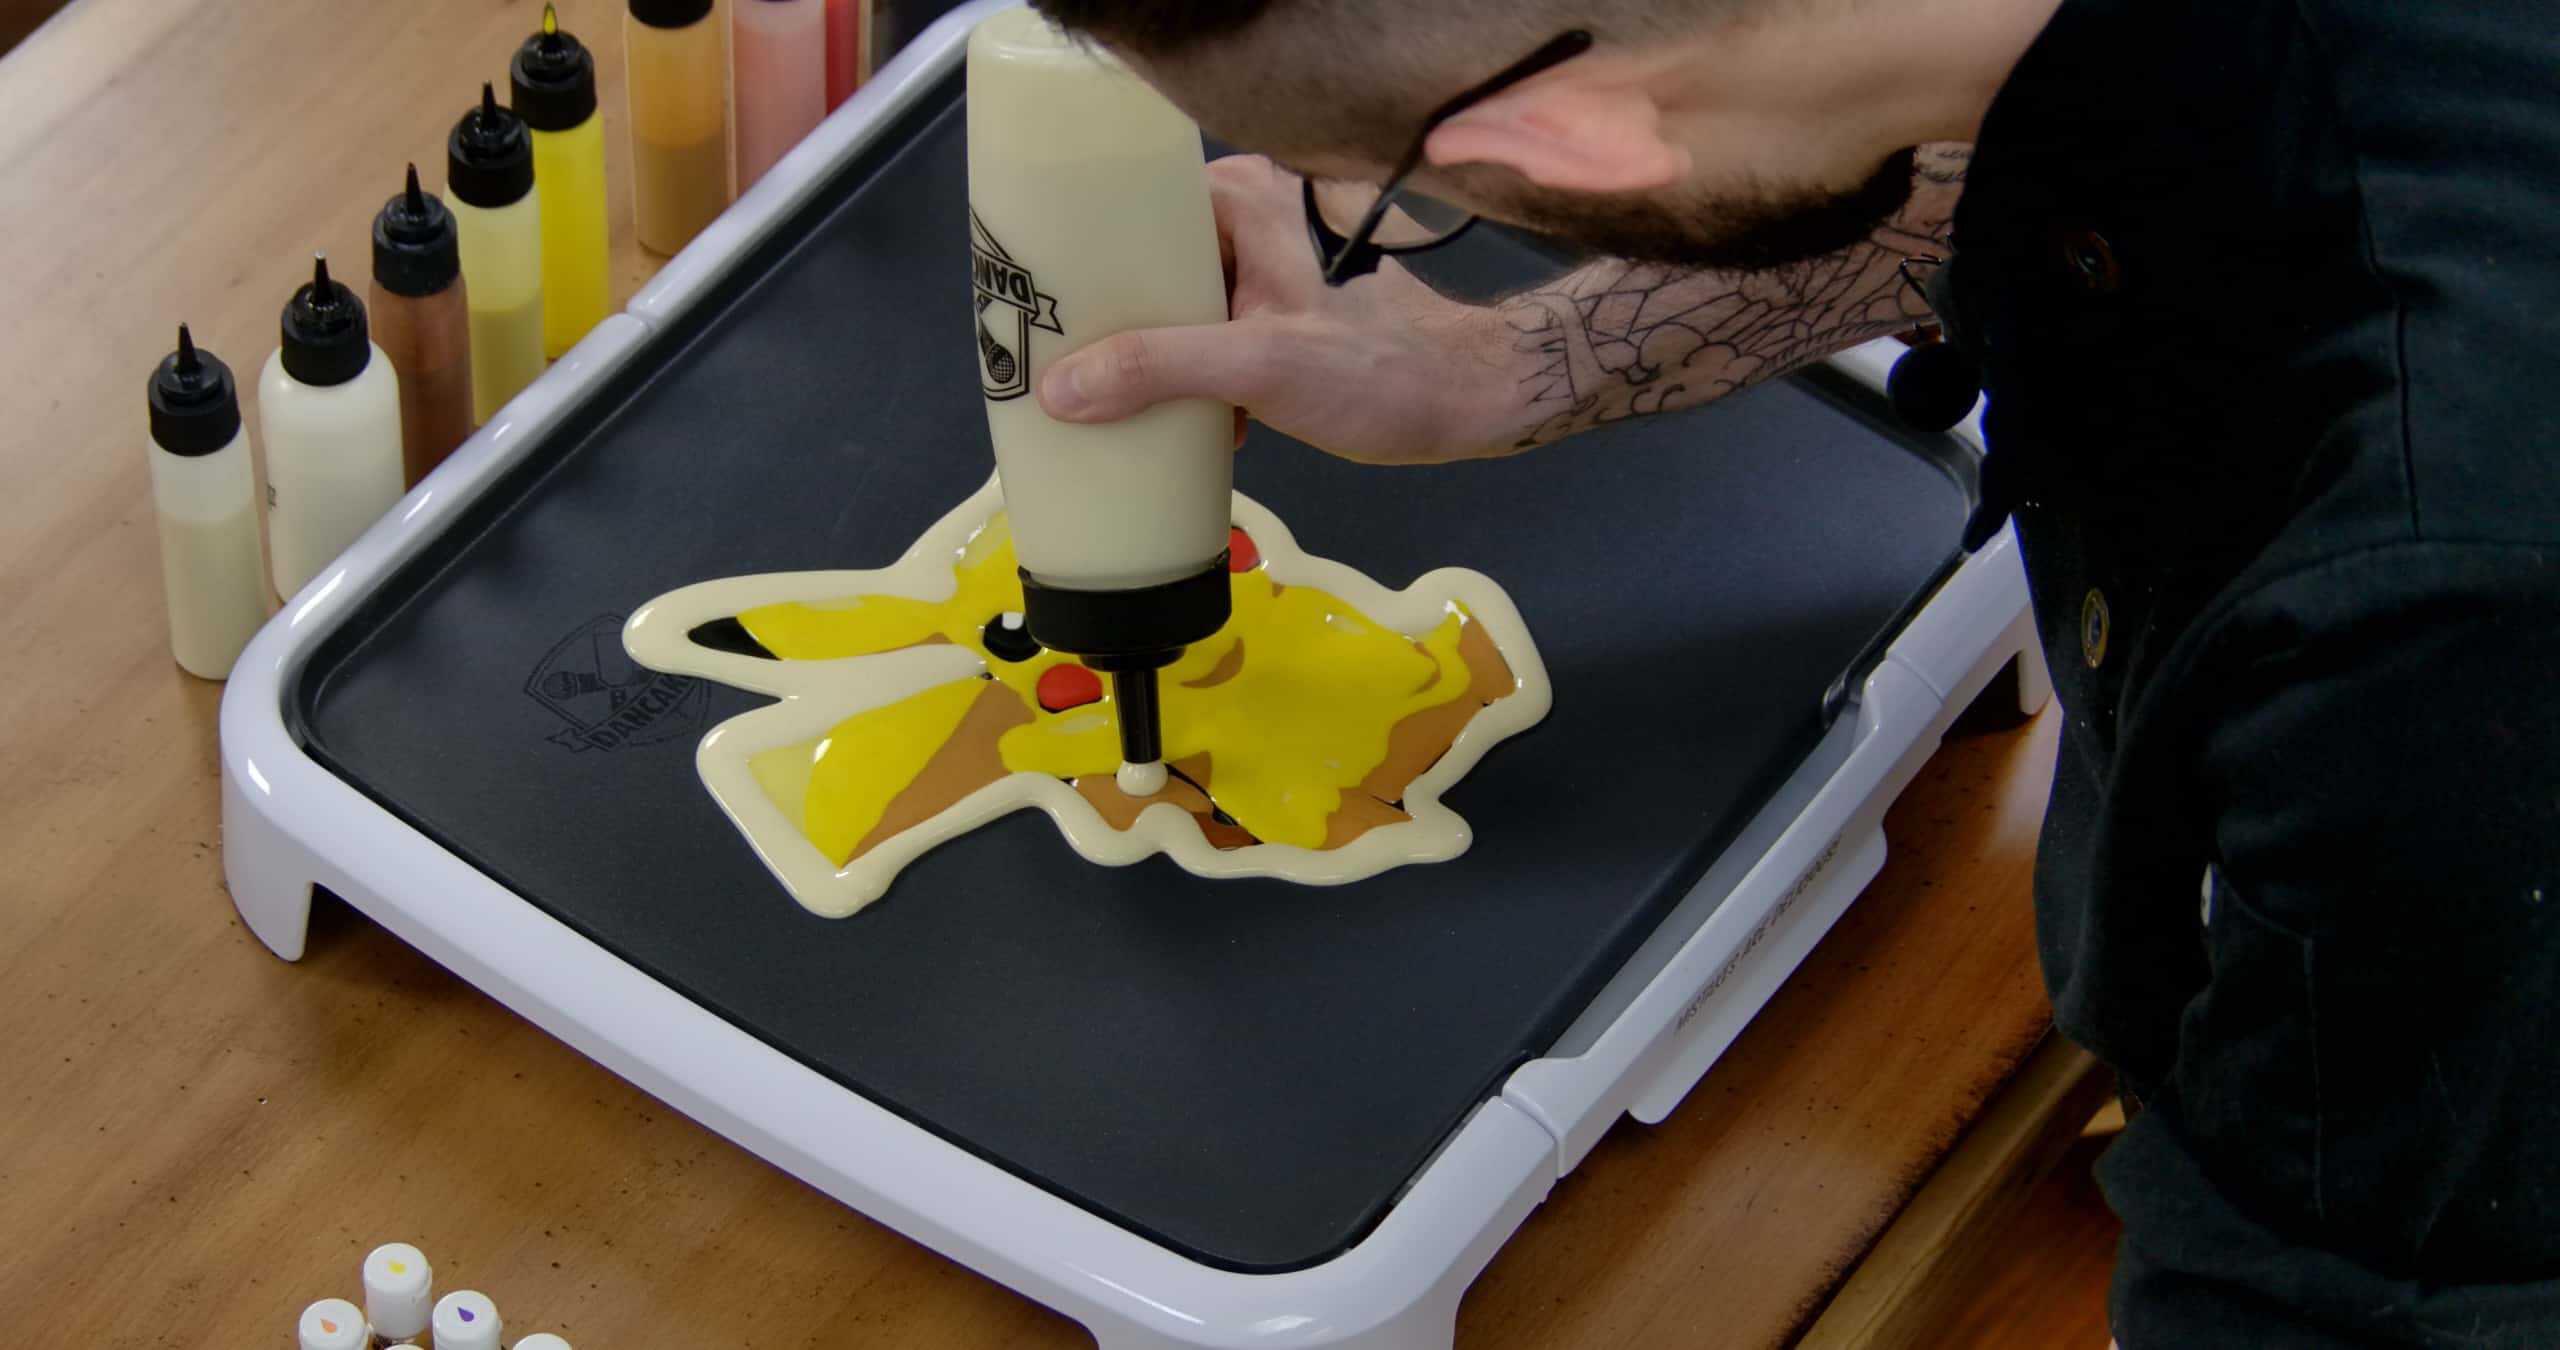
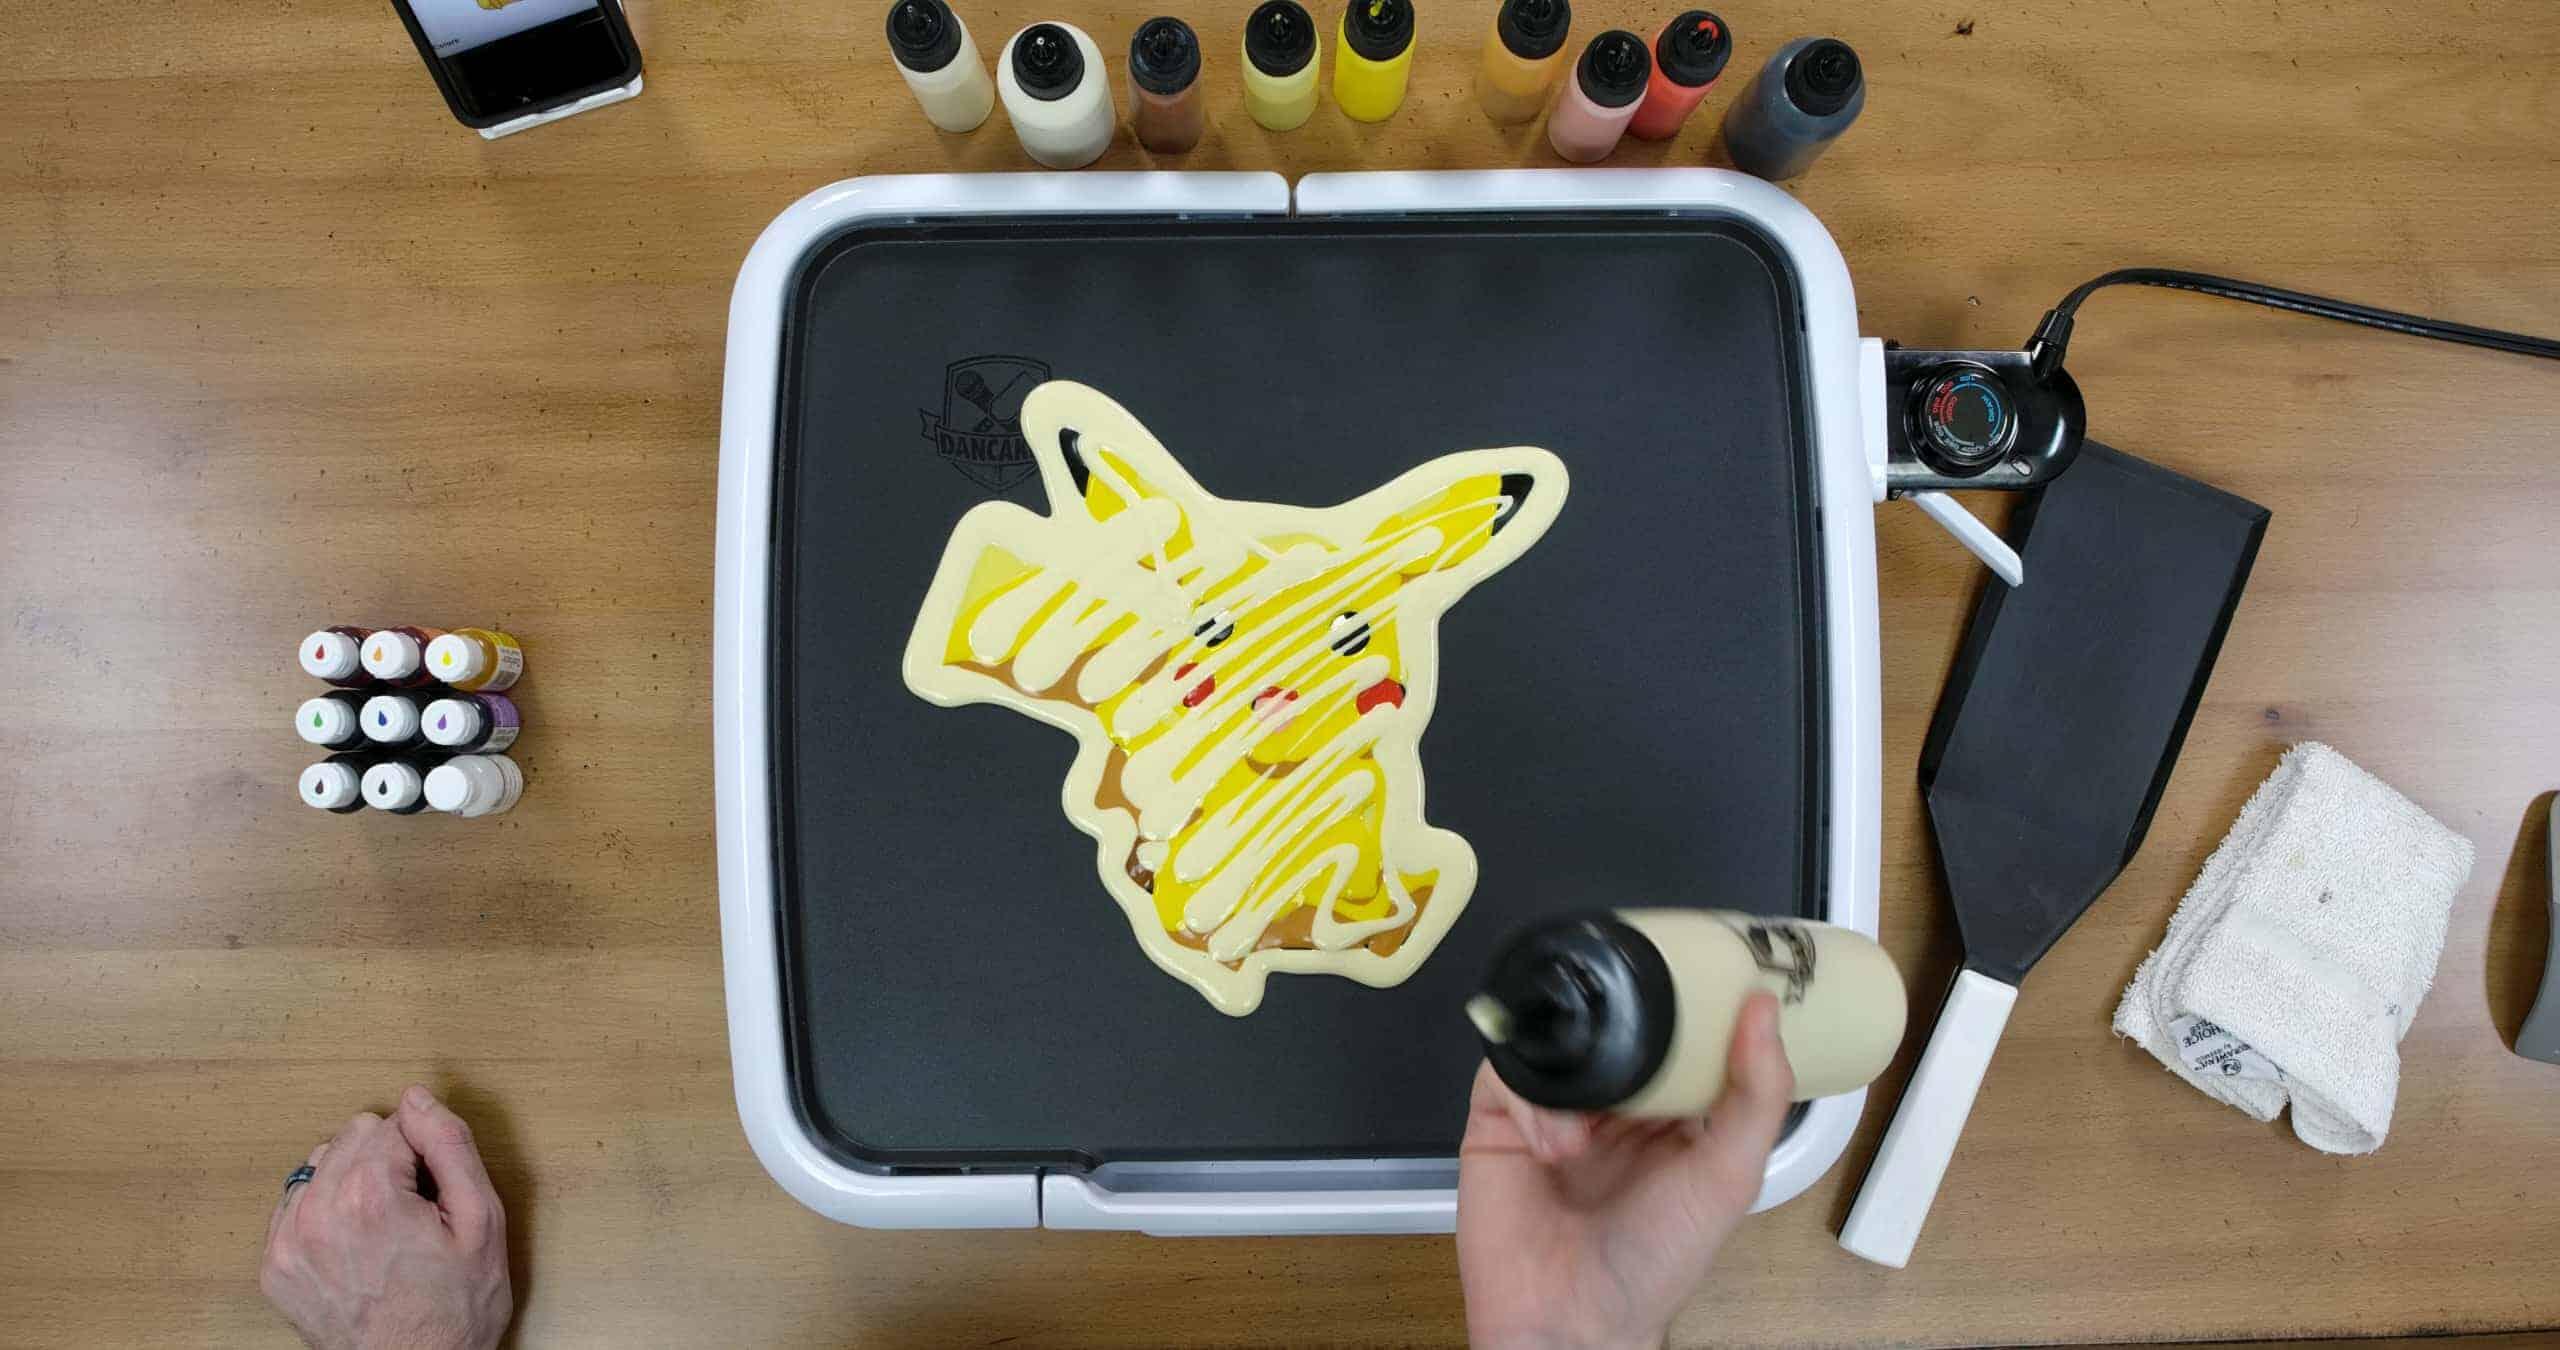
Once your main design work is done, I like to outline my work. Create an outline around your entire Pikachu with batter. We often use plain batter for this, but You can use any color (or colors) that you’d like! Then cover the back of your pancake with a zig-zag as well. For extra precautions (like say, if your pancake is looking paper thin) you can cover the whole backside in plain batter to give it more thickness. This’ll help make it stronger for the flip!
Step 8
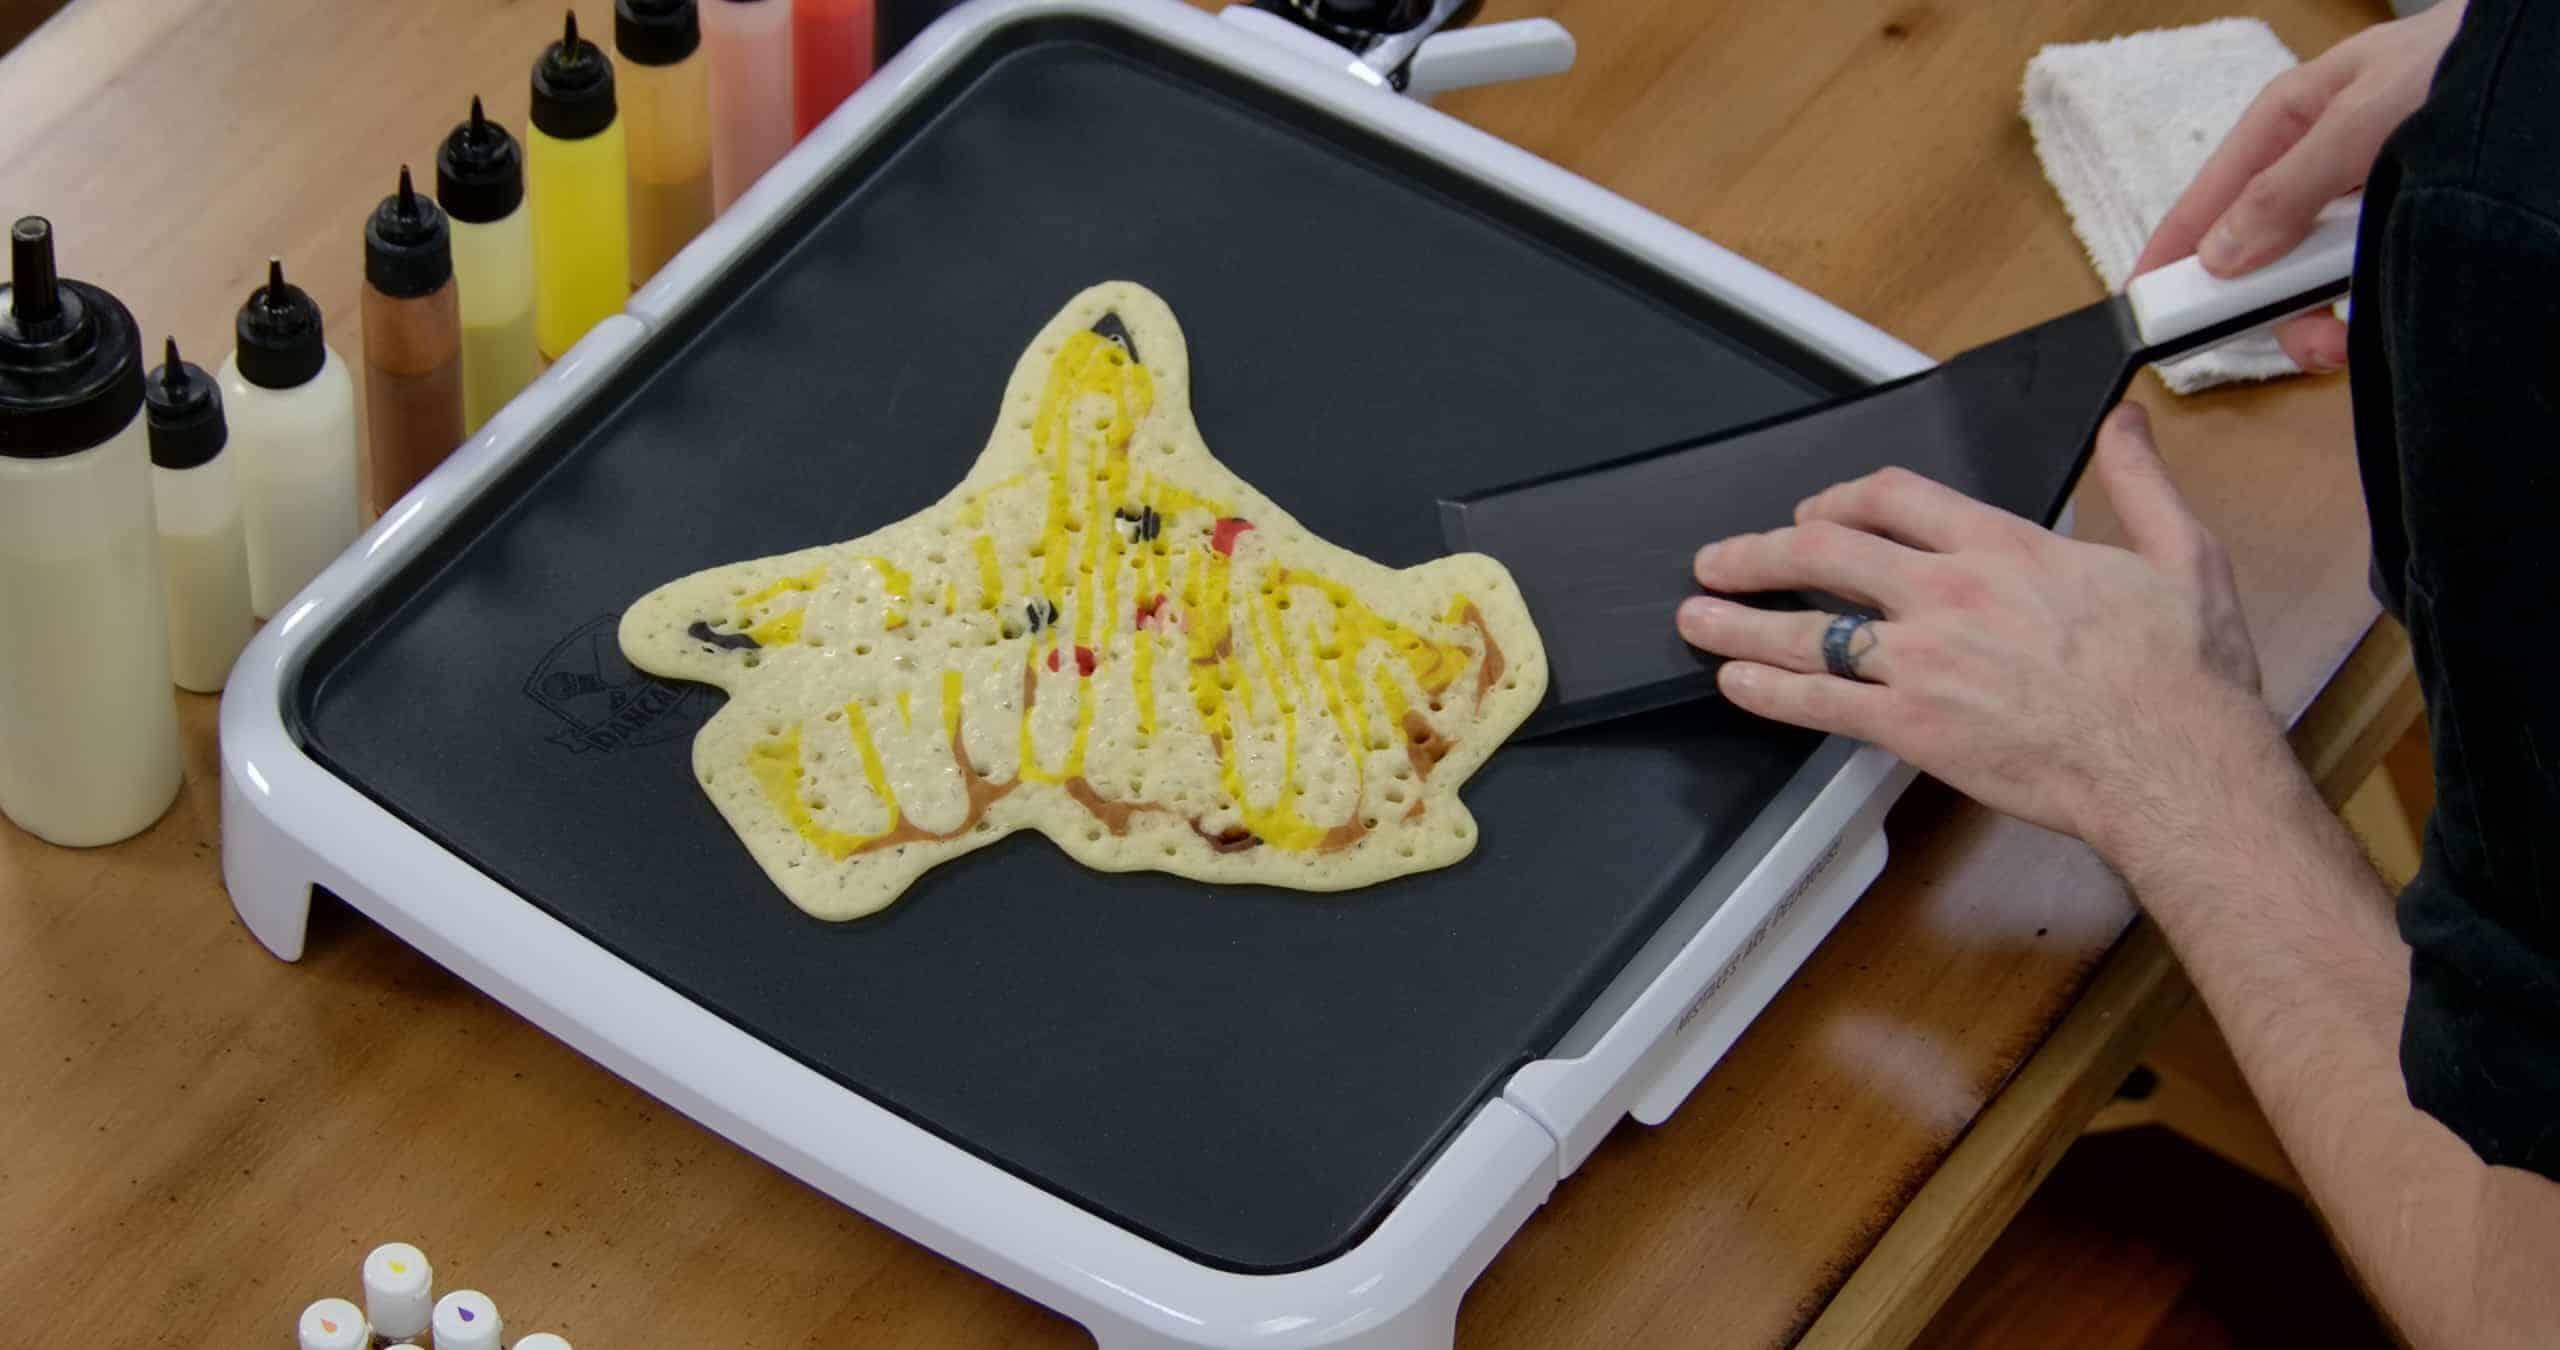
Once you’ve covered every part of Pikachu (check for holes!), you can turn the griddle/pan to around 225°.
While it’s cooking slowly, don’t panic! These pancakes are cooking at a much slower temperature than typical pancakes. They will take a very long time to burn.
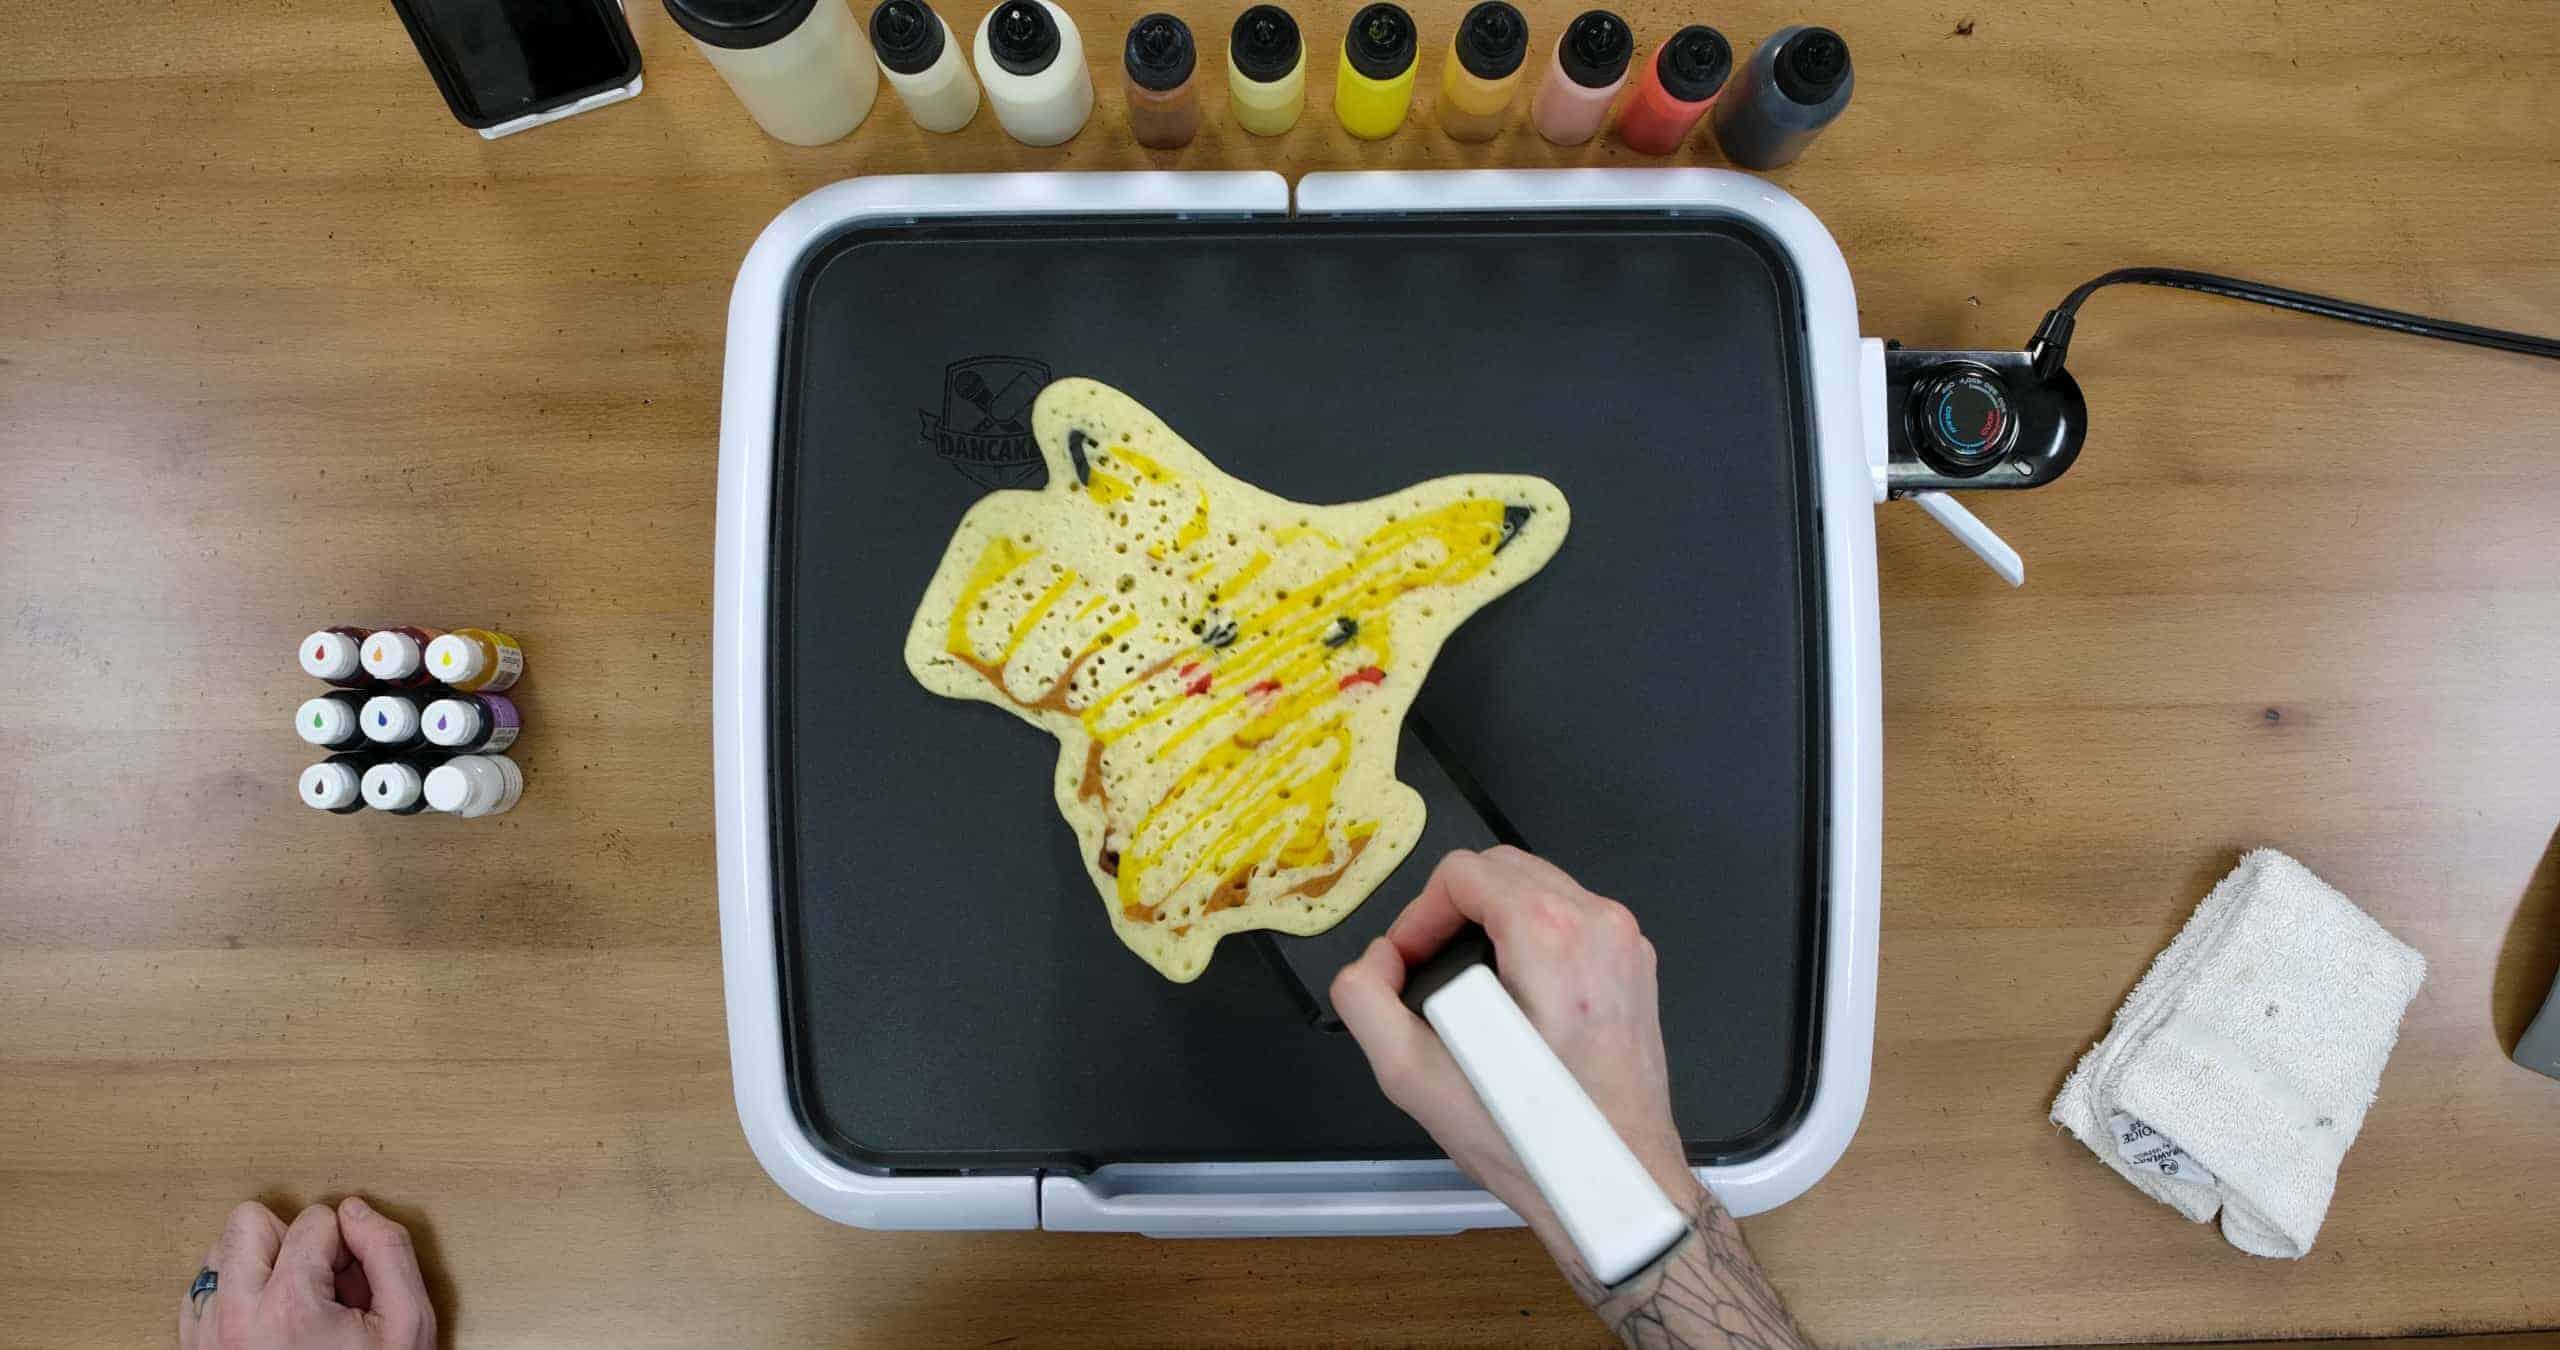
Once bubbles begin to cover the surface of your pancake, and the pancake starts to look more like a solid than a liquid, you can work the spatula gently around the edges to separate the pancake from the griddle. This is a process we call “carving.”
Be patient, you shouldn’t need to carve the pancake off forcefully; it’ll separate more and more as it cooks. Once it moves across the surface of the griddle with ease, it’s ready to flip!
Step 9
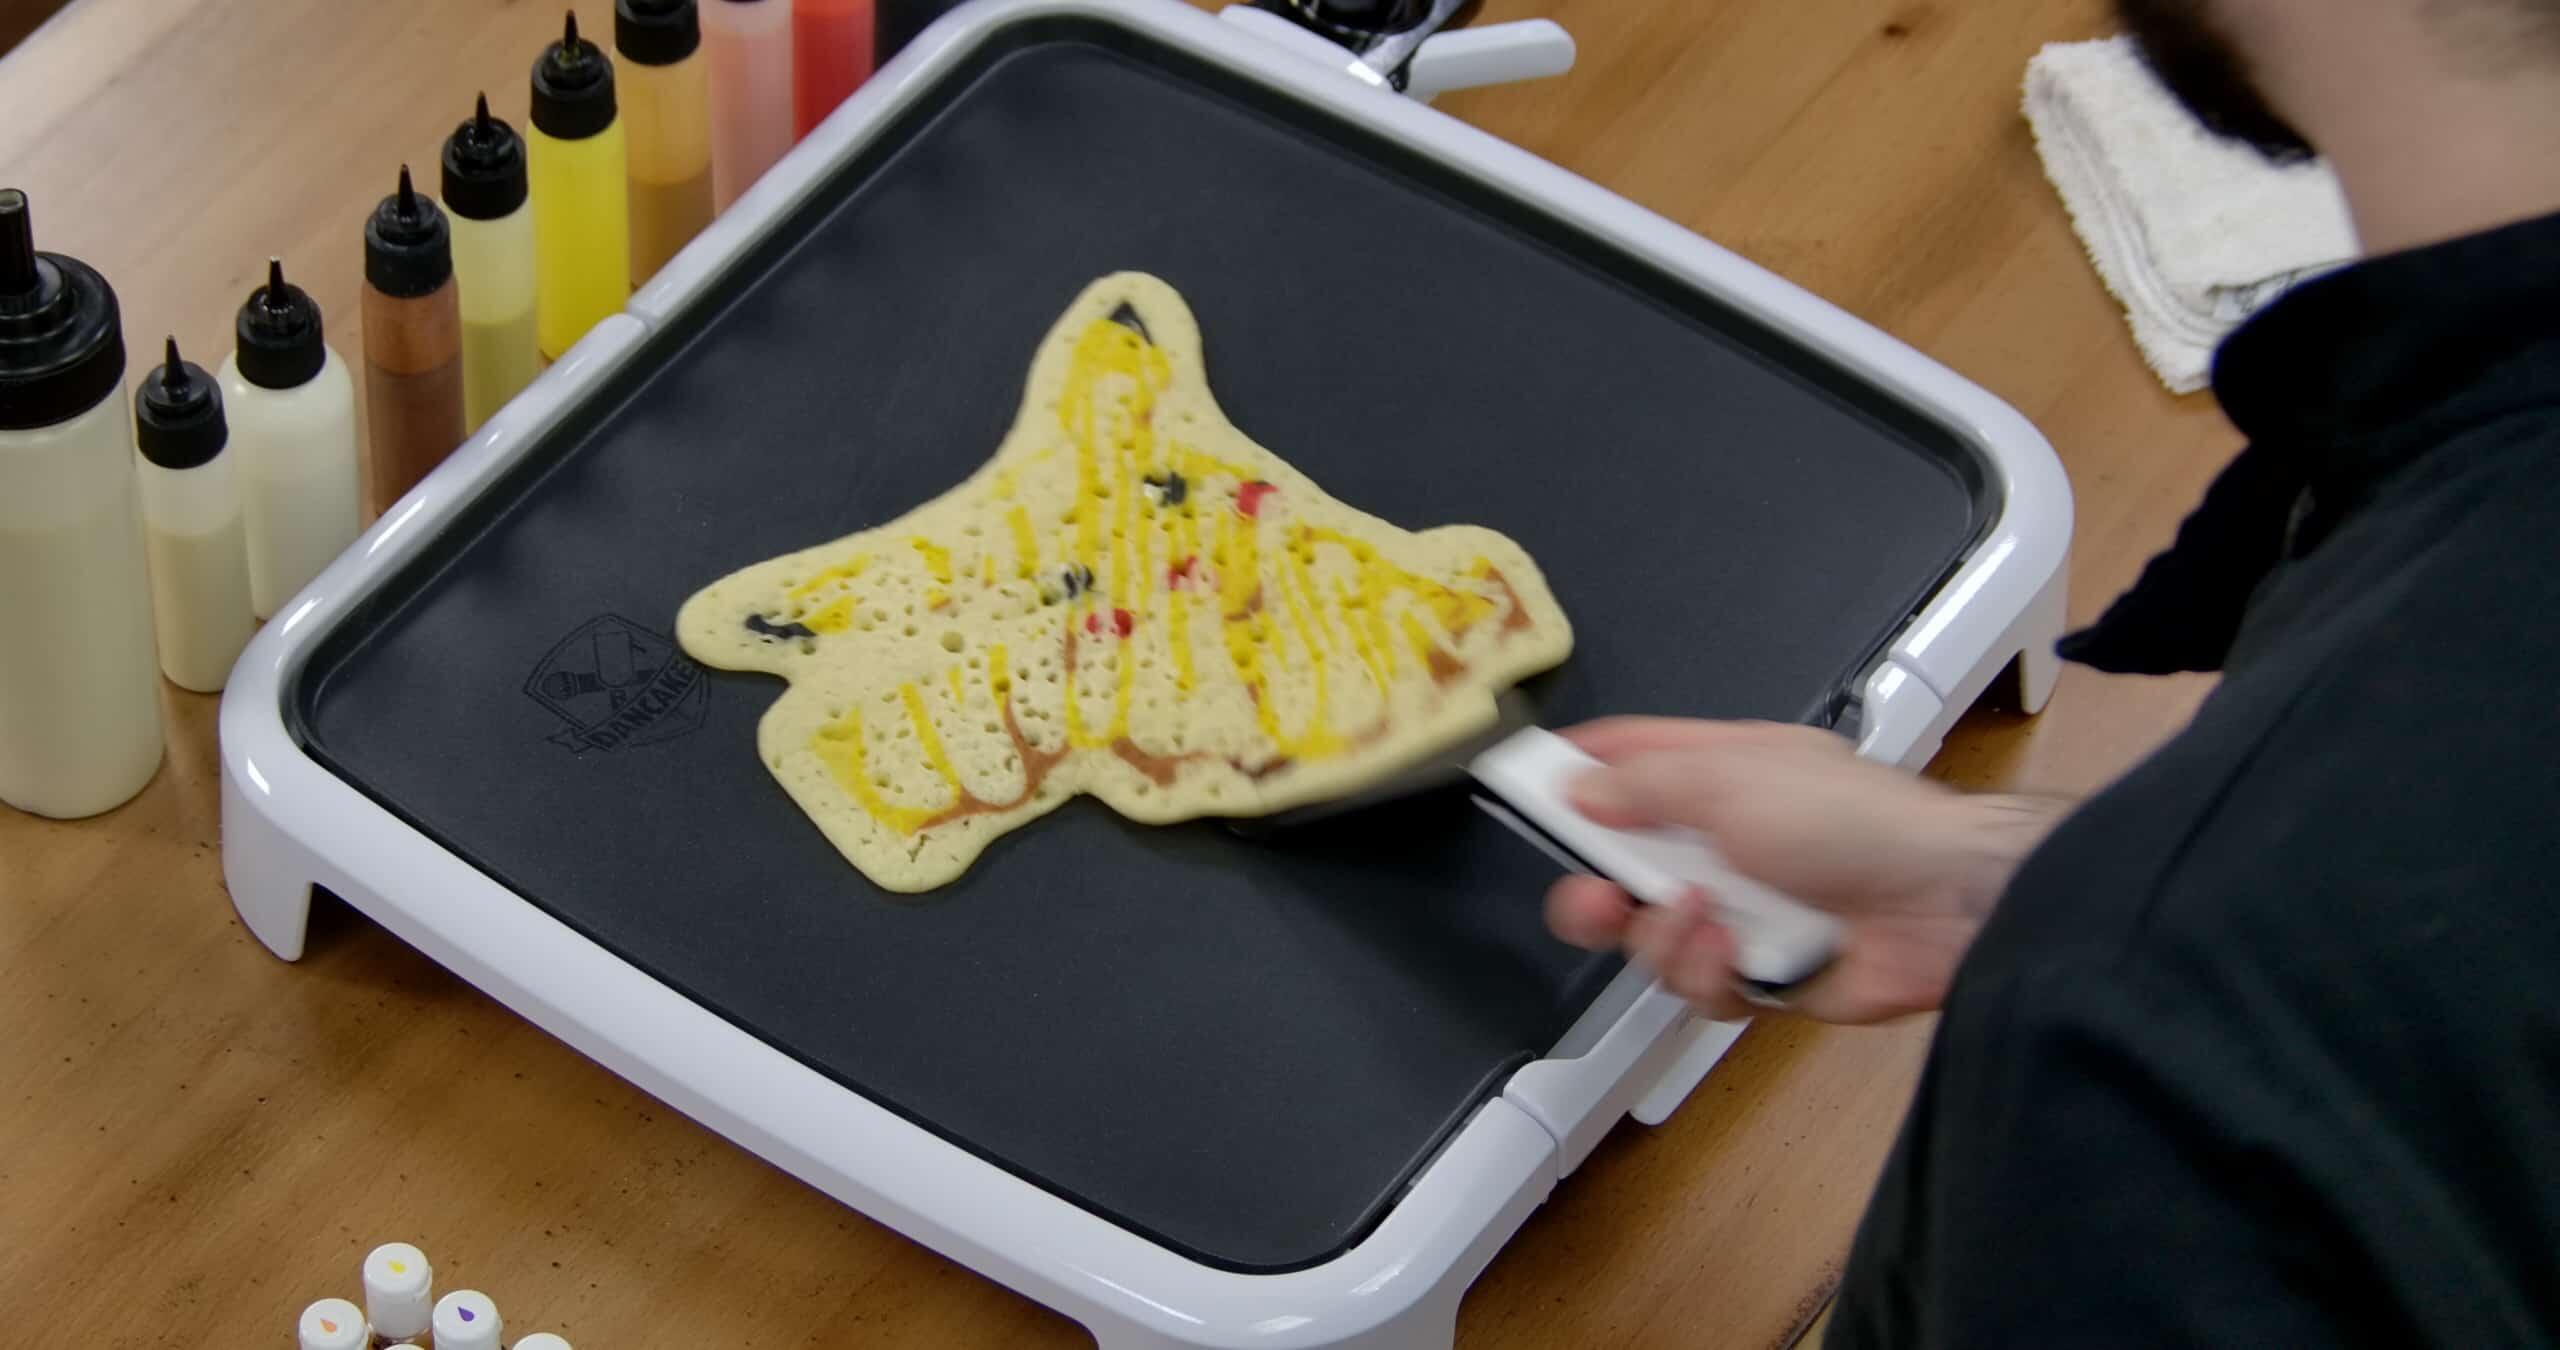

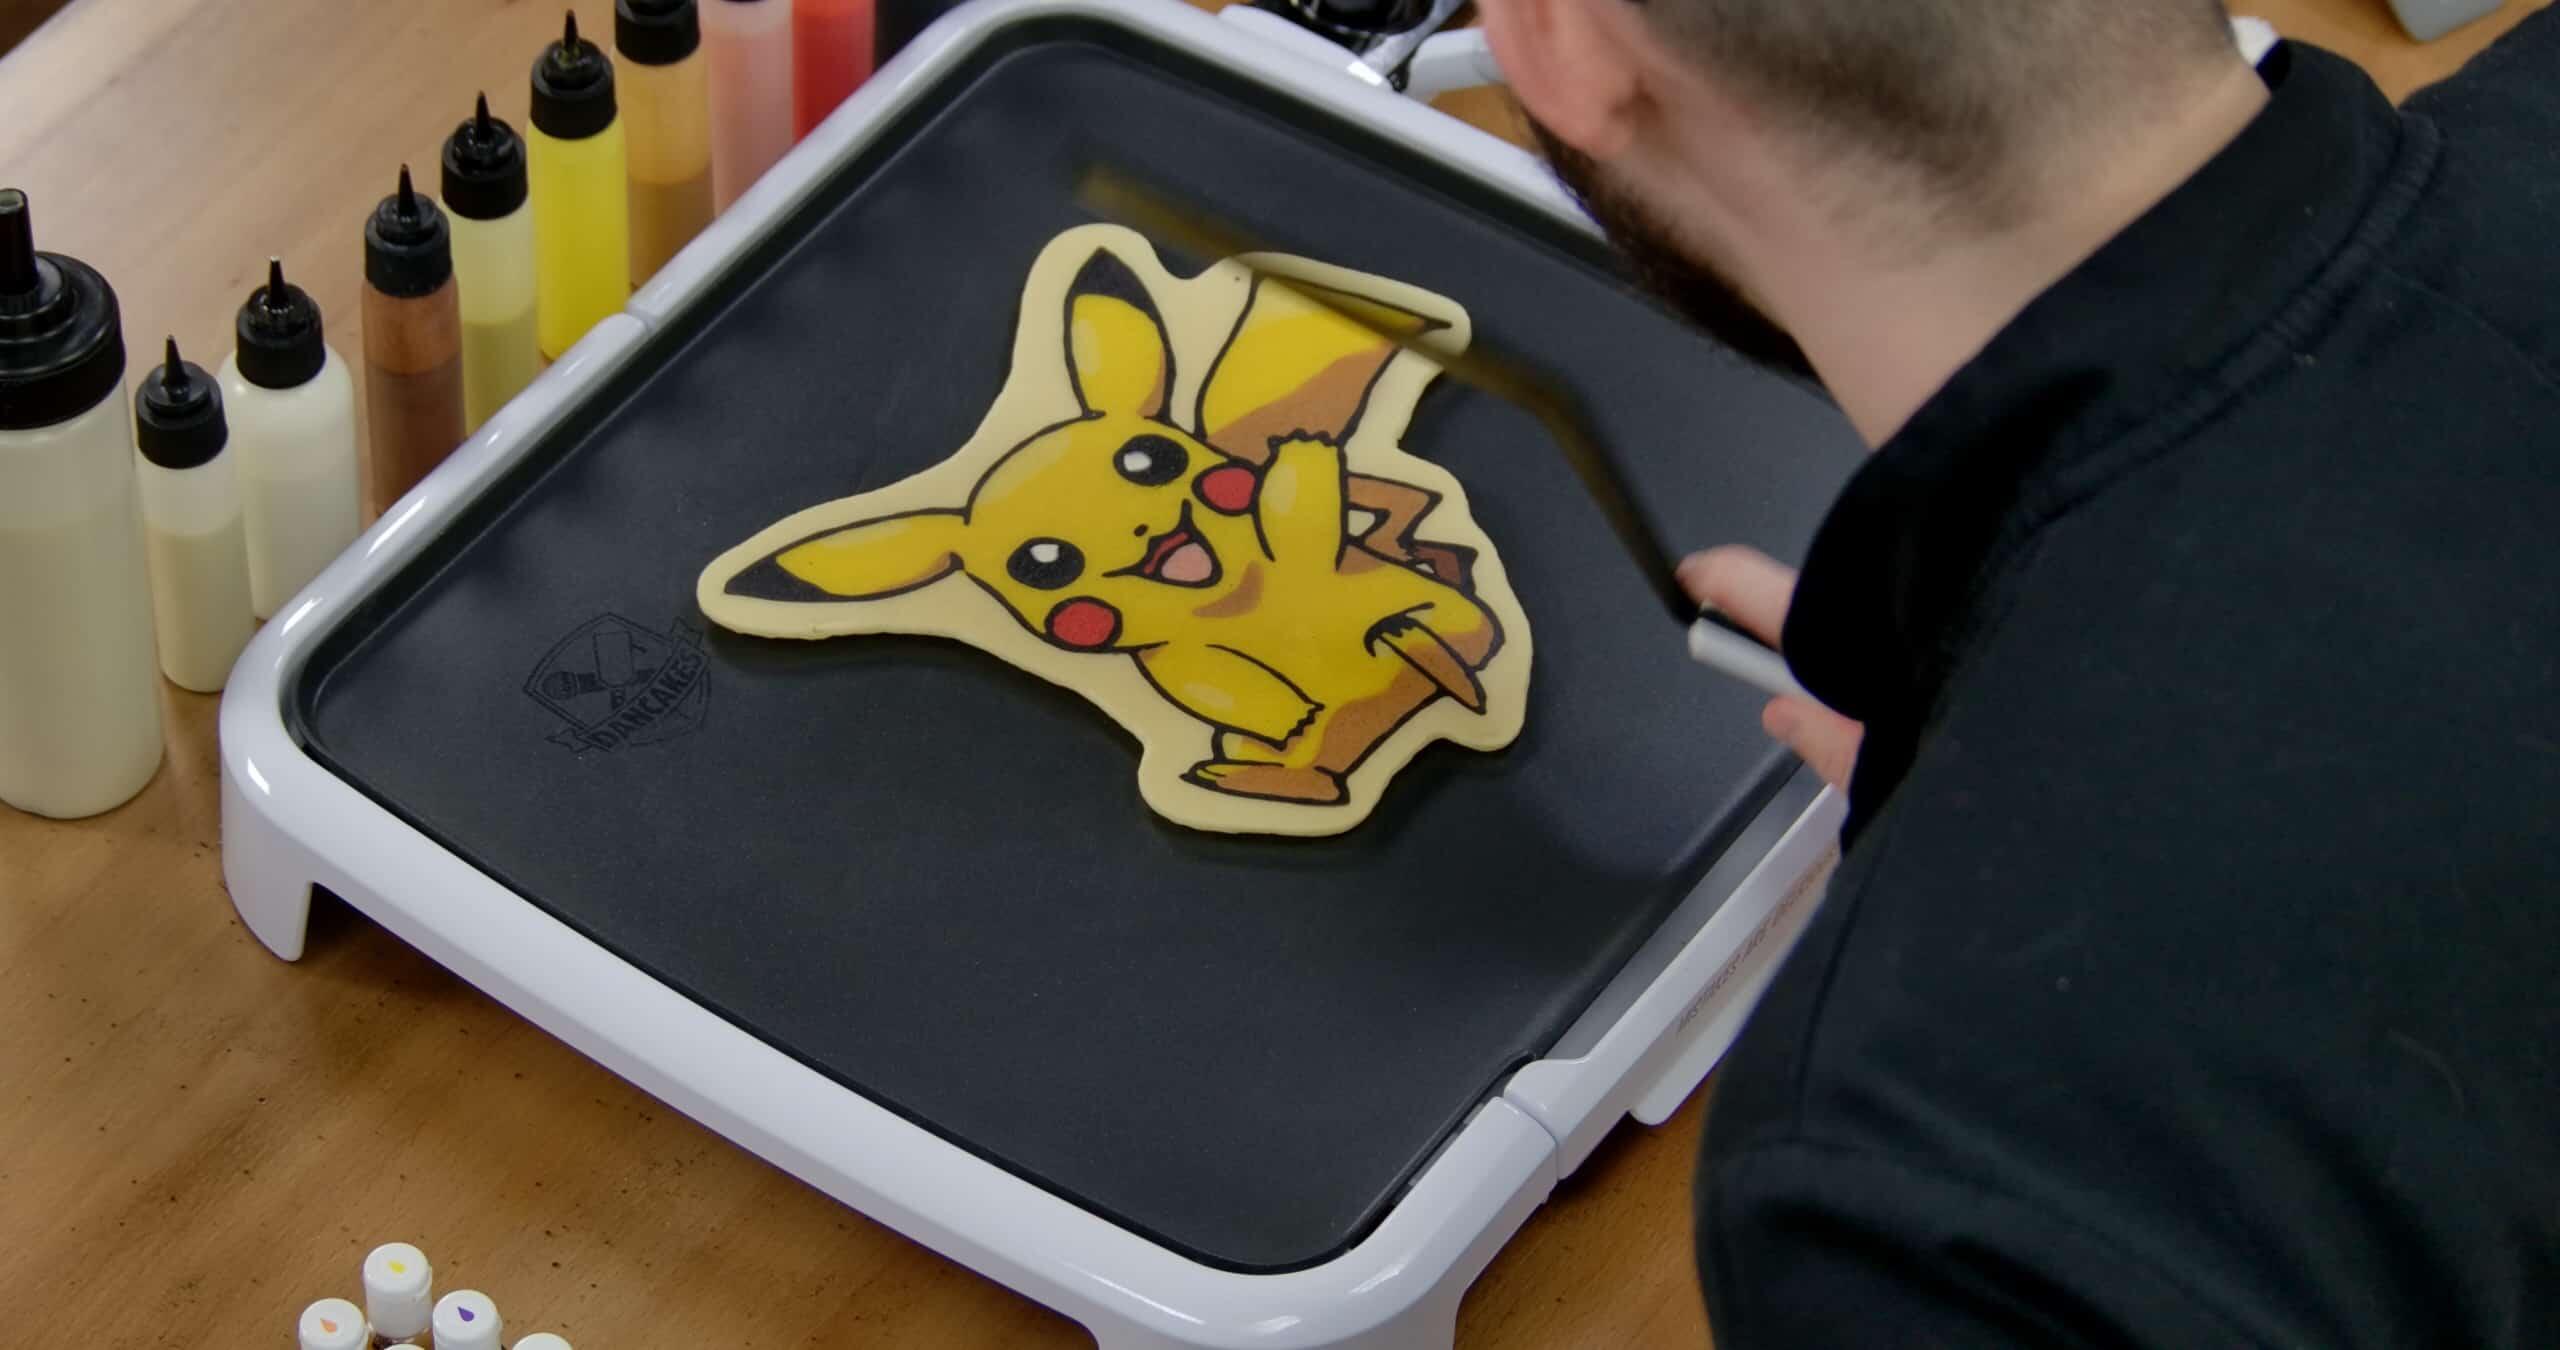
Once the pancake is unstuck and can freely move around the griddle, it’s about time to flip. It’s very important to slide the spatula under the pancake in one smooth motion, quickly and confidently. You also can’t be hesitant while flipping it. The more confidently you do this step, the more likely your pancake will be fine. Take a breath, have faith… and give it a flip!
Conclusion
Congrats! We’re sure you did great. Even if you don’t think so, remember,
Mistakes Are Delicious!
You’ll do even better next time!
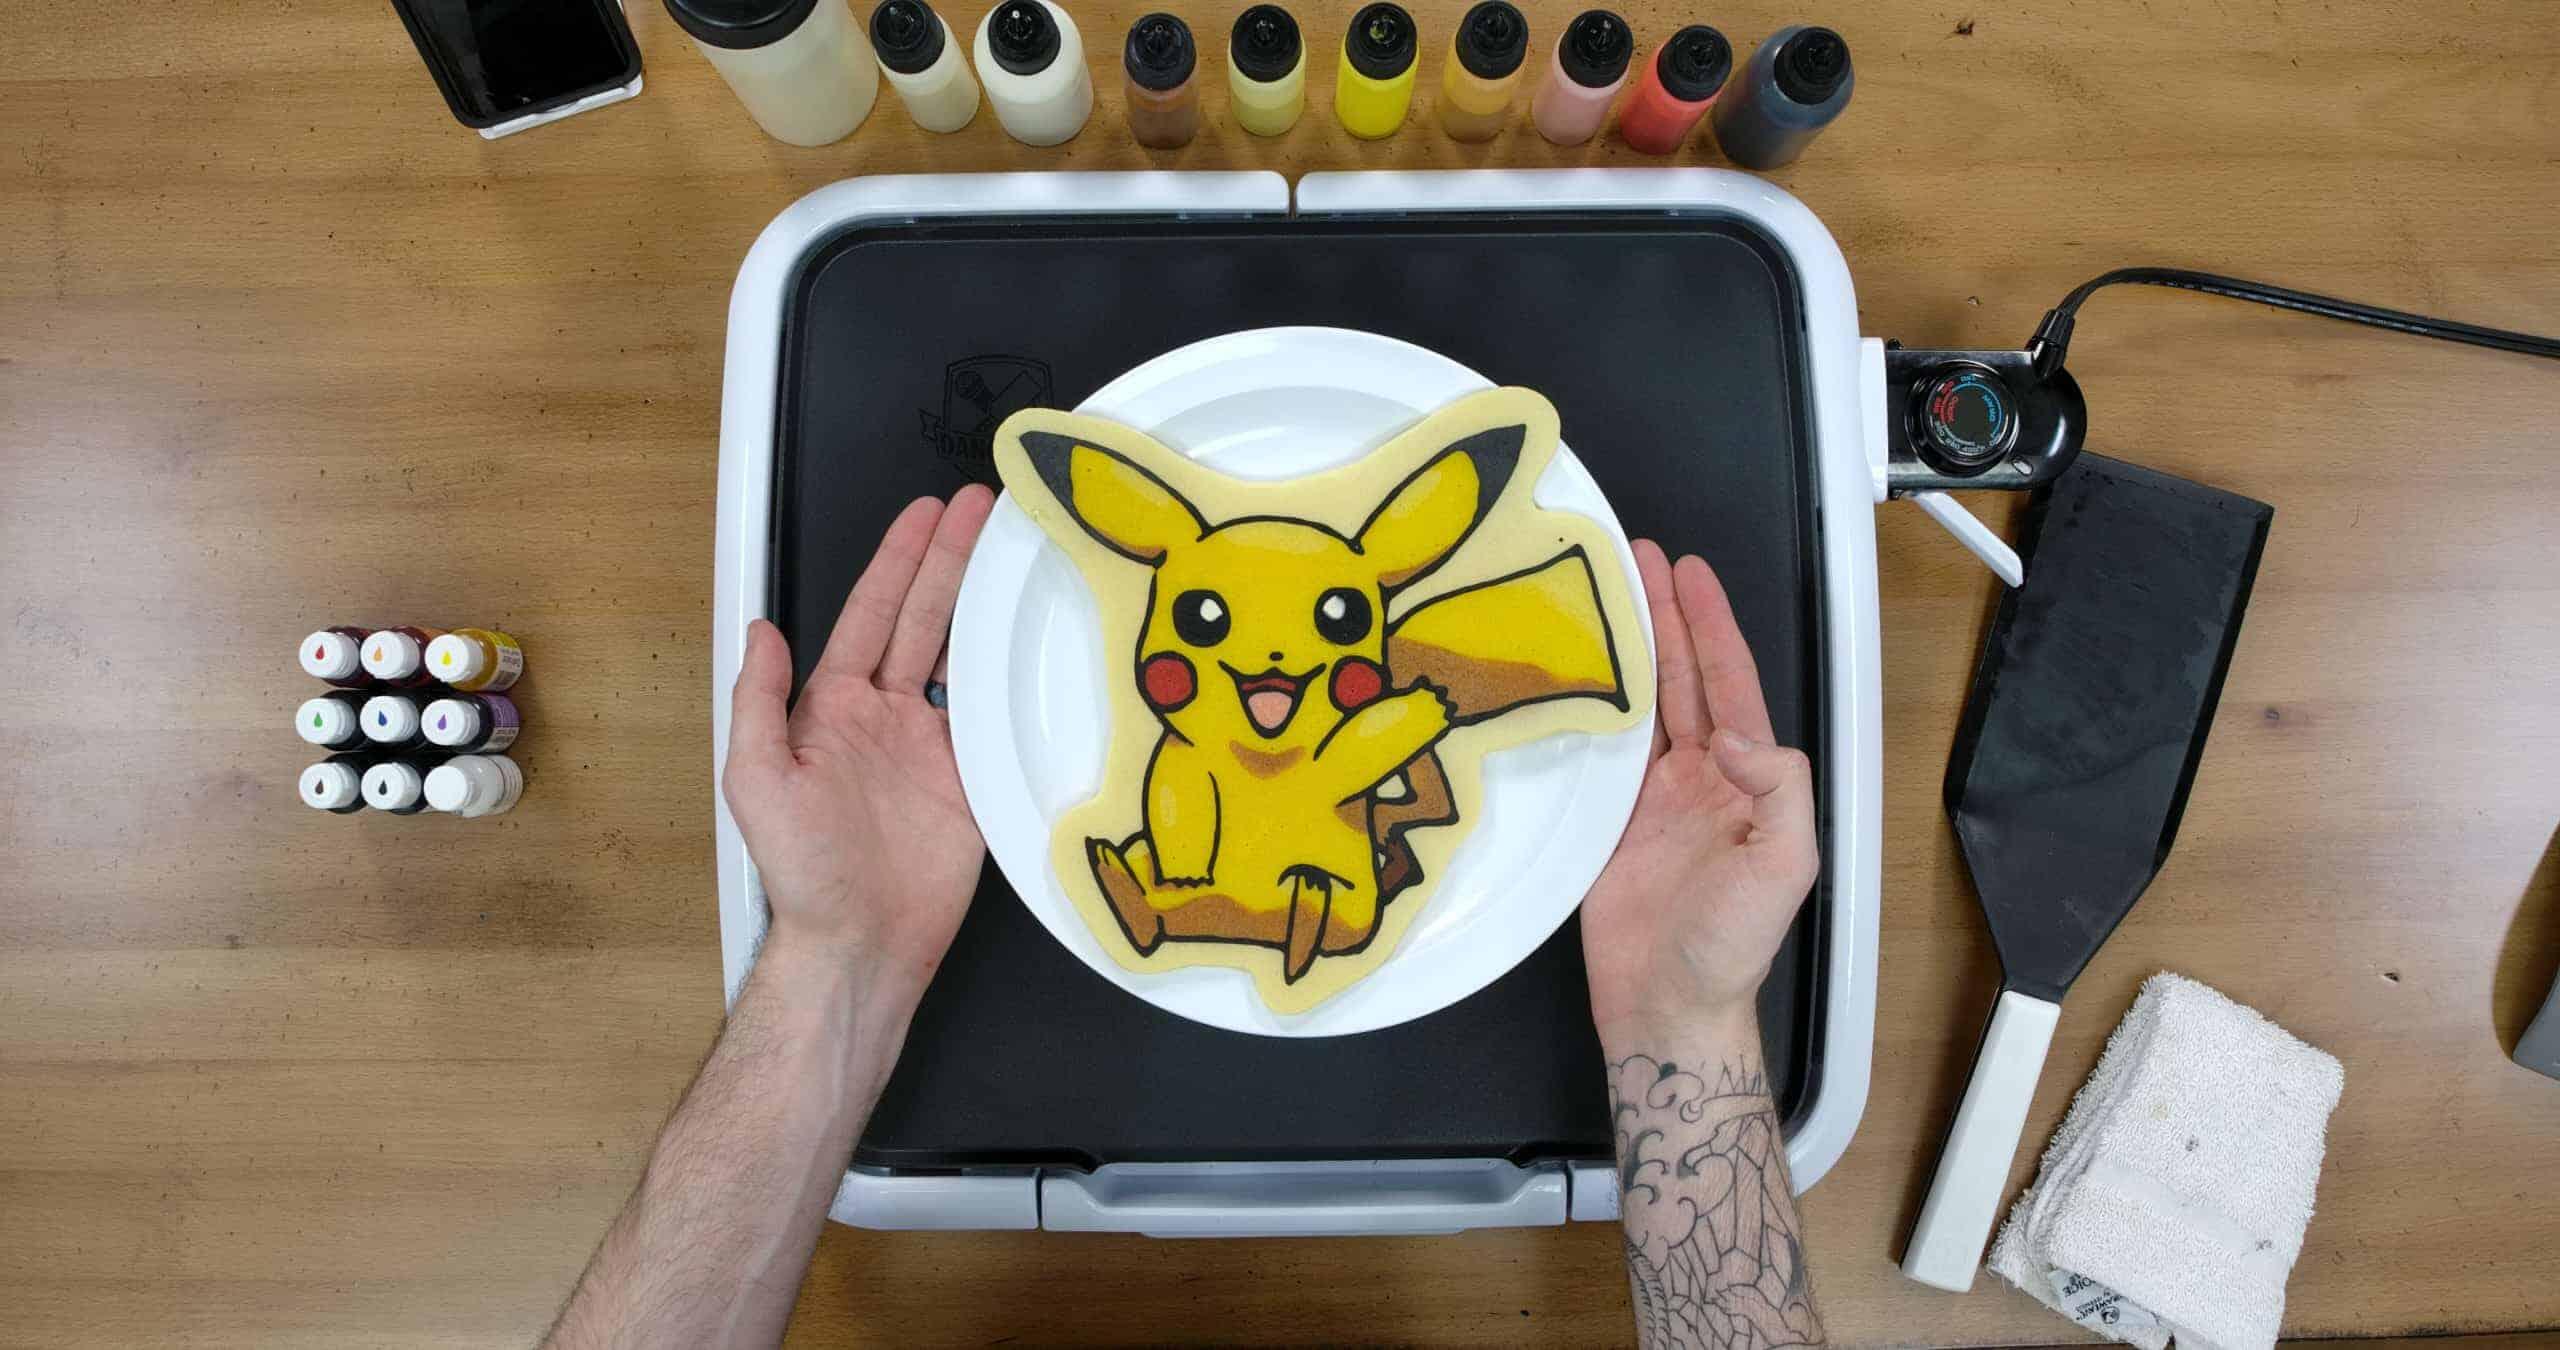
Plate your Pikachu Pancake and enjoy! This most famous pokemon makes for quite a tasty treat!